Installing the front panel I/O device assembly
To instal the front panel I/O device assembly:
1. Thread each front panel I/O device assembly cable through the same holes from which they were
removed.
2. Push the front panel I/O device assembly into the chassis. Using your fingers, orient the cables so
that there is enough room for the front panel I/O device assembly to easily fit in its slot.
3. Loosely place the bracket on the front panel I/O device assembly and hook the bracket to the
chassis.
4. Screw the bracket to the front panel I/O device assembly, and then screw the bracket to the chassis.
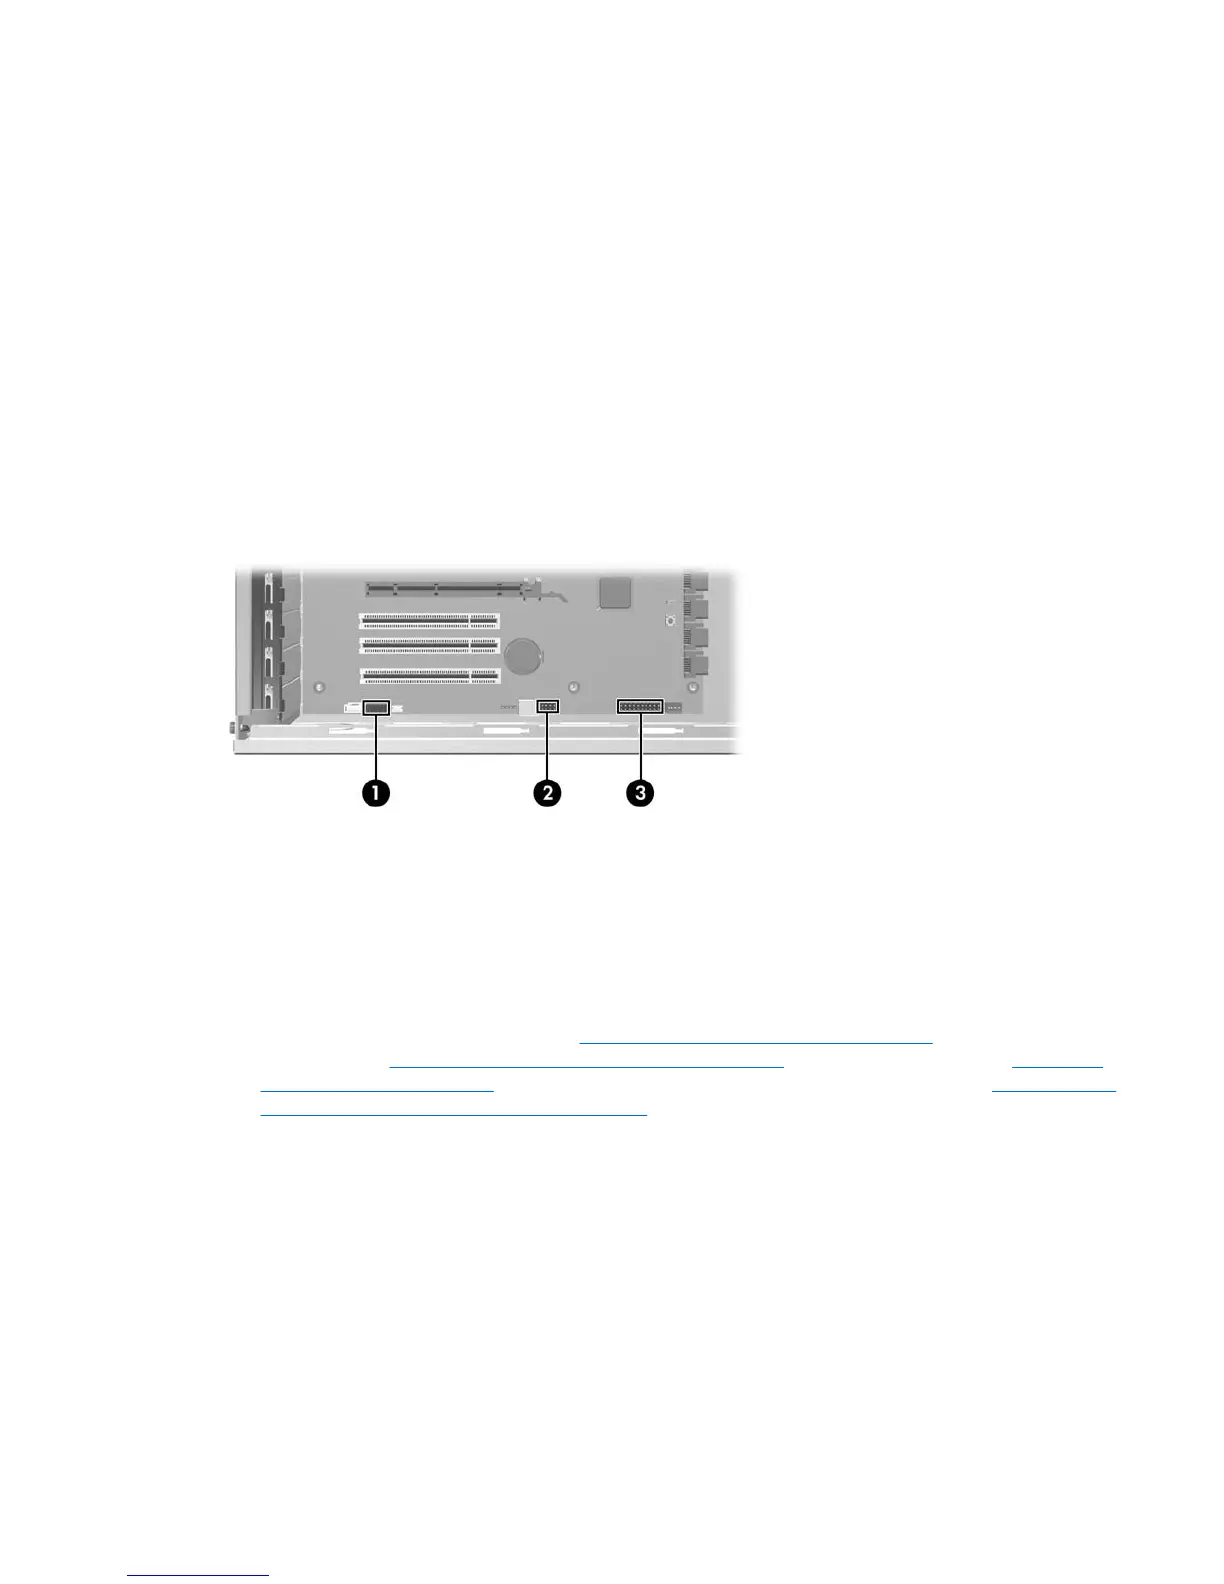
5. Connect the front audio cable to the audio connector (1). Connect the front USB cable to the USB
connector (2). Connect the front control panel cable to the control panel connector (3). If an
IEEE-1394 card is installed, connect the front IEEE-1394 cable to the card connector.
Figure 4-15 Attaching the front panel I/O device assembly cables
Power button assembly
This section describes how to remove the power button assembly.
Removing the power button assembly
To remove the power button assembly:
1. Disconnect power from the system (
Predisassembly procedures on page 58), remove the side
access panel (
Removing the side access panel on page 64), remove the front bezel (Removing
the front bezel on page 68), and then remove the front panel I/O device assembly (Removing the
front panel I/O device assembly on page 69).
ENWW Removing and replacing components 71

 Loading...


