Installing SATA hard drives in the optical drive bays (optional)
1. If necessary, remove the EMI shield.
2. Disconnect power from the system (
Predisassembly procedures on page 58), remove the side
access panel (
Removing the side access panel on page 64), and then remove the front bezel
(
Removing the front bezel on page 68).
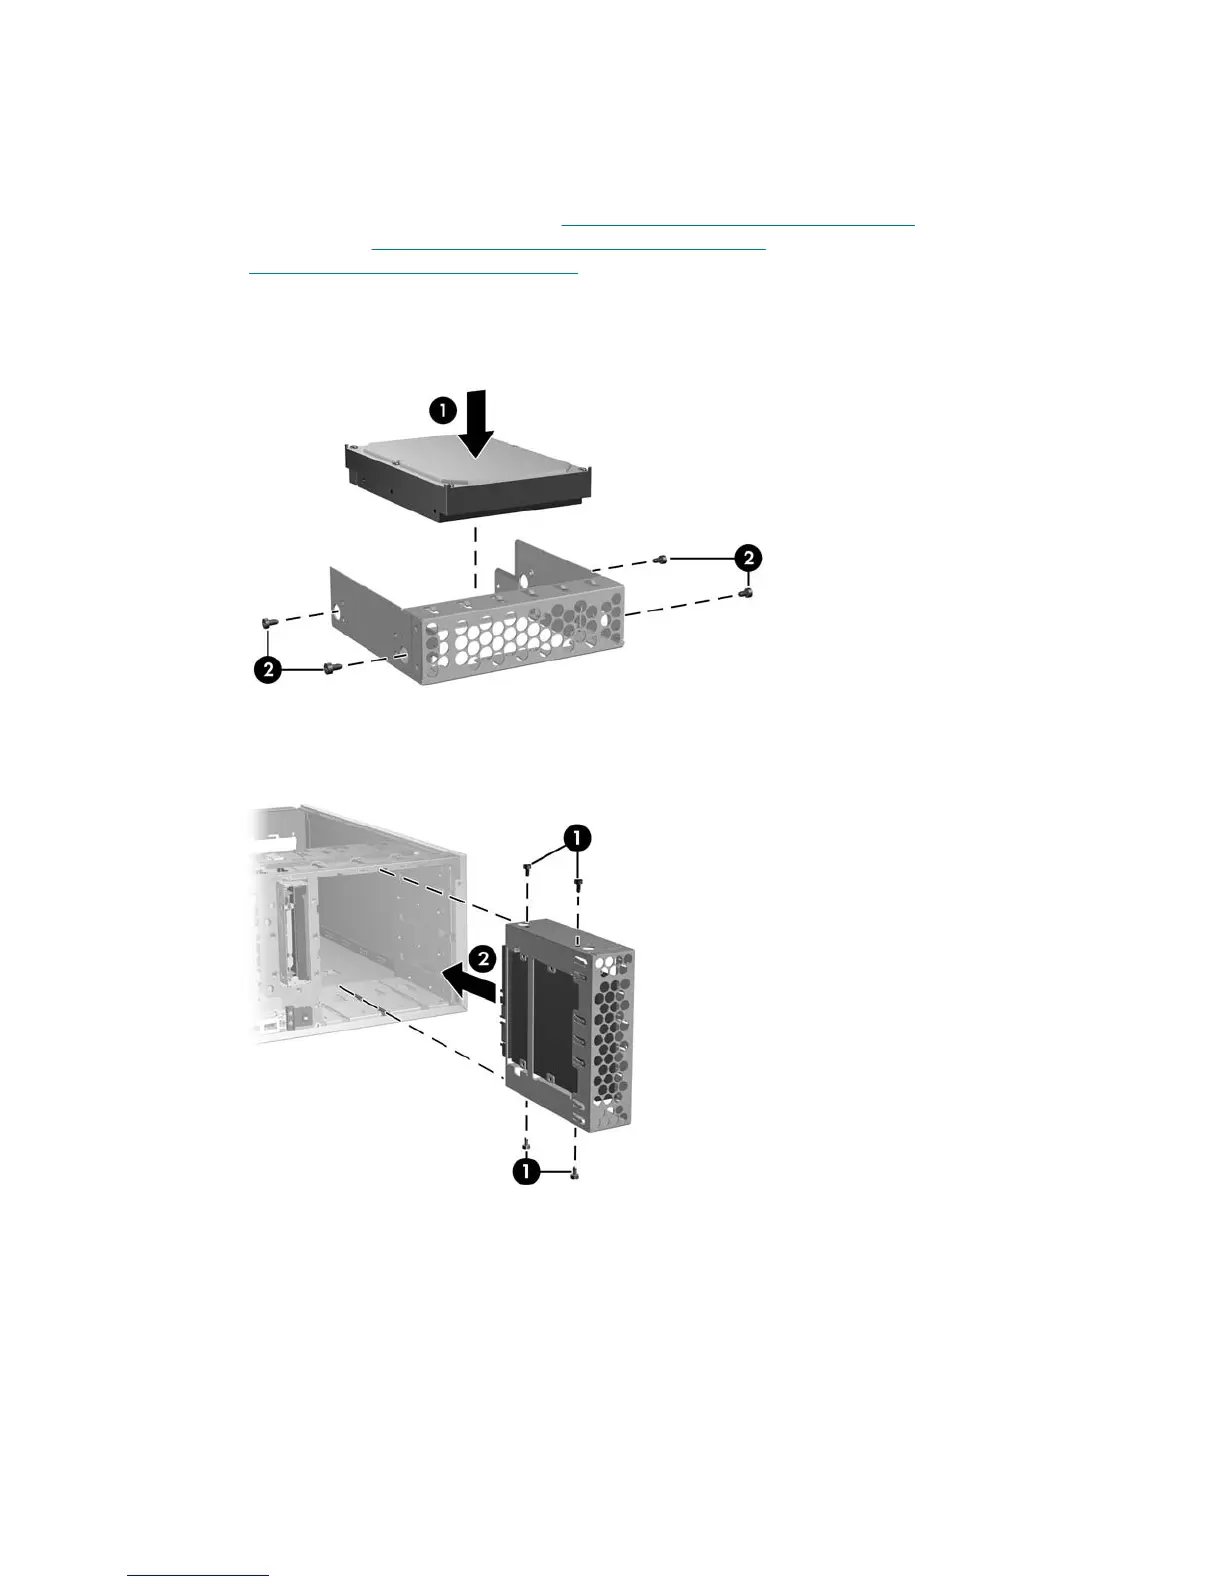
3. Place the SATA hard drive in the drive bracket (1), and then install four silver, ANSI 6–32 screws
through the bracket and into the hard drive as shown in the following figure (2).
Figure 4-56 Installing the hard drive in bracket
4. Install additional black, metric M3 screws into the bracket (1). Align the screws with the grooves in
the optical drive bay, and then slide the drive into the workstation chassis (2).
Figure 4-57 Installing the hard drive in the optical drive bay
102 Chapter 4 Removal and replacement procedures ENWW

 Loading...


