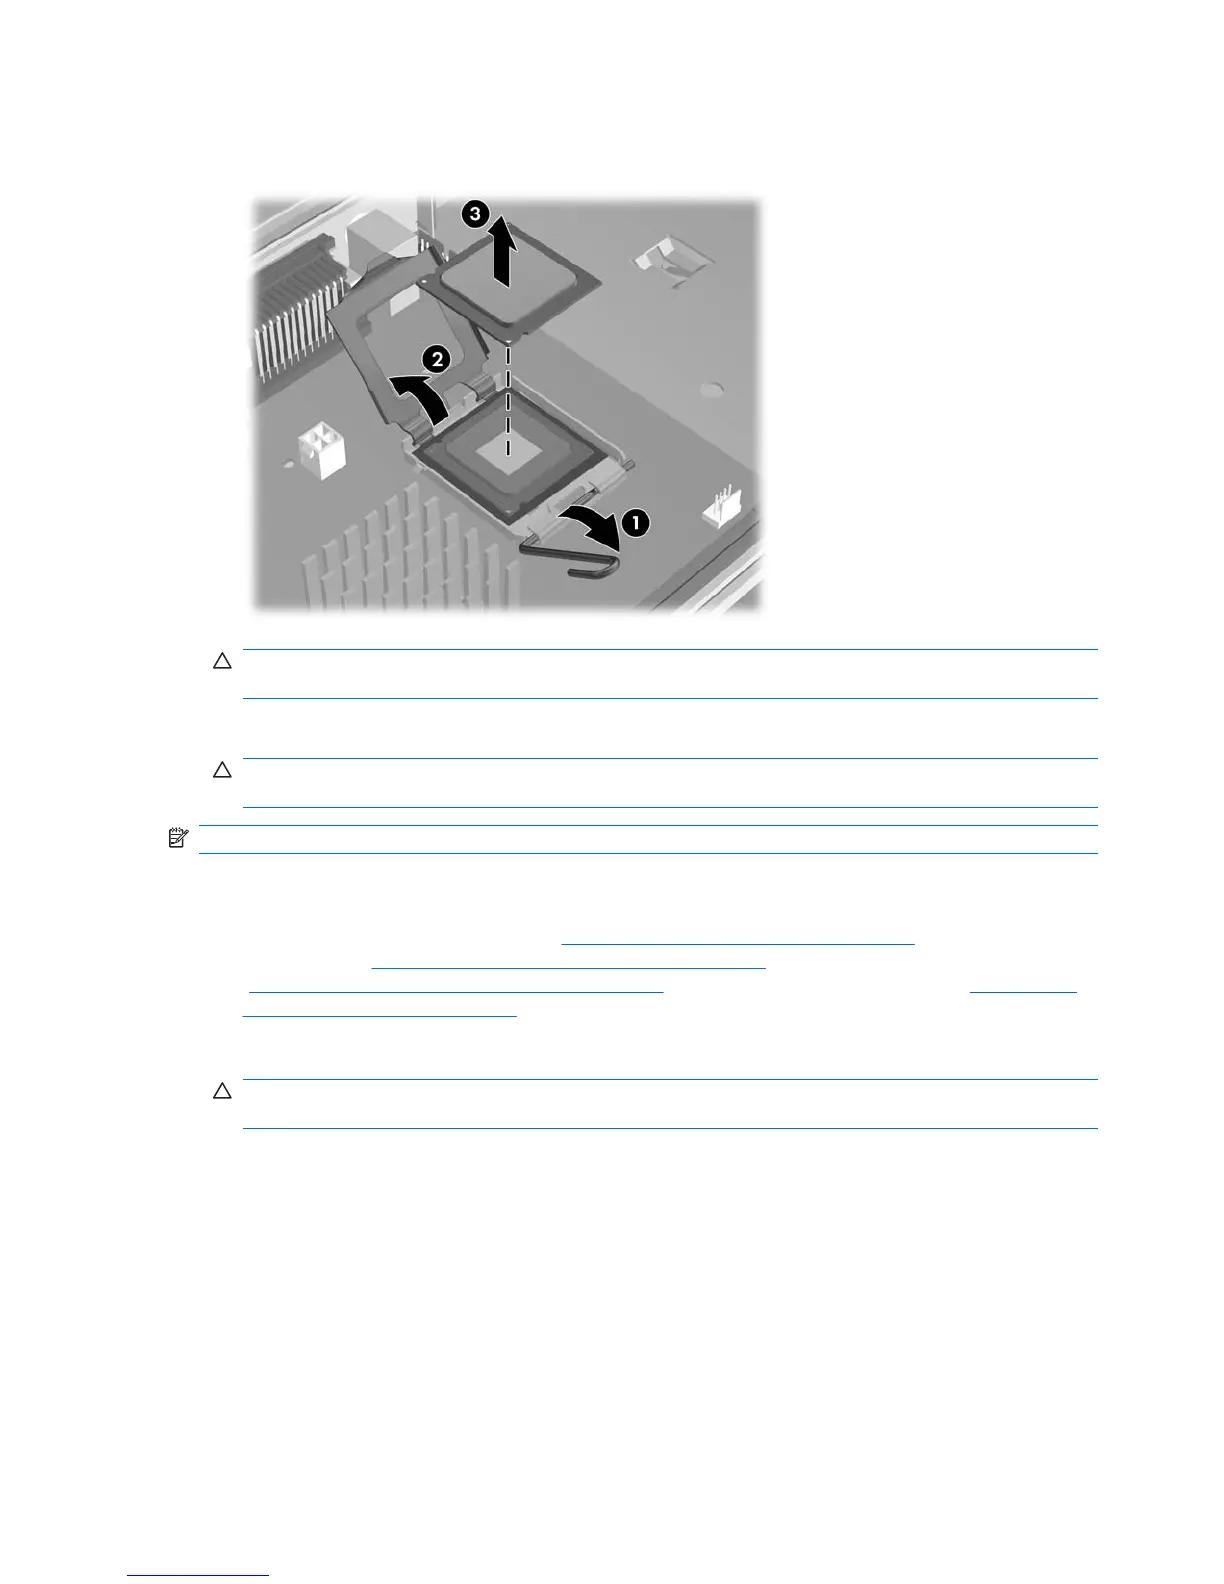
2. Raise the processor socket lever (1) and open the cover (2).
Figure 4-61 Removing the system processor
CAUTION: The processor socket contacts are delicate. To avoid bending the contacts, use
extreme care when handling the processor.
3. Pull the processor straight out of the socket (3).
CAUTION: Do not touch the processor socket pins or the gold pads underneath the processor.
Handle the processor by the edges.
NOTE: Store the processor in a static free container in a safe place where it cannot be damaged.
Installing a system processor
1. Disconnect power from the system (Predisassembly procedures on page 58), remove the side
access panel (
Removing the side access panel on page 64), remove the processor heatsink
(
Removing the processor heatsink on page 103), and then remove the processor (Removing a
system processor on page 105).
2. Raise the processor socket lever and cover fully.
CAUTION: The processor socket contacts are delicate. To avoid bending the contacts, use
extreme care when installing the processor in the socket.
106 Chapter 4 Removal and replacement procedures ENWW

 Loading...


