Assembly
5.
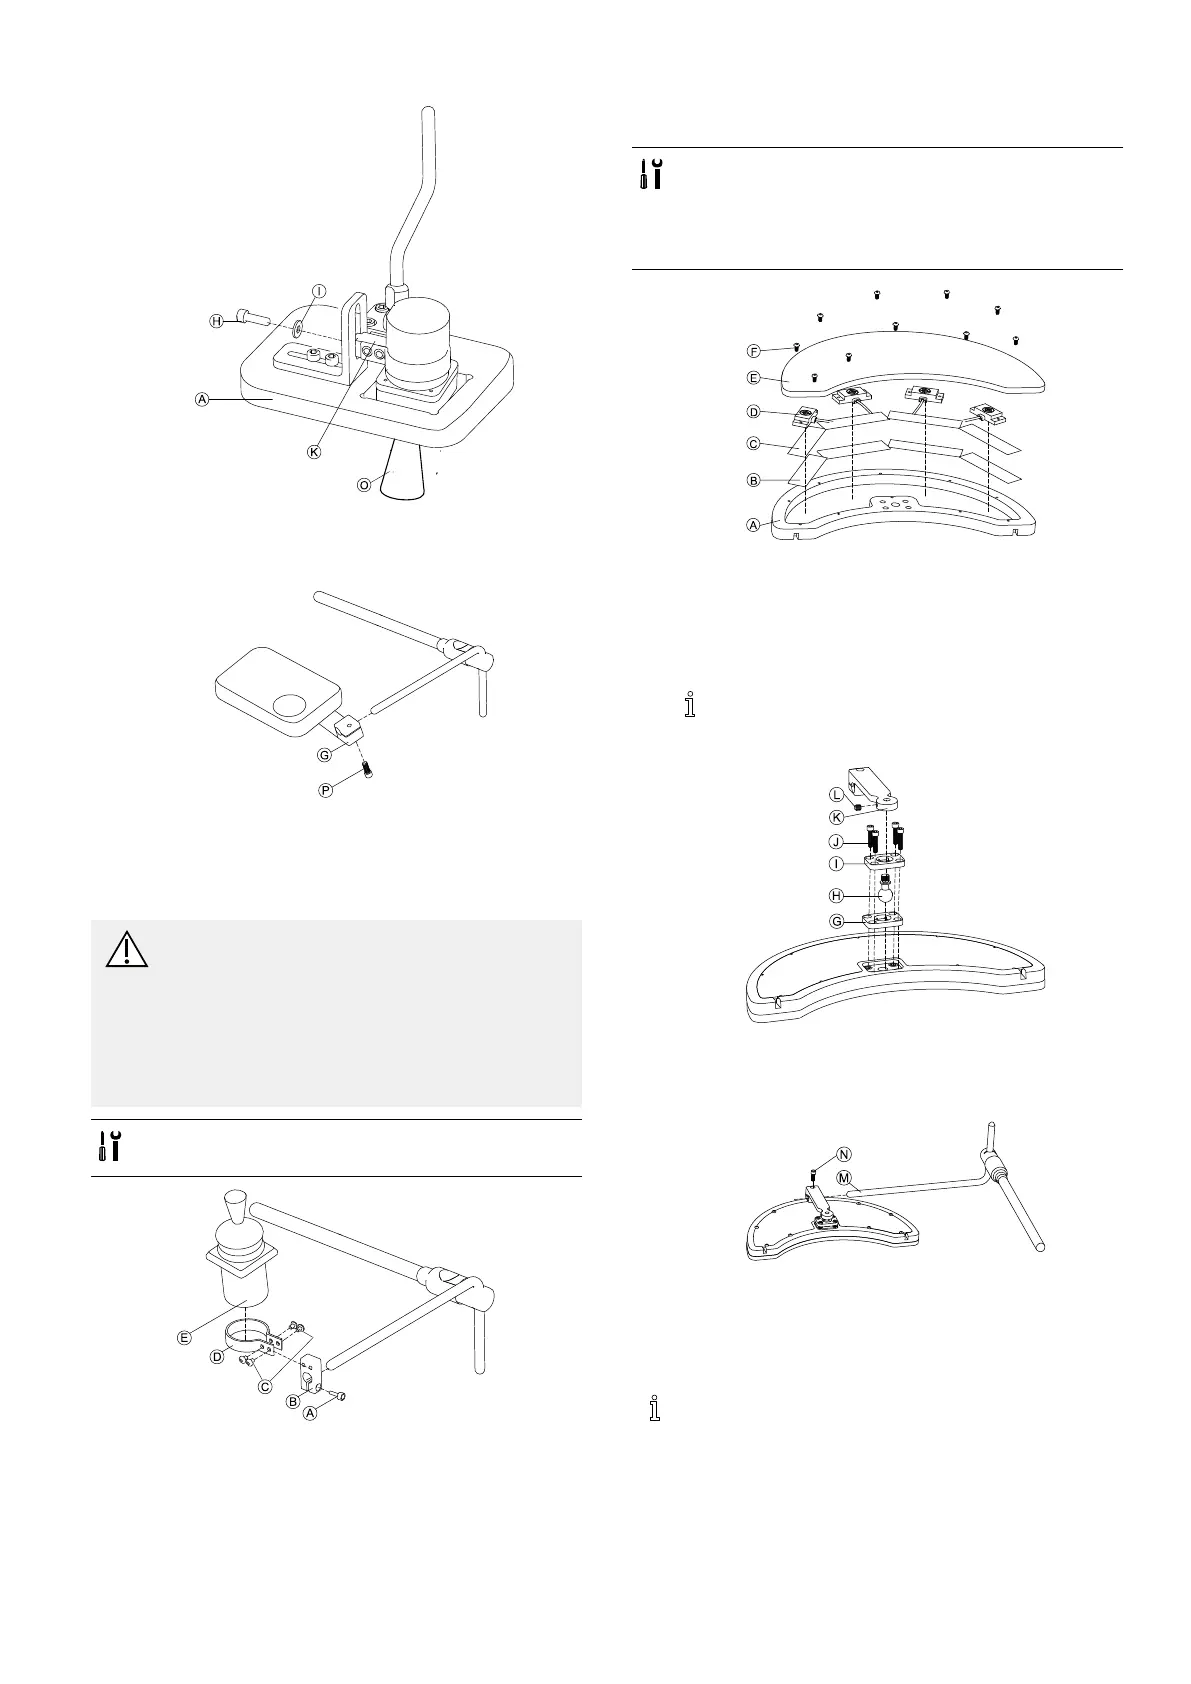
Fig.3-84
FixadapterblockMtoanglebracketHwithscrewJ
andwasherK.
6.
Fig.3-85
PullhitchmountGovernucleusandtightenwith
screwP.
NucleusOnlyMount
CAUTION!
RiskofInjuryandDamage
Remainingburrsandmissingendcapsafter
modicationsonrods,suchasshortenedrod,
canleadtoinjuryordamage.
–Deburrcutaftercuttingexcessivelength.
–Re-installendcapafterdeburring.
–Checkendcapfortighttting.
•1/8inchAllenkey
•5/32inchAllenkey
Fig.3-86
1.PulladapterblockBovernucleusandtightenwith
screwA.
2.InsertremoteEintoclampD.
3.MountclampDtoadapterblockBwithscrewsC.
3.12.5Mountingtheeclipsetraywith
proximitysensors
•3/32inchAllenkey
•5/32inchAllenkey
•3/16inchAllenkey
•4xloopstraps25x100mm
•4xhookstraps25x100mm
1.
FixhookstrapsBinsideeclipsetrayA.
2.CutloopstrapsCaccordinglyshapeofproximity
sensorsD.
3.Fixloopstrapstoproximitysensors.
4.Fixloopstrapstohookstraps.
5.
Payattentionthatwiringofproximitysensors
tintointendedgaps.
FixcoverageEtoeclipsetraywithscrewsF.
6.
InsertclampplateGintocutoutoneclipsetray.
7.Fixclampplate,clampballHandupperclampplate
IwithscrewsJ.
8.ScrewhitchmountKtoclampballwithgrubscrewL.
9.
PullhitchmountovernucleusMandtightenwith
screwN.
3.13Mountingthe10wayswitch
Formoreinformationabouthow10wayswitch
holdersaremountedtothewheelchair,referto
theservicemanualoftheseatingsystem.
Whilemountingthe10wayswitchorchangingthe
labeling,theorientationspotAmustfacedownwards,
seetablebelow.
1605129-G51