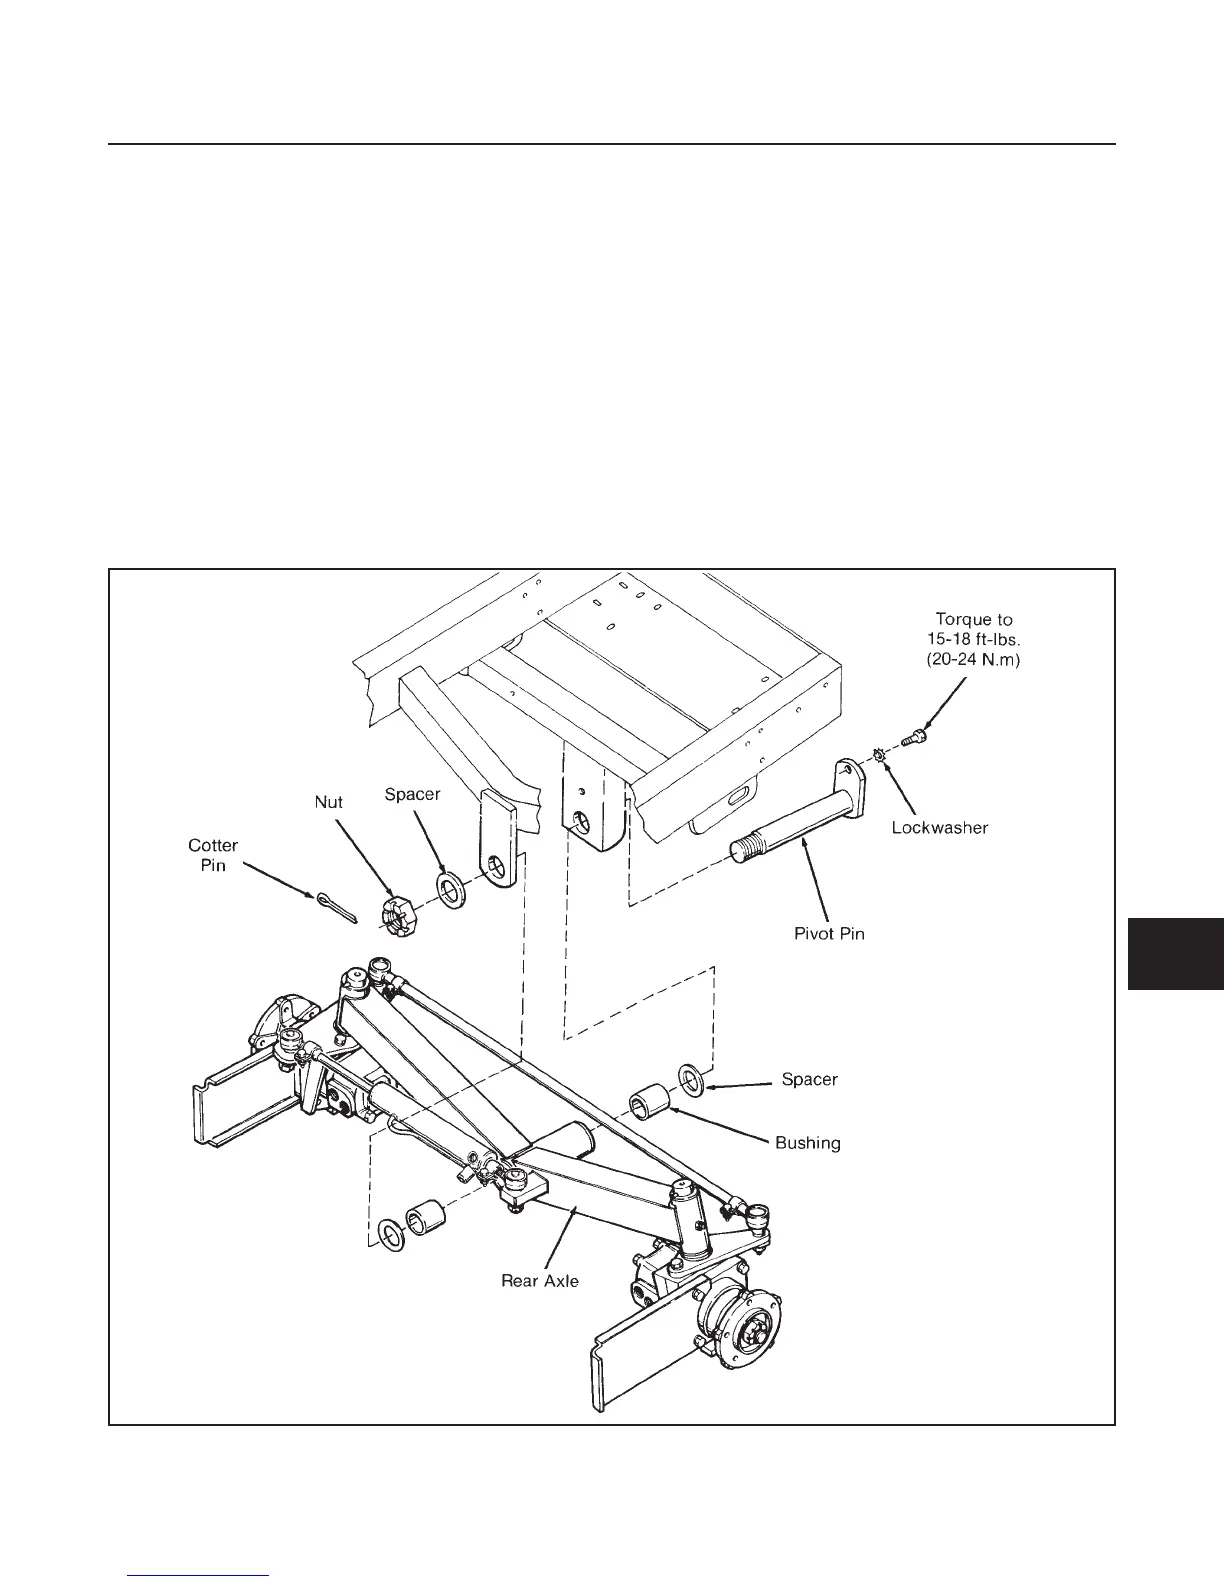
GENERAL
Repair of the rear axle is limited to replacement of bro-
ken parts and servicing bushings and bearings. (See
Steer Cylinder Service Section 6F and Adjustments
Section 6D.)
REMOVAL AND INSTALLATION
(See Figure 9G-1)
1. Block front wheels to prevent tractor movement.
2. Raise the rear of the tractor. Do not attach lifting
device to axle or any component connected to
axle assembly.
3. Disconnect hydraulic lines to steering cylinder and
hydraulic motors. Cap or plug all fittings.
4. Remove cotter pin and slotted nut.
5. Remove capscrew.
6. Making sure tractor and axle are well supported,
remove pivot shaft and thrust washer to free axle
from tractor frame.
7. Remove pivot pin bushings.
8. Inspect all parts for damage or excessive wear.
Replace if necessary.
9. Reassemble axle.
10. Install bushings and position axle under tractor
frame.
11. Install pivot pin, thrust washer, slotted nut and a
new cotter pin.
12. Install capscrew and torque to 15–18 ft-lbs. (20–
24 N.m).
CHASSIS
SECTION 9G. REAR AXLE
9G-1
9G
Figure 9G-1. Removal and Installation