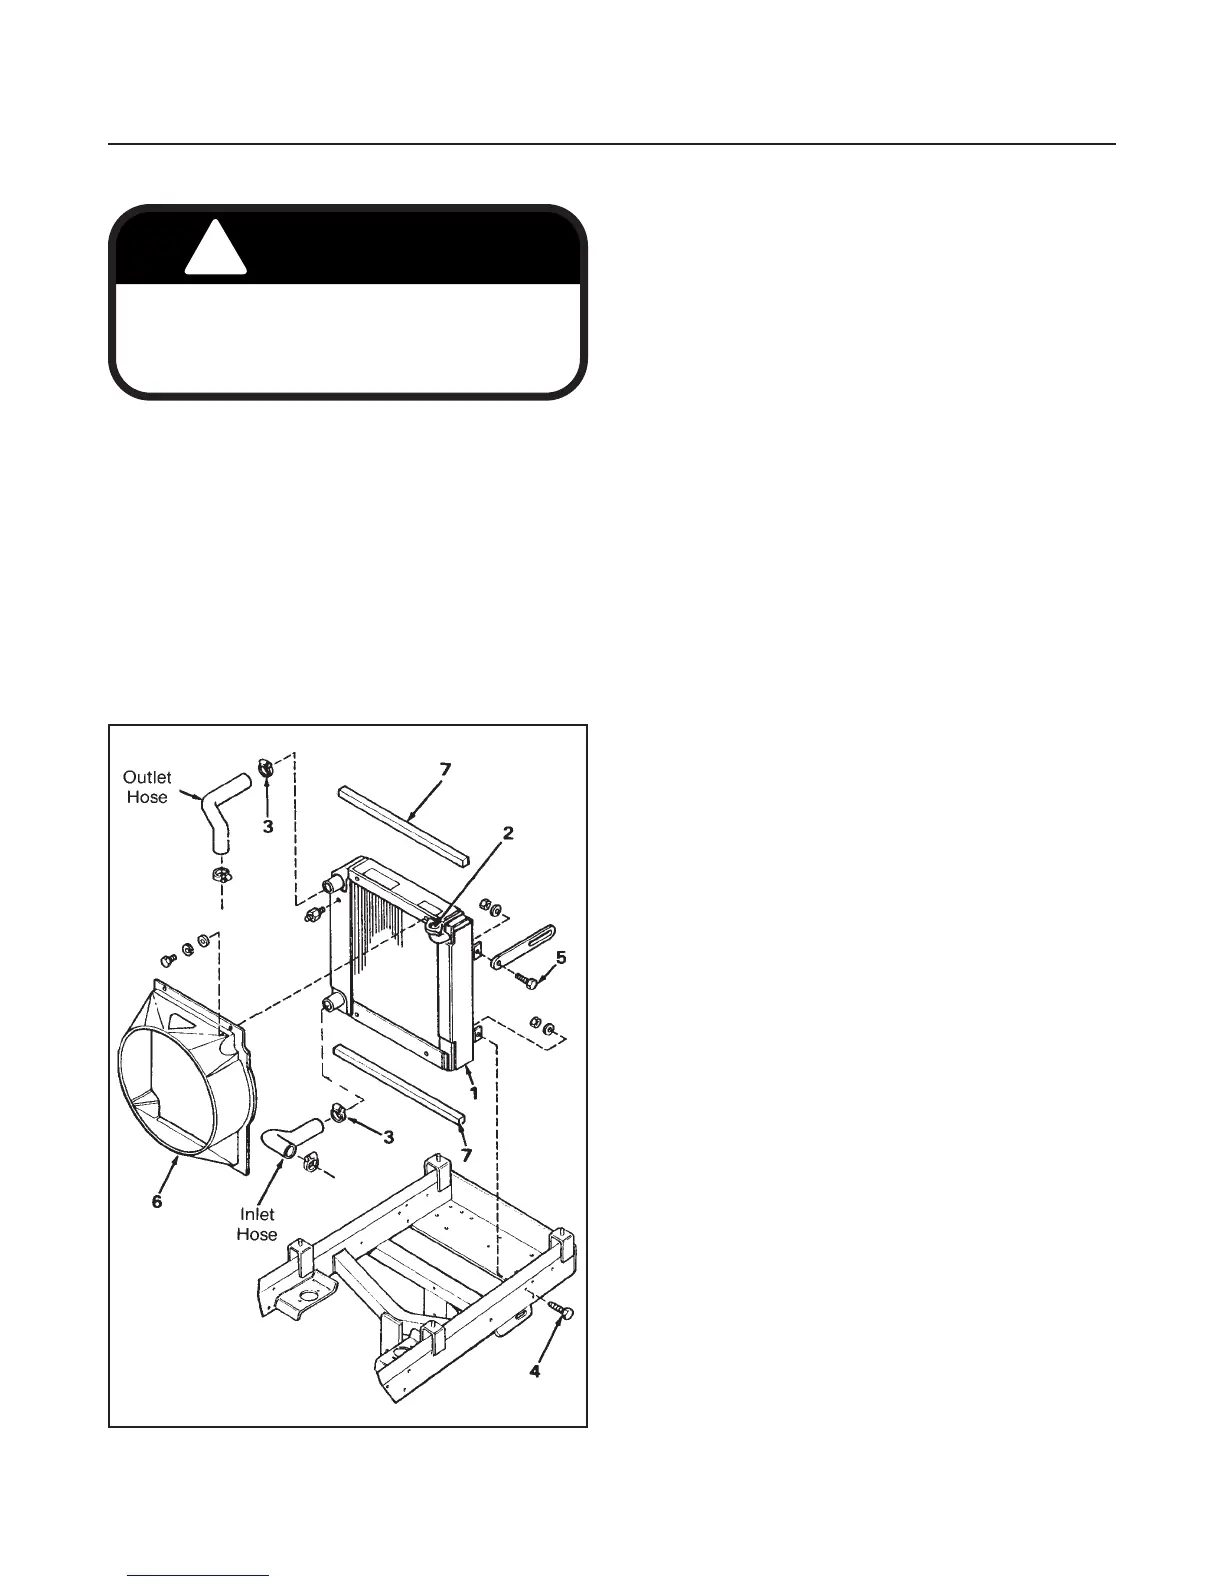
RADIATOR (See Figure 3D-2)
CHANGING COOLANT
1. Open drain cock (1) and radiator cap (2) and drain
coolant into a clean container.
2. Flush the inside of the radiator (3) with clean water.
NOTE
Always mix anti-freeze with the cooling water.
Mixture ratios differ with the anti-freeze manu-
facturer and temperature. Follow the instructions
of each manufacturer. However, do not exceed
a 50/50 mixture of anti-freeze to water.
CLEANING RADIATOR CORE
When dust enters between fins and tubes, blow out
with air, then wash with tap water under pressure.
NOTE
Never use a screwdriver or other pointed tool for
cleaning. It may damage the core tubes of the
radiator.
Open access door at bottom of radiator to allow trash
to fall out during cleaning.
REMOVAL (See Figure 3D-2)
1. Loosen wing nuts holding oil cooler in place and
tilt oil cooler out of the way.
2. Remove hardware securing fan shroud to radiator
and move shroud back over fan.
3 Open drain cock (1), remove radiator cap (2) and
drain the coolant.
4. Disconnect the inlet and outlet hoses by loosen-
ing hose clamps (3).
5. Disconnect overflow tube at radiator cap.
6 Remove attaching hardware (4 and 5).
7. Inspect weatherstrip (7). Replace if damaged.
INSTALLATION (See Figure 3D-2)
1. Install weatherstrip (6) if removed.
2. Place the radiator (3) on frame and secure with
attaching hardware (4 and 5).
3. Connect overflow coolant tube.
4. Connect the inlet and outlet hoses; tighten hose
clamps (3).
5. Close drain cock (1) and fill the radiator with clean
distilled water/anti-freeze mixture.
NOTE
Always mix anti-freeze with the cooling water.
Mixture ratios differ with the anti-freeze manu-
facturer and temperature. Follow the instructions
of each manufacturer. However, do not exceed
a 50/50 mixture of antifreeze to water.
6. Secure fan shroud to radiator with attaching hard-
ware.
7. Secure oil cooler in place with wing nuts and
washers.
ENGINE
SECTION 3D. DIESEL ENGINE
3D-2