8. One at a time, loosen the high pressure fuel injec-
tor line nuts at the injector while cranking the
engine.
9. When bubbles disappear, tighten the fuel line nuts.
Repeat Steps 6 and 7 for the remaining fuel injec-
tion lines.
10. When all the lines have been purged and the
engine is running, listen to the engine. If it sounds
like it’s missing, repeat Steps 6 and 7 for all the
injection lines.
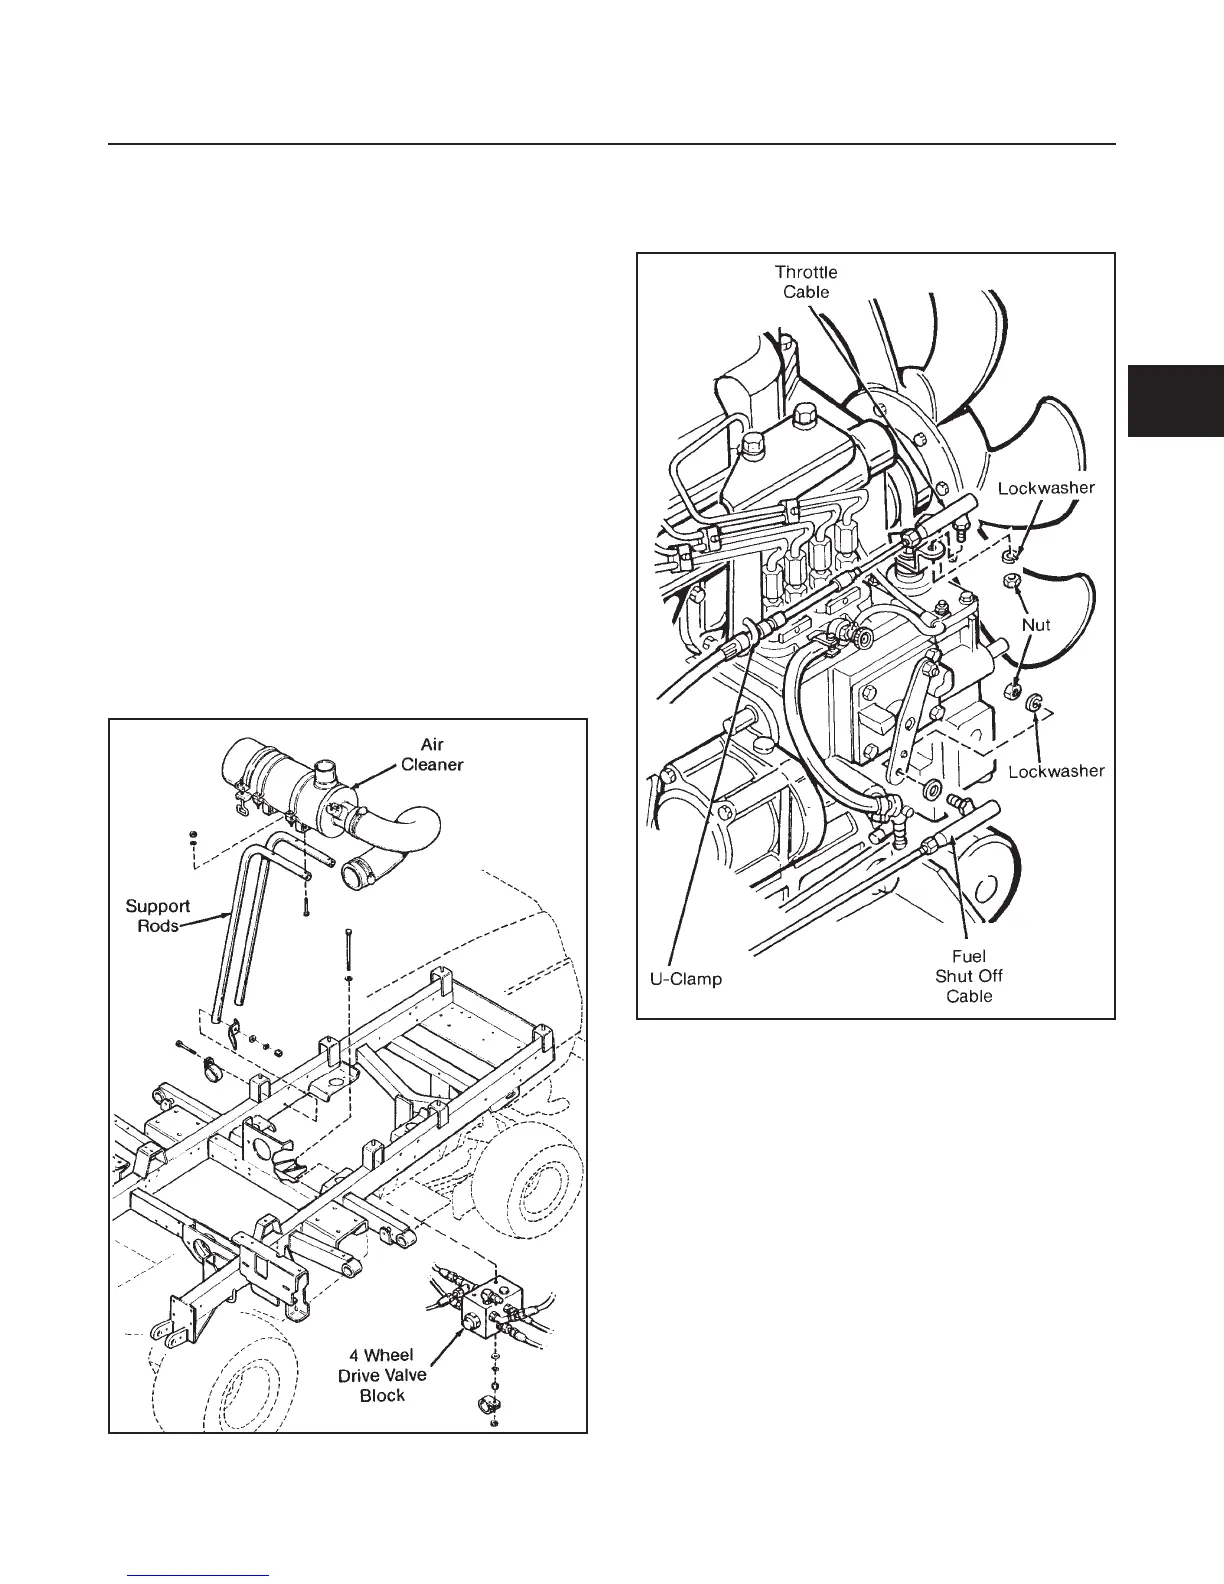
ENGINE REMOVAL
(See Figures 3D-6 to 3D-8)
1. Disconnect and tag all electrical connections at the
engine.
2. Remove the fuel line from engine.
3. Disconnect air cleaner and support rods (see Fig-
ure 3D-6).
4. Disconnect the throttle cable at the fuel injection
pump (Figure 3D-7).
5. Remove the exhaust pipe and radiator shroud de-
scribed in preceding paragraphs (see Figure 3D-2
and 3D-3).
6. Tag and remove hydraulic lines from 4 wheel drive
valve block (see Figure 3D-6).
7. Remove 4 wheel drive valve block.
8. Remove the bolts (1) and lockwashers (2) that
mount the hydrostatic pump drive plate (3) to the
engine (see Figure 3D-8).
9. Attach a chain hoist to the engine (the engine
weighs approximately 400 lbs.).
10. Remove all bolts (4), lockwashers (5) and flat
washers (6) that hold the engine to the machine
frame.
11. Carefully lift the engine out of the machine.
ENGINE
SECTION 3D. DIESEL ENGINE
3D-5
3D
Figure 3D-6. Component Removal
Figure 3D-7. Fuel Shut-Off Solenoid and
Throttle Cable Connections