Getting Started
2-6
Buffered readings display
After readings have been stored in the buffer, they are dis-
played on the front panel by pressing the RECALL key. This
action brings up the first reading in the buffer, such as:
+00.00000 VDC
Rdg#+00000 @Time=+000.000000 sec
where the top line shows the reading, and the bottom line
shows the reading number and time-stamp. The RANGE
▲
and
▼
keys scroll through the readings and the and
keys change the digit being scrolled. You can scroll through
statistical data on the buffered readings by pressing the
NEXT and PREVious DISPLAY keys. This also gives you
the option of printing the data.
NOTE
Buffered readings are preserved across
power transition when the memory op-
tions are installed.
Message displays
While operating the Model 2001, the front panel display is
also used for showing status and error messages. These mes-
sages are shown to inform you of parameter conflicts, trigger
overruns, etc. Refer to paragraph 3.3.4 for a complete list of
these messages.
Section 4, IEEE-488 Reference, describes the programming
of user messages to be shown on the front panel. (See the
DISPlay subsystem.) Both lines of the display are available
for this purpose.
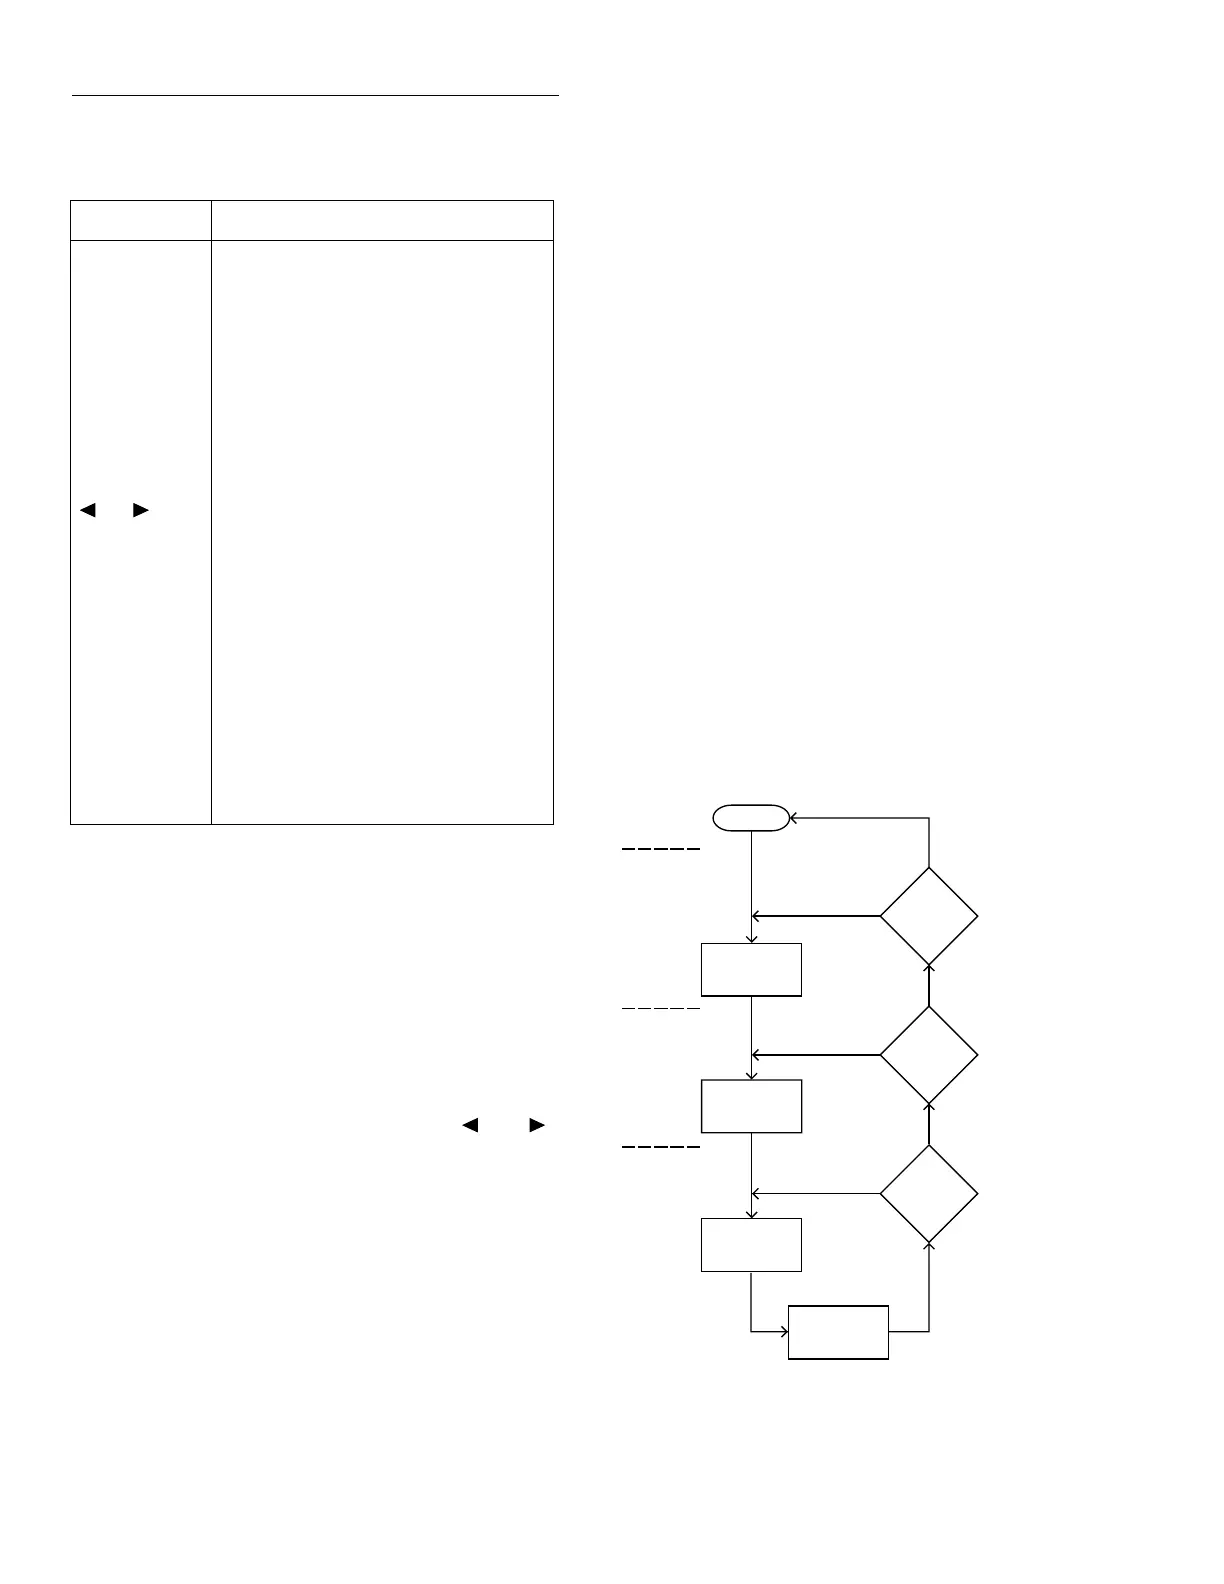
2.3 Overview of measurement process
The following overview is intended to acquaint you with the
basic measurement fundamentals without overwhelming
you with the details of enhanced capabilities. This brief over-
view is sufficient to support the operation examples in para-
graphs 2.5 (front panel) and 2.6 (IEEE-488 bus). For a
complete explanation on all aspects of the measurement pro-
cess, see paragraph 3.7.
The simplified model for a measurement operation is shown
in Figure 2-3. As shown, the measurement operation consists
of three layers: the arm layer, scan layer, and measure layer.
Table 2-2
Menu summary
Action Description
CONFIG-DCV Press the CONFIG key, then the DCV
key, to view the top level of the DCV
configuration menu. Access to other
function and operation configurations are
similar, e.g., CONFIG-ACV or CON-
FIG-TRIG.
MENU Press the MENU key to view the top
level of the main menu. The operations
that have no corresponding key are
included in the main menu.
or Use the cursor keys to move the high-
lighted cursor among menu selections, or
the digits of a parameter value, or change
channels on the scanner.
RANGE
▲
RANGE
▼
Use the RANGE keys to increment and
decrement digits of a parameter value.
ENTER Accepts menu selection or data entry.
EXIT Cancels changed menu selection. Also
returns you to the previous menu level.
INFO Displays context-sensitive information
about the present menu level. Toggles
information message on/off.
igure 2-3
implified model of measurement operation
Arm
Layer
Idle
Scan
Layer
Measure
Layer
Yes
No
Arm
Count
Another
Arm
?
Another
Scan
?
Scan
Count
Another
Measure-
ment
?
Measure
Count
Measure
Event
Arm
Event
Scan
Event
Yes
No
Yes
No
Device
Action