448 N9030B PXA Signal Analyzer Service Guide
Assembly Replacement Procedures
RF Area (Options 503, 508, 513, 526)
Replacement
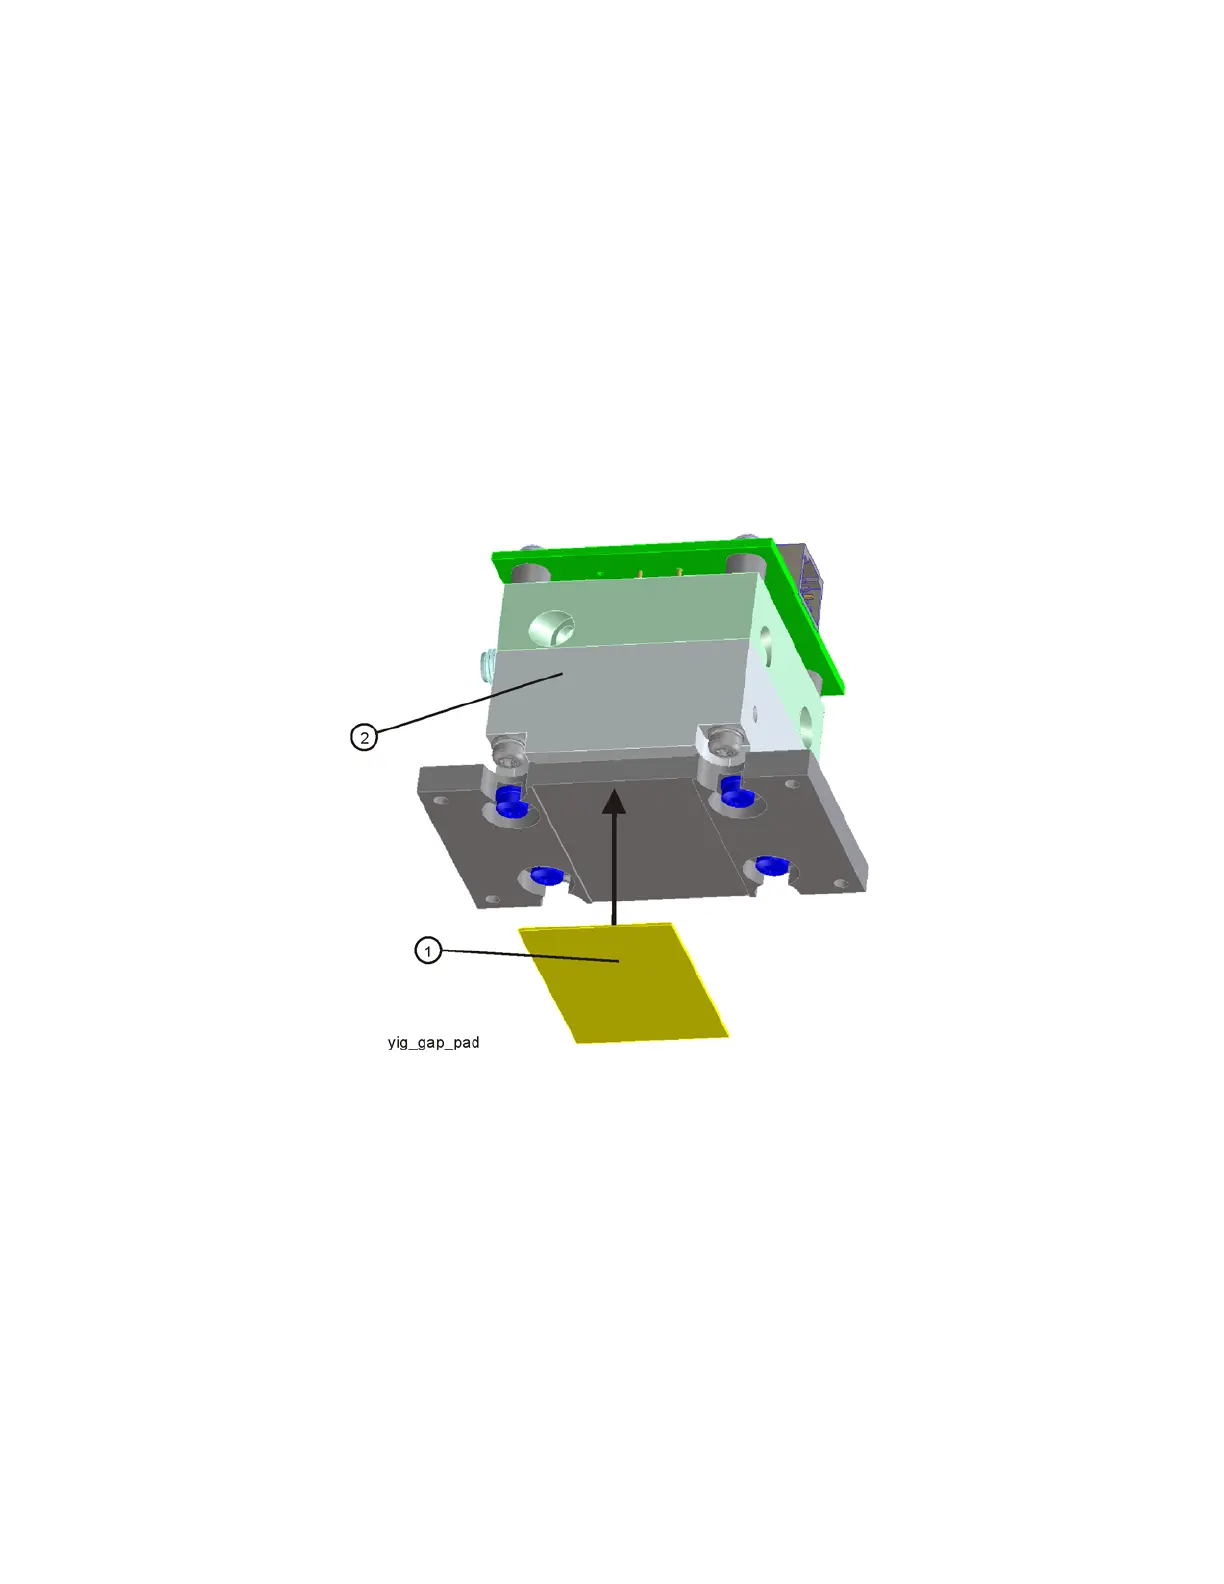
1. Inspect the chassis where the YTF Preselector mounts and remove the gap
pad if present (see Figure 16-14, item (1)). The gap pad may remain
attached to the faulty YTF Preselector.
2. Refer to Figure 16-14. Install the replacement gap pad (1) (5022-7179)
into the recess in the base of the replacement YTF Preselector (2) Refer to
A12MP1 in Chapter 15, “Replaceable Parts.”. Peel back one corner of the
clear plastic backing on the pink side of the gap pad. Remove the blue
backing from the other side of the gap pad. Install the gap pad as shown
with the pink side exposed. Carefully peel off the clear plastic backing and
smooth the gap pad into the recess.
Figure 16-14 Gap Pad Installation
3. Refer to Figure 16-13. Place the YTF Preselector into the chassis with the
ports toward the front of the instrument. Replace the four screws (1)
(0515-0372). Torque to 9 inch-pounds.
4. Figure 16-12. Replace the cables W2, W56 and W57. Torque to
10 inch-pounds.
5. Replace the wire harness W11.
6. Refer to Figure 16-7. Position the RF bracket onto the chassis and replace
the sixteen screws (0515-0372). Torque to 9 inch-pounds.
7. Replace the front panel. Refer to the Front Frame Assembly replacement
procedure.