Image Optimization 5-47
Wire cage
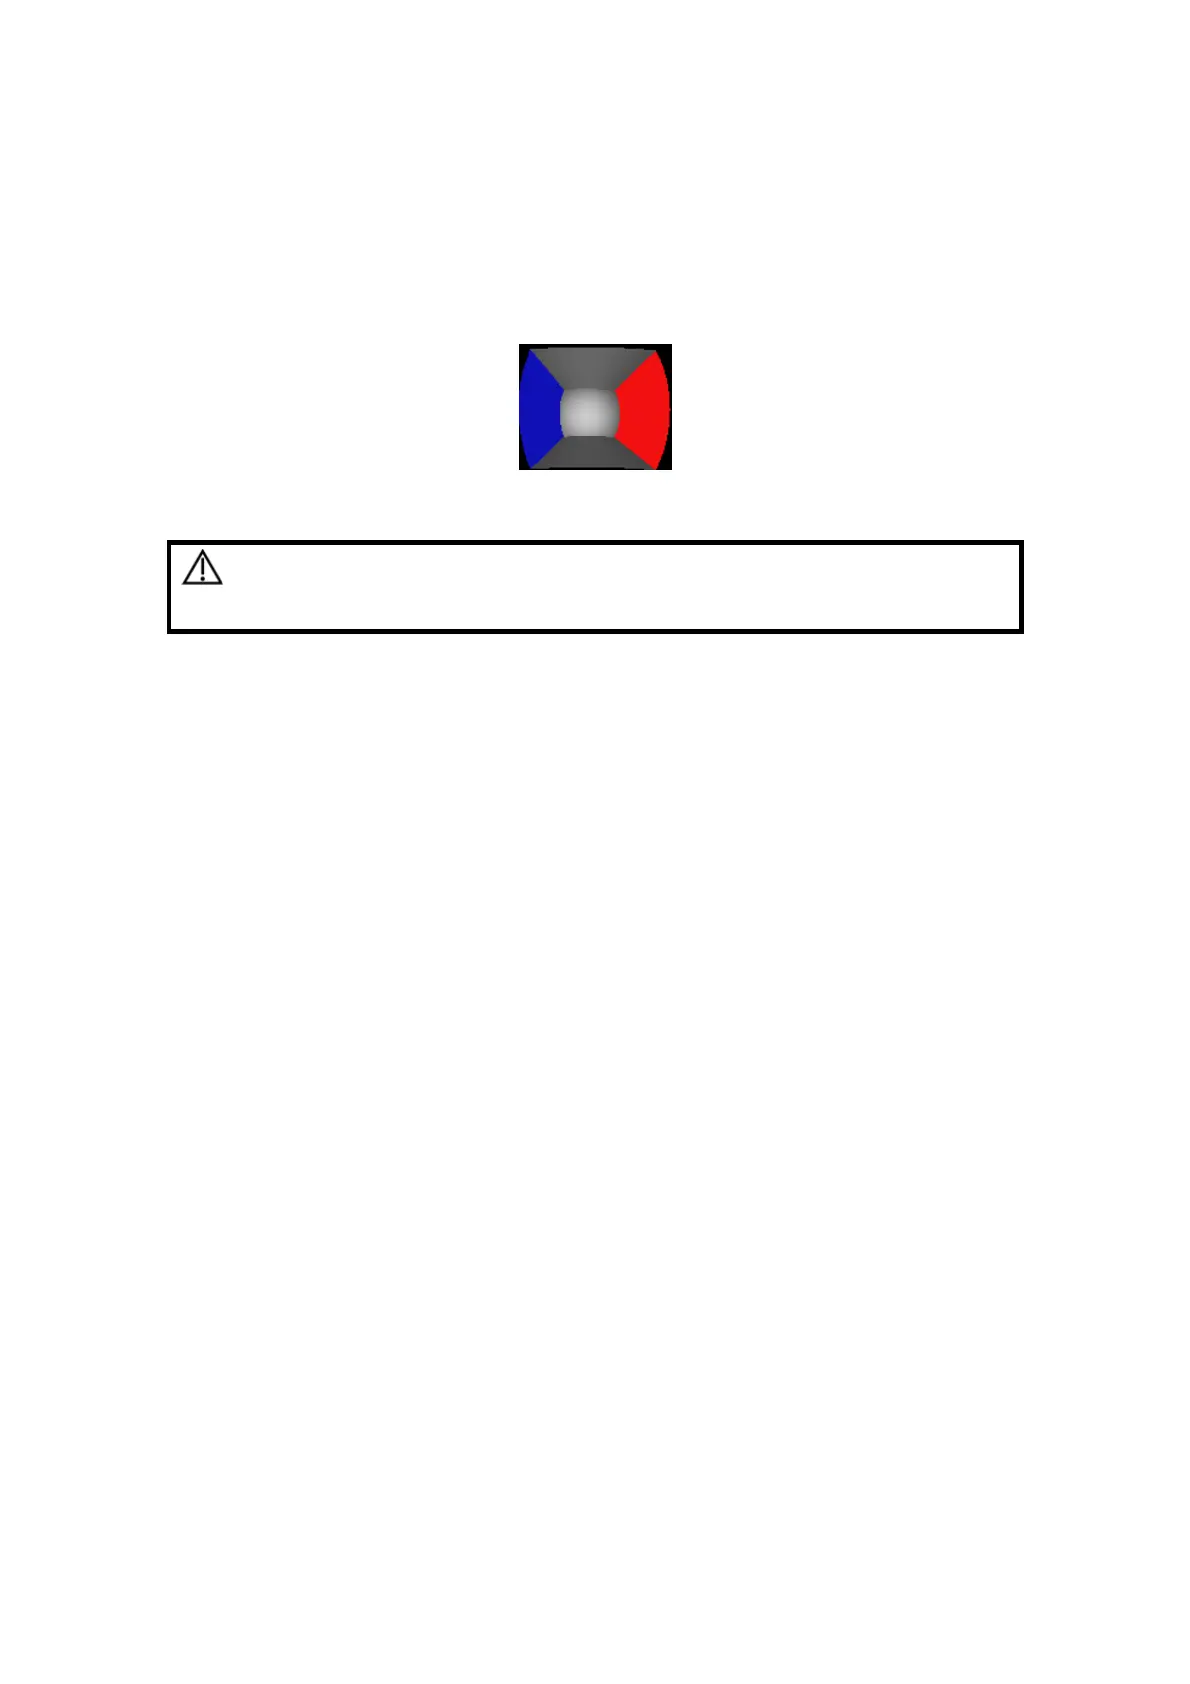
When you view a 3D/4D image on the display monitor, it’s sometimes difficult to
recognize the orientation. To help, the system displays a three-dimensional drawing to
illustrate the orientation. Of which, the blue plane presents the image acquisition
where started, while the red plane presents the image acquisition where ended,
besides, a yellow plane in the wire cage presents the position of the sectional plane.
See the graphic below:
Wire Cage
CAUTION:
The ultrasound images are provided for reference only, not for
confirming a diagnosis. Please use caution to avoid
misdiagnosis.
5.11.3 3D/4D Preset
5.11.3.1 Shortcut Key Preset
The system supports setting shortcut key to enter 3D/4D imaging. Assign a key as
user-defined 3D/4D key, the setting path is “[Setup] → [System Preset] → [Key Config]”.
Refer to “15.1.7 Key Config” for details.
5.11.3.2 Menu Preset
Open the Menu Preset screen via “[Setup] → [Image Preset] → [Menu Preset]”.
1. Select the probe type and imaging mode (Smart3D, Static 3D or 4D).
2. Set the soft menu items for Smart3D, Static 3D or 4D imaging respectively, refer to
“5.13.2 Soft Menu and Menu Preset” for details.
5.11.3.3 Parameter Preset
Open the 3D/4D Image Preset interface via “[Setup] → [Image Preset] → 3D/4D”.
The main preset page is shown as follows: