Setting up a Form for Automated Data Entry
118 Chapter 5
• Select the data source you will be using from the
Data Source
drop-down list.
• Select a Table you would like to use from the
Table
drop-down
list.
9Click
Next>
.
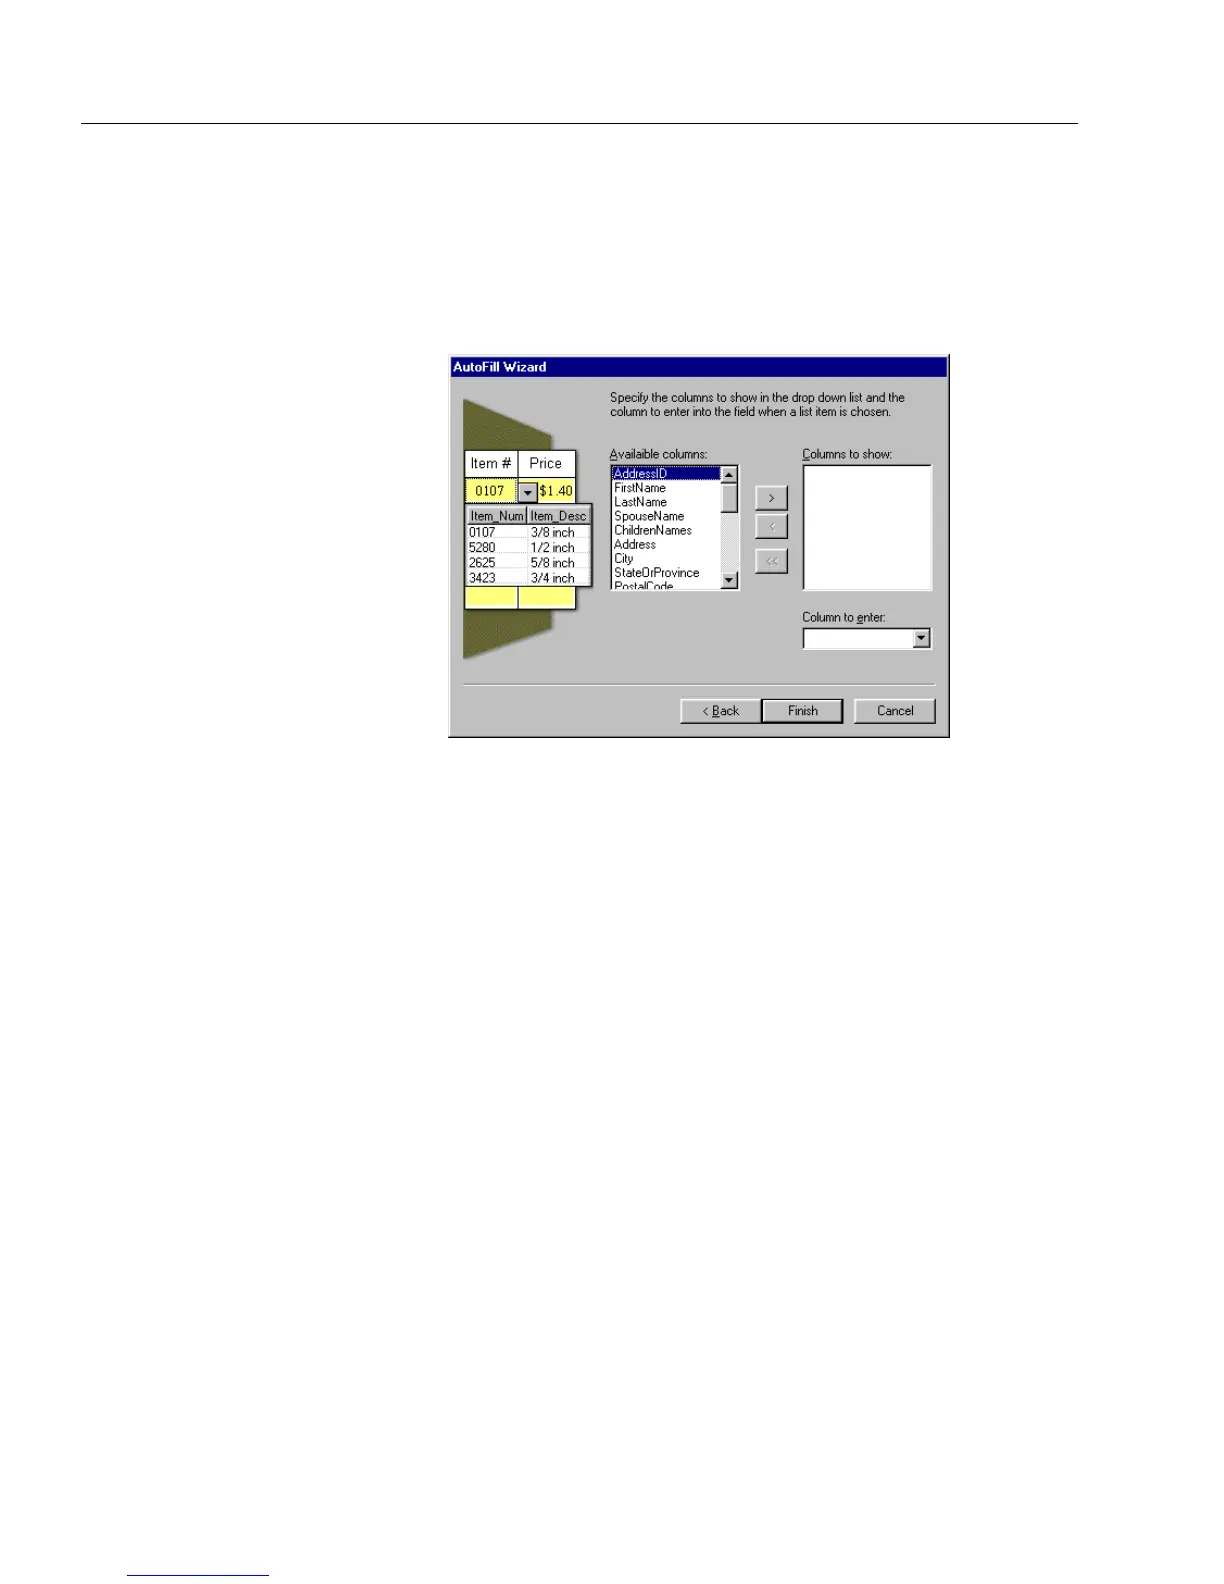
A dialog box similar to the one below appears.
10 Specify the columns (or fields) that you want to use in the drop-
down list. Also, select the field that you want to appear first in
the drop-down list. You can have a maximum of 10 columns
displayed in your drop-down list.
• Select the columns in the
Available columns
list and click the
right-arrow button. The columns you have chosen appear in
the
Columns to show
list box. All the columns you choose will
appear in the drop-down list.
•In the
Columns to enter
text box, choose the field you want to
appear first in the drop-down list. The information you
choose from this column is what appears first in the field in fill
view.
11 Cli ck
Finish
to close the AutoFill Wizard.
The Fill Text Definition dialog box appears.
12 Click
OK
to apply your settings and close the dialog box.