- 79 -
3. Scan
5
Enter a file name, and then press [OK].
You can enter up to 64 characters.
6
Change other settings if necessary, and then press the (START) button.
Specifying a Color Mode
1
Press [Scan] or the (SCAN) button.
2
Set a document in the ADF or on the document glass.
3
Select a scan function.
Sending Scanned Data as an E-mail Attachment
Saving Scanned Data in USB Memory
Saving Scanned Data in a Shared Folder
4
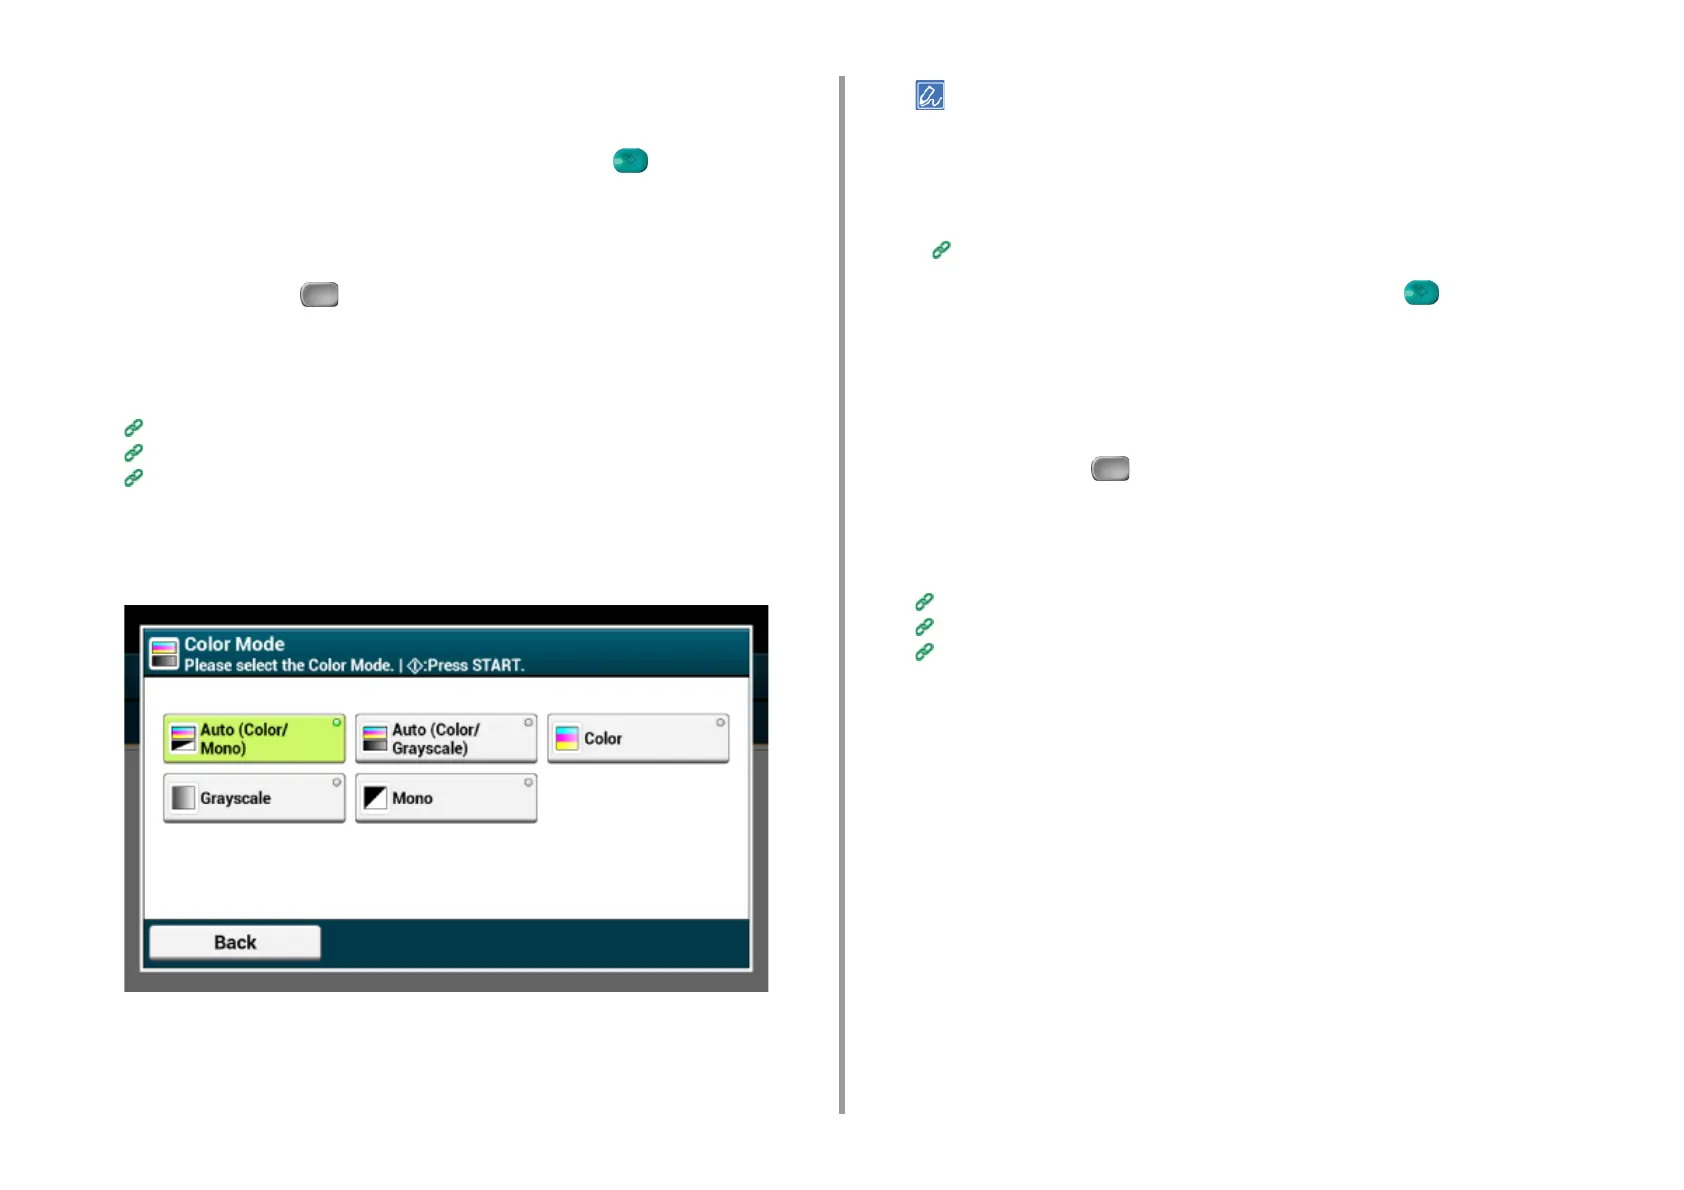
Press [Color Mode] in the [Basic] tab or [Scan To USB Memory] tab.
5
Select a color mode.
• When [Auto(Color/Grayscale)] is enabled, this machine detects the color of each page automatically. Color
documents are scanned in full color; black and white documents are scanned in grayscale.
• When [Auto(Color/Mono)] is enabled, this machine detects the color of each page automatically. Color
documents are scanned in full color; black and white documents are scanned in black and white.
• You can change the criteria for determining color document and black and white document from [Device
Settings] > [Admin Setup] > [Scanner Setup] > [Scanner Adjust] > [Auto Color Judge Level] on the touch panel.
Scanner Setup
6
Change other settings if necessary, and then press the (START) button.
Specifying a File Format
You can specify a file format of a scanned document.
1
Press [Scan] or the (SCAN) button.
2
Set a document in the ADF or on the document glass.
3
Select a scan function.
Sending Scanned Data as an E-mail Attachment
Saving Scanned Data in USB Memory
Saving Scanned Data in a Shared Folder
4
Press [File Format] on the [Image Settings] tab.