8-24
D Cooling Fan Models
Inverter Cooling Fan
3-phase 200-V AC
3G3MV-A2007 3G3IV-PFAN2007
3G3MV-A2015 3G3IV-PFAN2015M
3G3MV-A2022 3G3IV-PFAN2022
3G3MV-A2037 3G3IV-PFAN2037
3G3MV-A2055 3G3IV-PFAN2037 (2 parts)
3G3MV-A2075 3G3IV-PFAN2037 (2 parts)
Single-phase
3G3MV-AB015 3G3IV-PFAN2015M
200-V AC
3G3MV-AB022 3G3IV-PFAN2037
3G3MV-AB037 3G3IV-PFAN2037 (2 parts)
3-phase 400-V AC
3G3MV-A4015/-A4022 3G3IV-PFAN2015M
3G3MV-A4037 3G3IV-PFAN2037
3G3MV-A4055 3G3IV-PFAN2037 (2 parts)
3G3MV-A4075 3G3IV-PFAN2037 (2 parts)
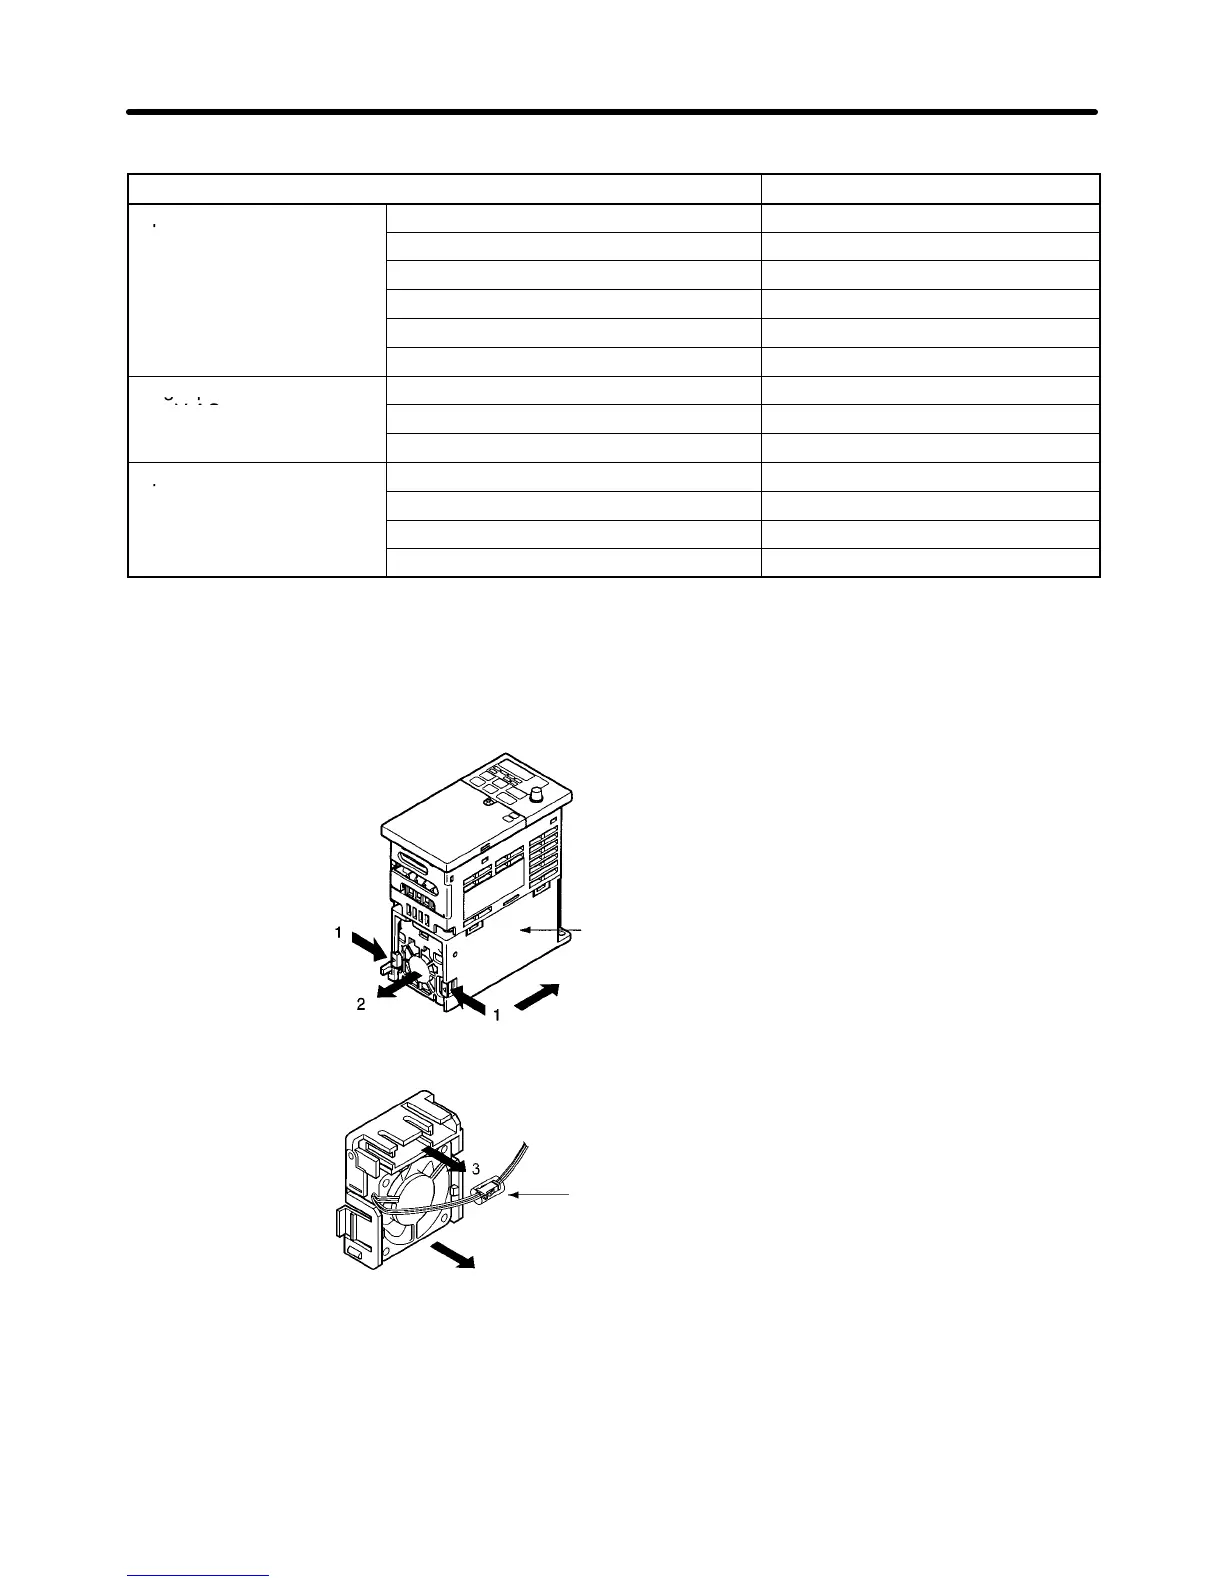
D Replacing Cooling Fan (68-, 140-, 170-, and 180-mm-wide Inverters)
1. Press the left and right sides of the fan cover located on the lower part of the radiation fin in the arrow
1 directions. Then lift the bottom of the Fan in the arrow 2 direction to remove the Fan as shown in the
following illustration.
Radiation fin (Heat sink)
Wind direction
2. Hold the fan wire and pull the protective tube of the cover in the arrow 3 direction.
Protective tube
There is a connector inside.
Fan wind direction
3. Slide the protective tube and remove the internal connector.
4. Remove the Fan from the fan cover.
5. Mount the new Fan on the fan cover. At this time, make sure that the wind direction of the Fan will be
in the direction of the heat radiation fin.
6. Attach the connector, cover the connector with the protective tube, and insert the connector into the
cover.
Maintenance Operations Chapter 8
 Loading...