radEAGLE User Manual Powering the radEAGLE
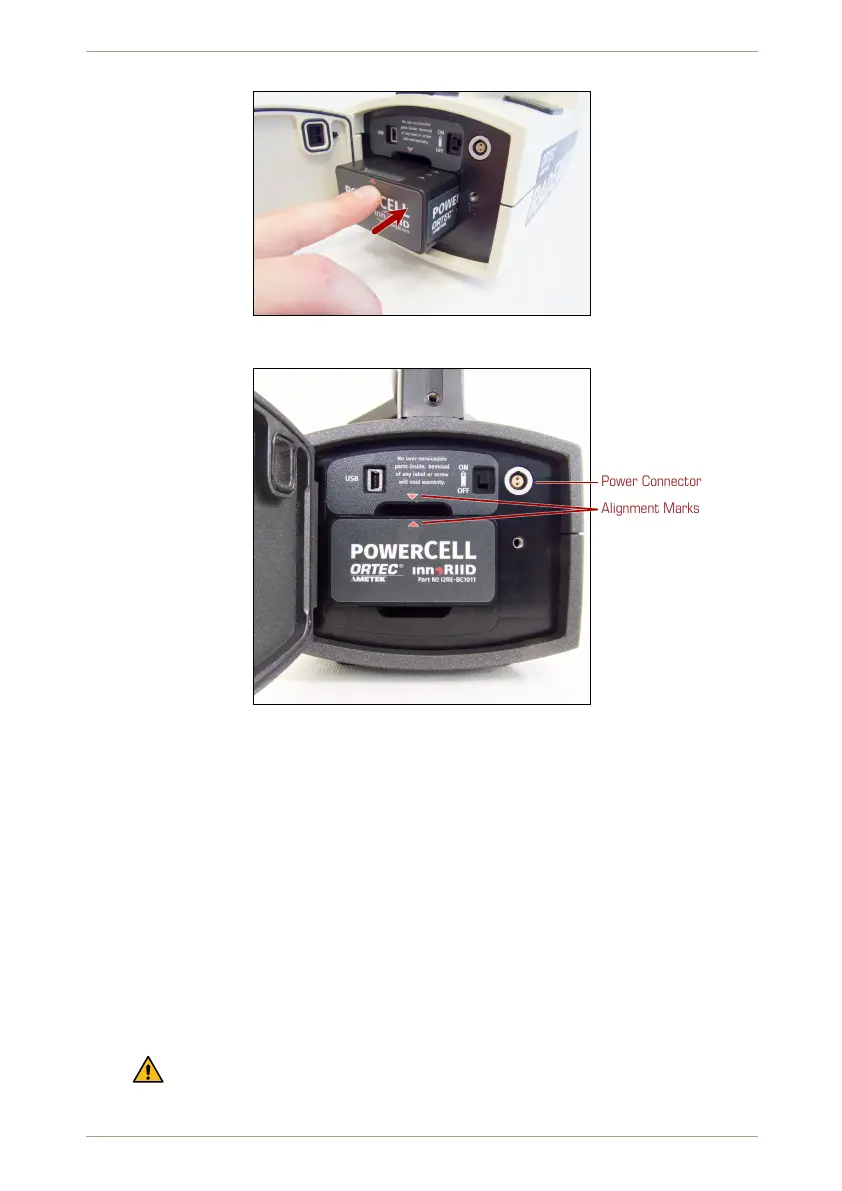
Figure 133: Snapping the powerCELL into place
Power Connector
Alignment Marks
Figure 134: The powerCELL correctly mounted in the radEAGLE.
8.2.2 Underwater Enclosure
Ü To remove the powerCELL…
1. Use a 2.5 mm hex key (aka “Allen” wrench) to loosen and remove the screws along
the edge of battery cover plate on the rear side of the instrument.
2. Remove the cover plate (Fig. 135, p. 112).
3. Tilt the instrument so the powerCELL slides out (Fig. 136, p. 112). You might need to
carefully shake the instrument.
Ü To install a powerCELL…
1. Slide the battery pack into the compartment, contact side ahead (Fig. 137, p. 113).
Observe the orientation marks:
– “TOP” and arrows are engraved in the top side of the powerCELL.
© innoRIID GmbH • 2019-04-11 Software 3.2.12 • Document 3.3.0o 111/147