8.3 External Power Sources radEAGLE User Manual
While the radEAGLE is powered by an external source providing enough power to
charge the internal battery, the the battery symbol (Fig. 1, p. 14) is decorated by a
bolt.
Ü To connect an external power source…
1. Remove the protective cap from the connector (Fig. 129, p. 109).
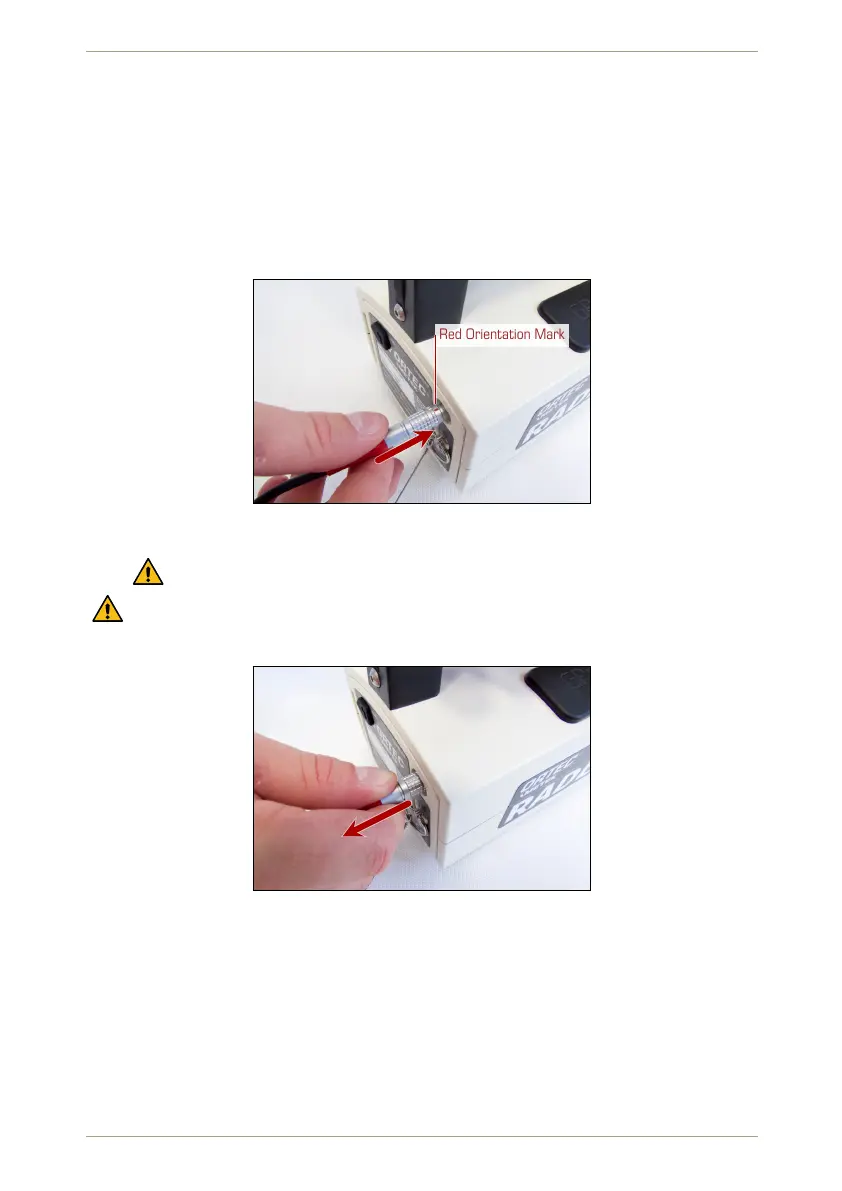
2. Insert the plug (Fig. 140, p. 114).
Red Orientation Mark
Figure 140: Inserting the external power plug
Observe the orientation mark. The red marker on the plug must face upwards.
Always grab the plug when handling the connection (Fig. 141, p. 114). Do not pull at
the cable behind the plug (Fig. 142, p. 115).
Figure 141: Unplugging the external power connection
8.3.1 Wall Power Supply
Every power supply shipped with the radEAGLE can handle common international AC volt-
ages and frequencies.
Some models come with a fixed plug for a certain country. You can use a common traveler’s
kit to mechanically adapt the plug to various international wall outlets.
114/147 Software 3.2.12 • Document 3.3.0o © innoRIID GmbH • 2019-04-11