Operation Guide 500ML Lighting Control Console
102 Programming
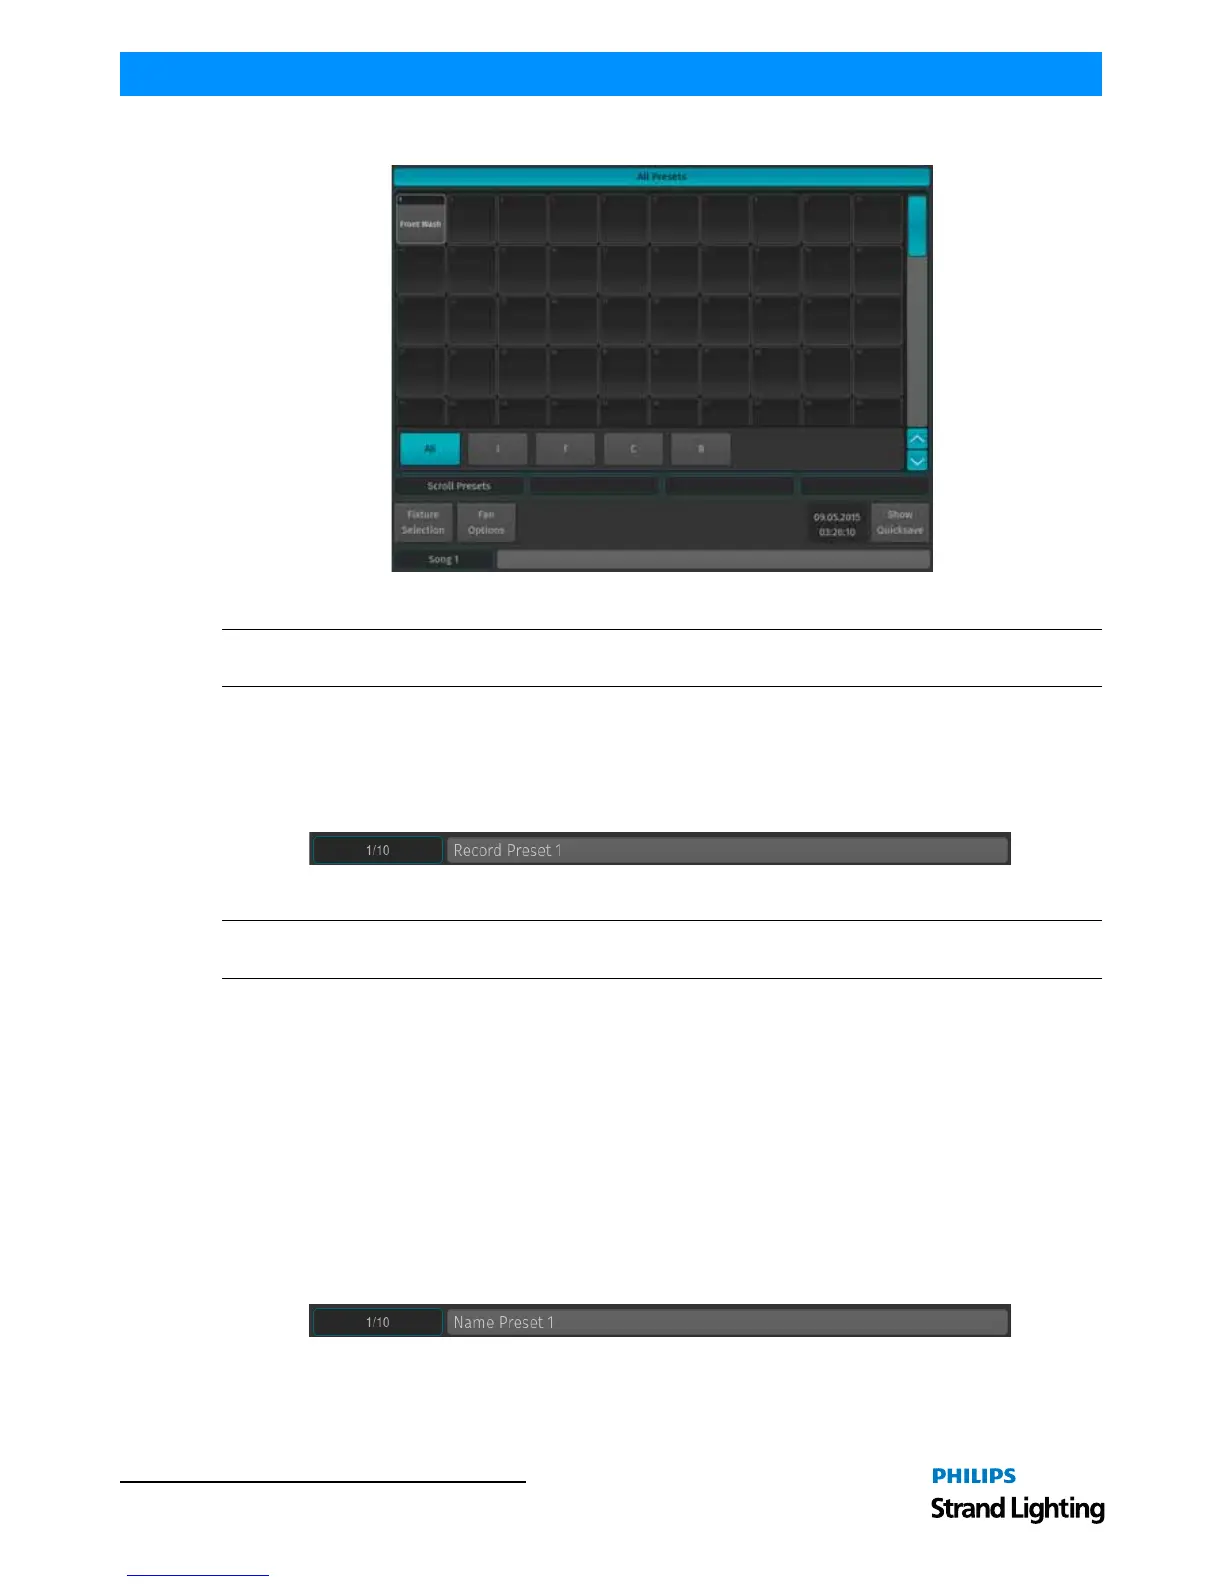
You may select different record options from the Record toolbar after pressing the [REC] button.
Figure 183: Preset Pool Window - All Presets
Note: You may select different record options from the Record toolbar after pressing the [REC] button. For more
info, see "Record Toolbar" on page 19.
Storing a Preset Using Command Line Interface
Once you created a look you would like to store as a preset, press the [REC] key and then press the [PRESET] key.
On the keypad, enter the number of the memory slot you wish to record and store the preset to- i.e., [1] followed by
[ENTER].
Figure 184: Command Line Interface - Record Preset
Note: You may select different record options from the Record toolbar after pressing the [REC] button. For more
info, see "Record Toolbar" on page 19.
Naming a Preset
Assigning Names Using Preset Pool Window
Hit the [PRESET] key while holding down the [ASSIGN] key. The Preset Pool window will be shown. The command
line will still read Assign. Now, press the [ASSIGN] key again. The command line will now read Name. Now select
the Preset Pool type using the Preset Pools toolbar and select the Preset you wish to rename from within the Preset
Pool Window.
Assigning Names Using Command Line Interface
You may use the command line approach by typing [ASSIGN] [ASSIGN] (the command line will read Name). Then
press the [PRESET] key, followed by the Preset ID, in this case [1]. Hit [ENTER] to complete the command. Please
note you may also rename multiple Presets at once by using the [THRU], [+] and [-] modifier keys.
Figure 185: Command Line Interface - Naming Presets