Configuring the Scanner Settings
56
3
D
DD
D
Select the option you want among
“Select: Send/Print”, “Send Scan”
and “Print Scan”.
• The option that is currently se-
lected is displayed first.
•“*” mark appears along with the
option currently selected
• Use [↑
↑↑
↑] and [↓
↓↓
↓] to display the
option you want to select.
E
EE
E
While the option you want to se-
lect is displayed, press [OK].
This saves the setting you have
configured, and returns to the Sys-
tem Settings menu.
Note
❒ Pressing [Cancel] discards the
selected option, and returns to
the previous screen.
F
FF
F
Configure the necessary settings
in accordance with your network
environment.
To configure network boot and
related settings when a fixed IP
address is assigned to this
machine
A Press [↓
↓↓
↓Next].
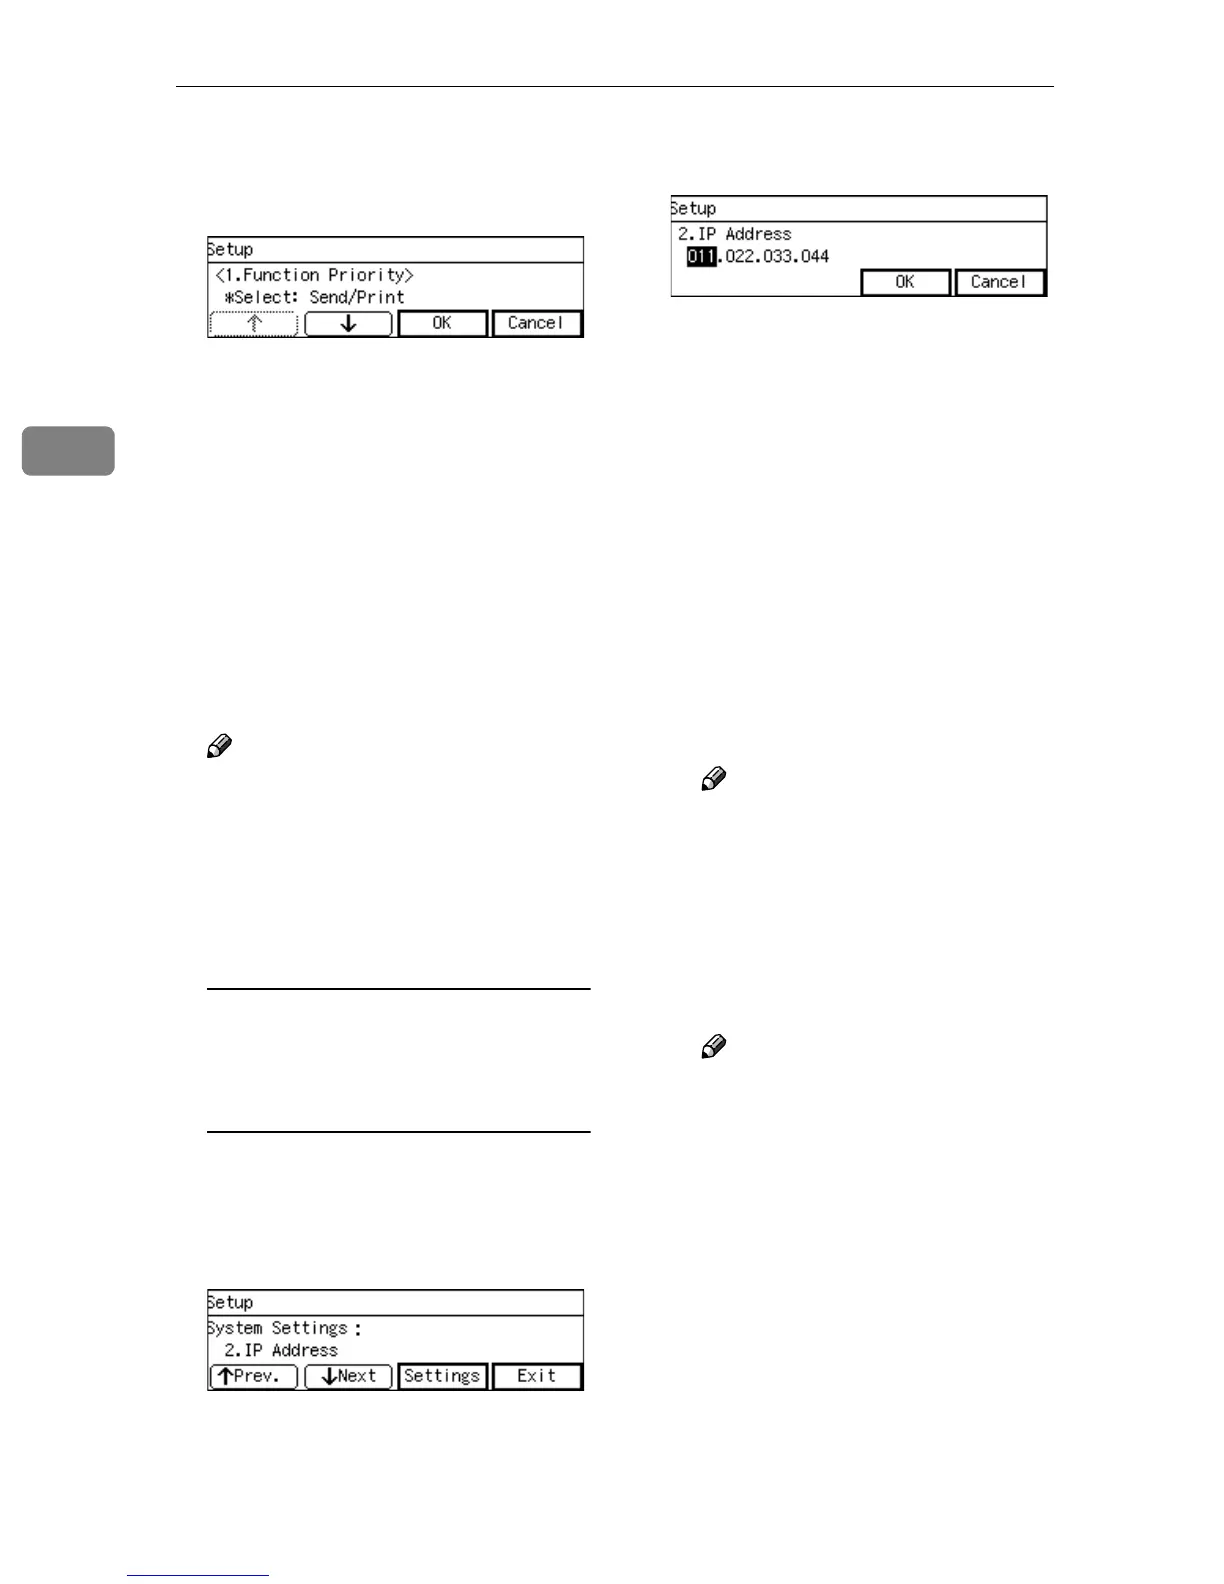
“2. IP Address” appears as the
setup item currently selected.
B Press [Settings].
The setting screen for “2. IP Ad-
dress” appears.
C Specify the IP address of this
machine.
• Input the IP address using
the number keys.
• An IP address consists of four
parts, and each part has a
number within the range of 0
to 255. Make sure that you in-
put each part of the IP address
in three digits. For example,
when you want to specify “8”
for a part, highlight the part
and then input “008” using the
number keys.
You can use {
{{
{1
11
1}
}}
} (or {
{{
{#}
}}
} )
and {
{{
{0
00
0}
}}
} keys to move the
highlighting to right and left.
Note
❒ You can use the {
{{
{Clear/Stop}
}}
}
key to clear the three-digit
number currently highlighted.
D When you are finished, press
[OK].
This returns to the System Set-
tings menu.
Note
❒ Pressing [Cancel] discards the
value that you have speci-
fied, and returns to the previ-
ous screen.
E Press [↓
↓↓
↓Next]
“3. Subnet Mask” appears as the
setup item currently selected.
F Specify each value for “3. Sub-
net Mask”, “4. Default Gate-
way Address”, “5. Access
Control” and “6. Access Mask”
in the same way that you have
done in steps B
BB
B through E
EE
E.
“7. Network Boot” appears as the
setup item currently selected.