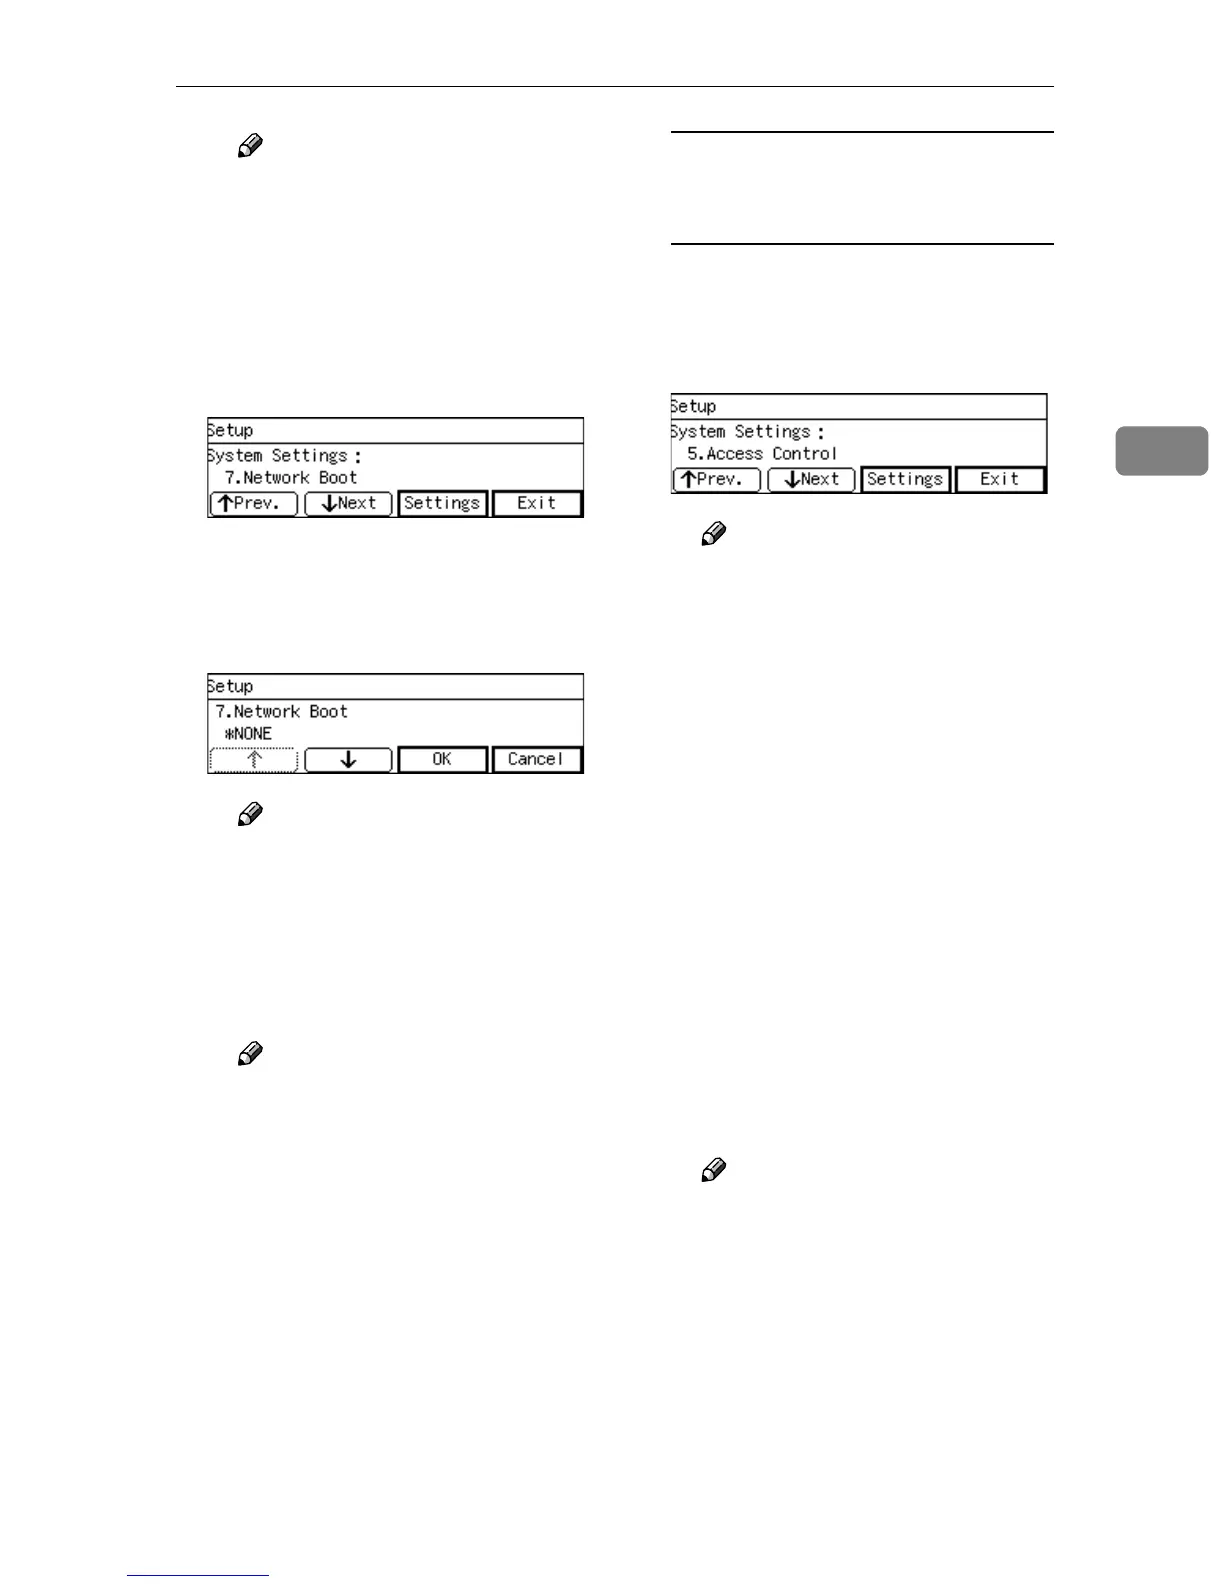
System Settings
57
3
Note
❒ When you want to set no lim-
itation of access to this ma-
chine, it is not necessary to
specify “5. Access Control”,
while you need to confirm
that “6. Access Mask” is set
to “000.000.000.000”.
G Press [Settings].
The setting screen for “7. Net-
work Boot” appears.
H Use [↑
↑↑
↑] and [↓
↓↓
↓] to display
“NONE”.
Note
❒ “*” mark appears along with
the option currently selected.
I While “NONE” is displayed,
press [OK].
This returns to the System Set-
tings menu.
Note
❒ Pressing [Cancel] leaves the
setting as it was (the option
marked with “*” remains ac-
tive), and returns to the pre-
vious screen.
To configure network boot
settings when you use this
machine on a DHCP environment
A Press [↓
↓↓
↓Next] three times at 2. IP
Address.
“5. Access Control” appears as
the setup item currently selected.
Note
❒ It is not necessary to specify
“2. IP Address”, “3. Subnet
Mask” and “4. Default Gate-
way Address”. The DHCP
server on your network as-
signs these values automati-
cally.
B Specify each value for “5. Ac-
cess Control” and “7. Network
Boot”.
You can specify these values in
the same way that you have
done in steps B through E un-
der p.56 “To configure network
boot and related settings when
a fixed IP address is assigned to
this machine”. When you are
finished, “7. Network Boot” ap-
pears as the setup item current-
ly selected.
Note
❒ When you want to set no lim-
itation of access to this ma-
chine, it is not necessary to
specify “5. Access Control”,
while you need to confirm
that “6. Access Mask” is set
to “000.000.000.000”.