Configuring the Scanner Settings
70
3
C
CC
C
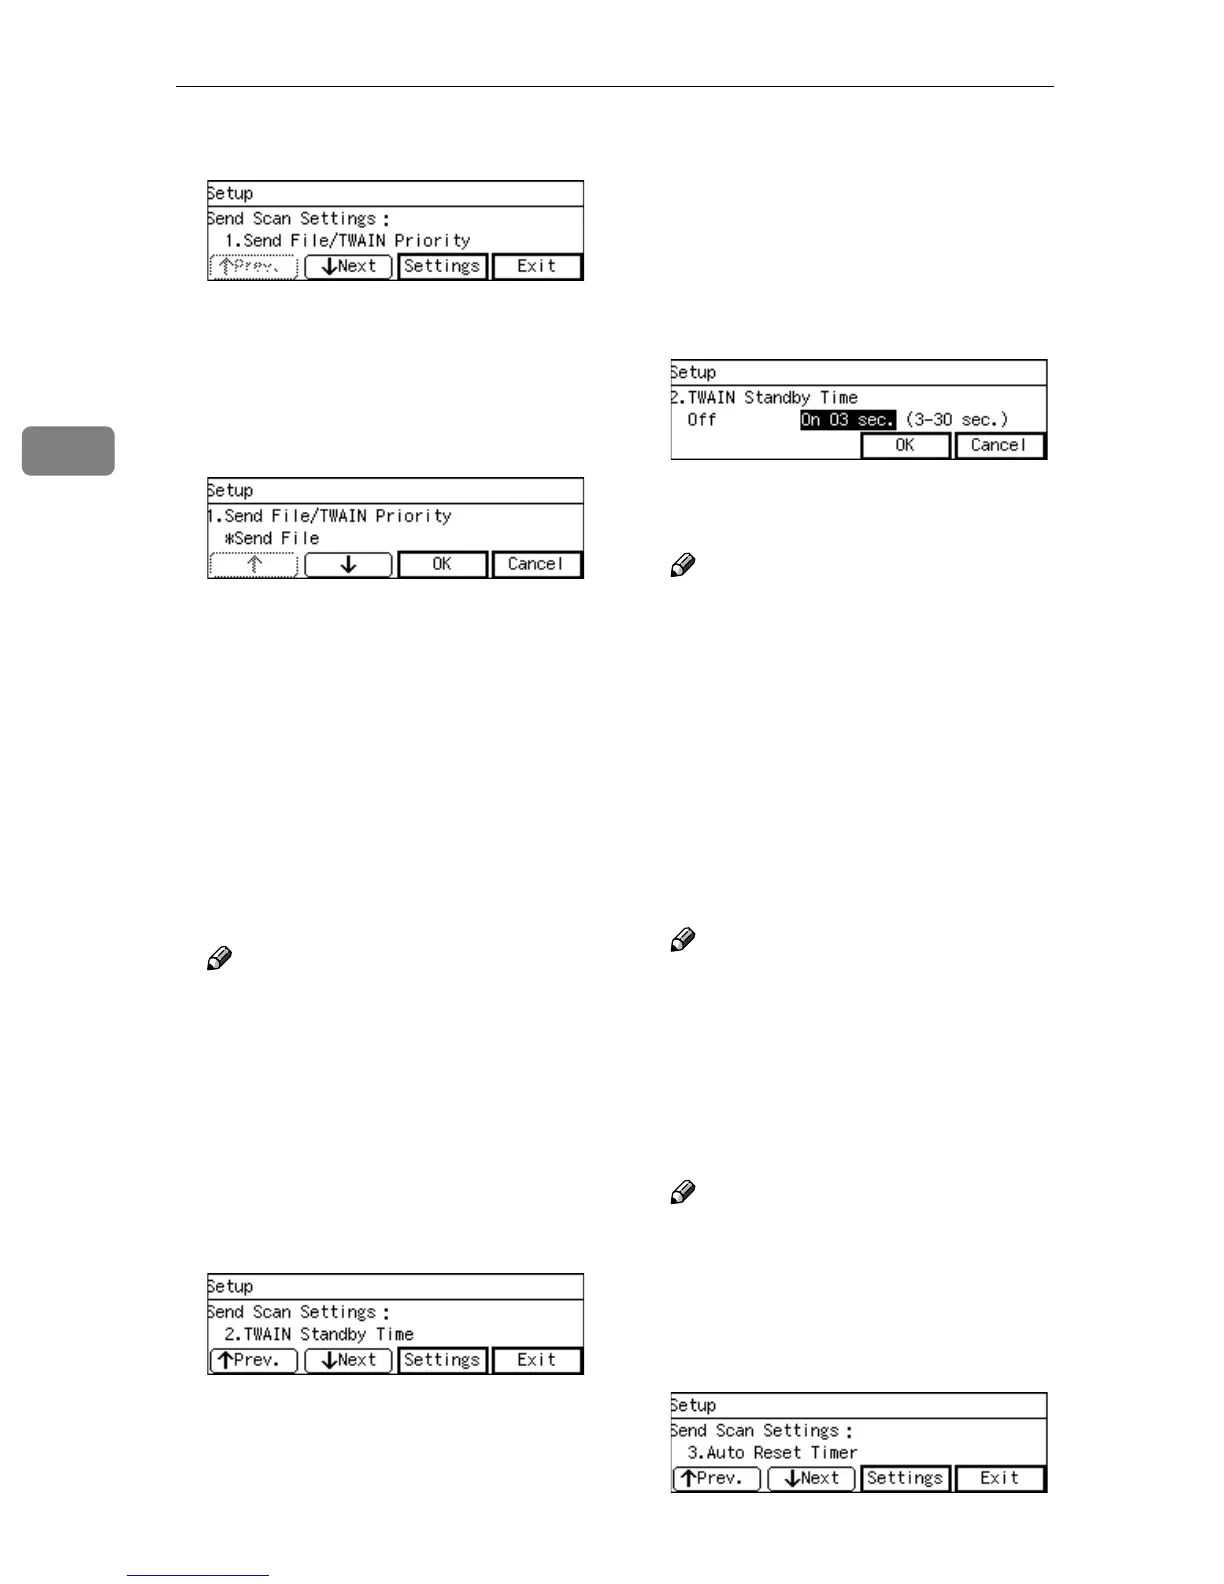
Press [Settings]
The setting screen for “1. Send
File/TWAIN Priority” appears.
D
DD
D
Select the function that you main-
ly use from “ Send File” or
“TWAIN”.
• The option that is currently se-
lected is displayed first.
•“*” mark appears along with the
option currently selected.
• Use [↑
↑↑
↑] and [↓
↓↓
↓] to display the
option you want to select.
E
EE
E
Press [OK].
This saves the setting you have
made, and returns to the SendScan
Settings menu.
Note
❒ Pressing [Cancel] discards the
selected option, and returns to
the previous screen.
F
FF
F
Press [↓
↓↓
↓Next].
“2. TWAIN Standby Time” ap-
pears as the setup item currently
selected.
G
GG
G
Press [Settings].
The setting screen for “2. TWAIN
Standby Time” appears.
H
HH
H
Select the option you want for “2.
TWAIN Standby Time”.
If you select “On”, specify the time
after which this machine stands by
for a network TWAIN command
(or a [Enter Custom Send File] com-
mand) using the number keys.
• Use the {
{{
{1
11
1}
}}
} and {
{{
{0
00
0}
}}
} keys to
highlight the setting you want.
Note
❒ To correct the number, press the
{
{{
{Clear/Stop}
}}
} key to clear the
number you have entered.
❒ Pressing [Cancel] discards the
adjusted time value, and re-
turns to the previous screen.
I
II
I
Press [ OK ]
This saves the setting you have
configured, and returns to the
SendScan Settings menu.
Note
❒ Pressing [Cancel] discards the
selected option, and returns to
the previous screen.
J
JJ
J
Press [↓
↓↓
↓Next].
“3. Auto Reset Timer” appears as
the setup item currently selected.
Note
❒ Pressing [↑
↑↑
↑Prev.] displays the
previous setup item.
K
KK
K
Set the auto reset timer in the
same way that you have done in
the steps
G
GG
G
through
I
II
I
.