Configuring the Scanner Settings
82
3
K
KK
K
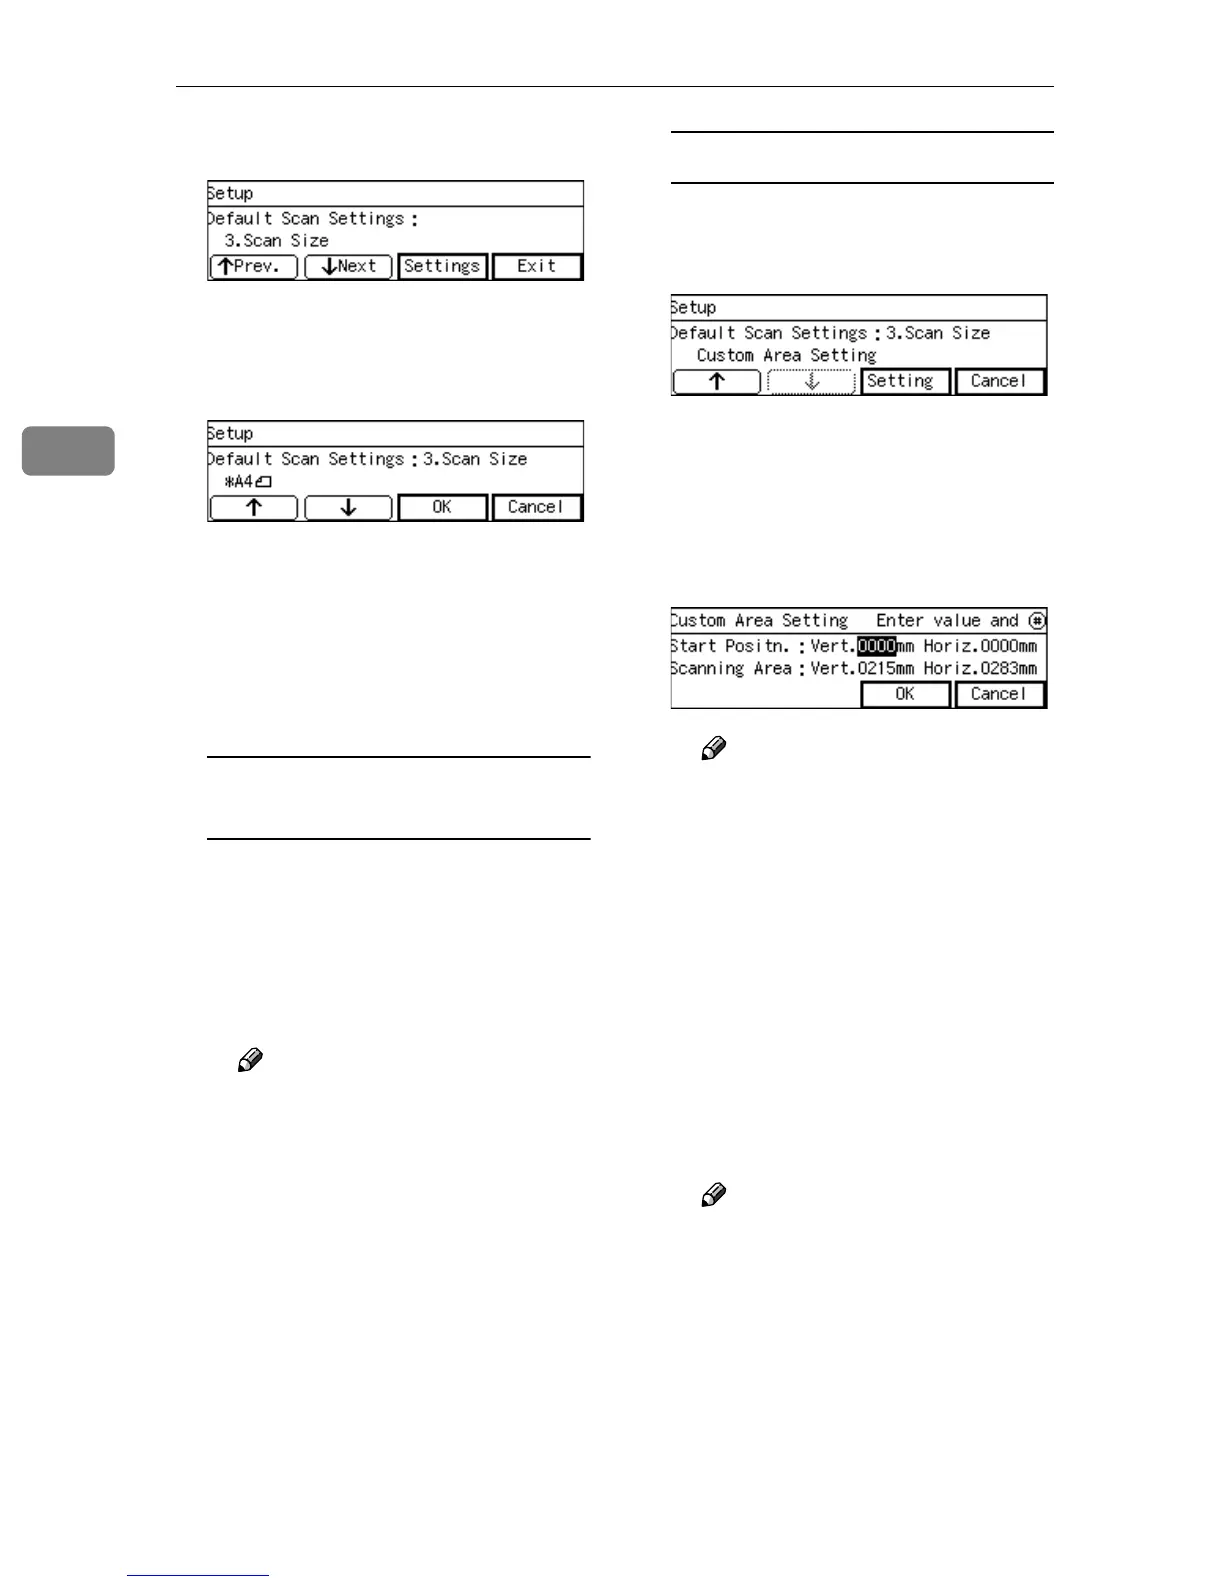
Press [Settings].
The setting screen for “3. Scan
Size” appears.
L
LL
L
Select the Scan size.
• The option that is currently se-
lected is displayed first.
•“*” mark appears along with the
option currently selected.
• Use [↑
↑↑
↑] and [↓
↓↓
↓] to display the
option you want to select.
To select a scan size from preset
sizes
A While the preset scan size you
want to select is displayed,
press [OK].
This saves the setting you have
selected, and returns to the De-
fault Scan Settings menu.
Note
❒ Pressing [Cancel] discards the
selected option, and returns
to the Default Scan Settings
menu.
To set a custom area
A While the option “Custom
Area Setting” is displayed,
press [Settings].
The setting screen for “Custom
Area Setting” appears.
B Use the {
{{
{1
11
1}
}}
} and {
{{
{0
00
0}
}}
} keys to
highlight the item you want to
input, and then use the num-
ber keys to input the value.
Note
❒ To correct the number you
have entered, use the {
{{
{1
11
1}
}}
}
and {
{{
{0
00
0}
}}
} keys to highlight it,
and then press the
{
{{
{Clear/Stop}
}}
} key to clear the
number.
❒ You can also use the {
{{
{#}
}}
} key
as well as the {
{{
{1
11
1}
}}
} and {
{{
{0
00
0}
}}
}
keys to move selection.
C Press [OK].
This saves the setting you have
entered, and returns to the De-
fault Scan Settings menu.
Note
❒ Pressing [Cancel] discards the
values you have entered, and
returns to the Default Scan
Settings menu.
M
MM
M
Press [↓
↓↓
↓Next].
“4. Image Density” appears as the
setup item currently selected.