2.Installation
13
Settings for @Remote Service
• Prepare the necessary equipment and check the following points before you visit the customer
site. For details, ask the @Remote key person.
• Make sure that the latest version of the firmware is installed on the machine.
Check Points before Making @Remote Settings
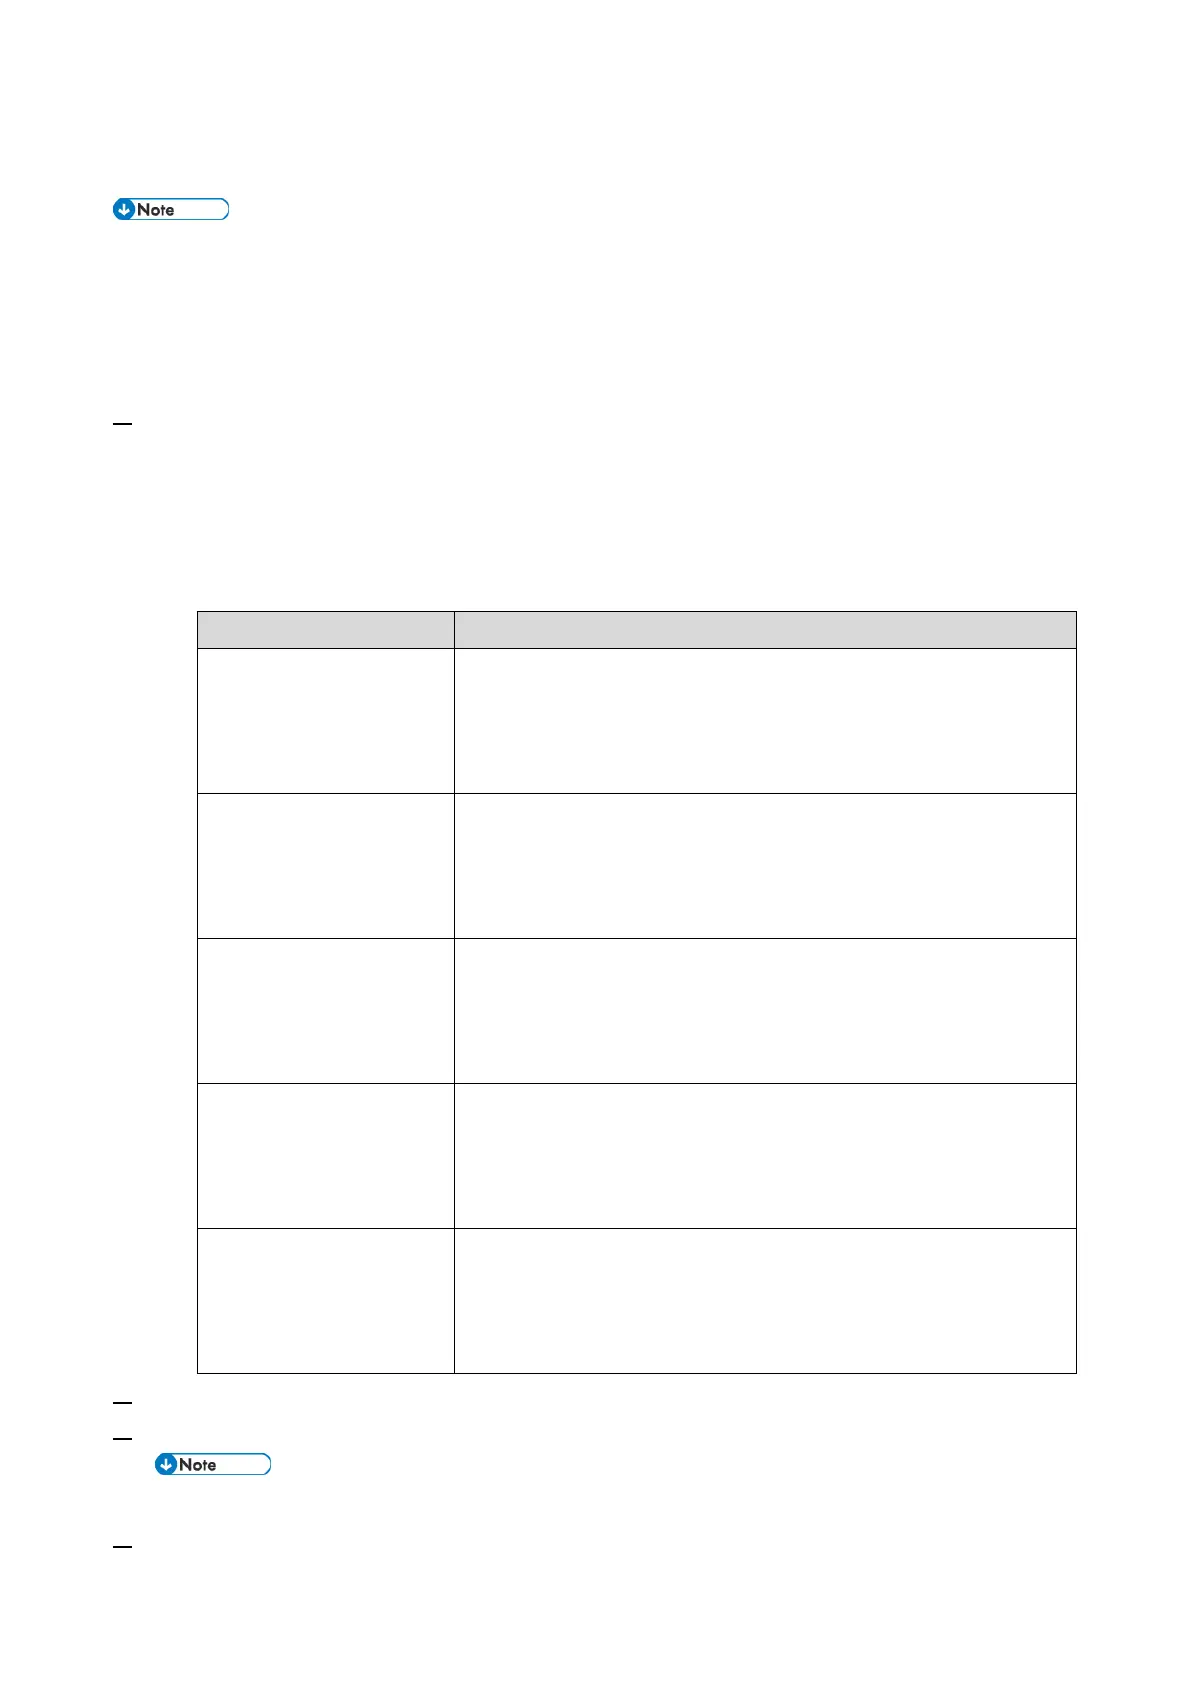
1. The following settings must be correctly programmed.
• Using Proxy server is enabled
• Proxy server IP address
• Proxy server Port number
• Proxy User ID
• Proxy Password
Using Proxy server is
enabled
Printer model: SP menu > @Remote > Remote Service >
HTTP Proxy Use
MF model: SP menu > @Remote > Remote Service > Use
Proxy
Printer model: SP menu > @Remote > Remote Service >
HTTP Proxy Host
MF model: SP menu > @Remote > Remote Service > Proxy
Host
Printer model: SP menu > @Remote > Remote Service >
HTTP Proxy Port
MF model: SP menu > @Remote > Remote Service > Proxy
PortNumber
Printer model: SP menu > @Remote > Remote Service >
HTTP Prox AutUsr
MF model: SP menu > @Remote > Remote Service > Proxy
User Name
Printer model: SP menu > @Remote > Remote Service >
HTTP Prox AutPass
MF model: SP menu > @Remote > Remote Service > Proxy
Password
2. Get a Request Number.
3. Enter the SP mode.
For further information, contact the supervisor in your branch office.
4. Check if the function flag is "Disable (Default)".

 Loading...