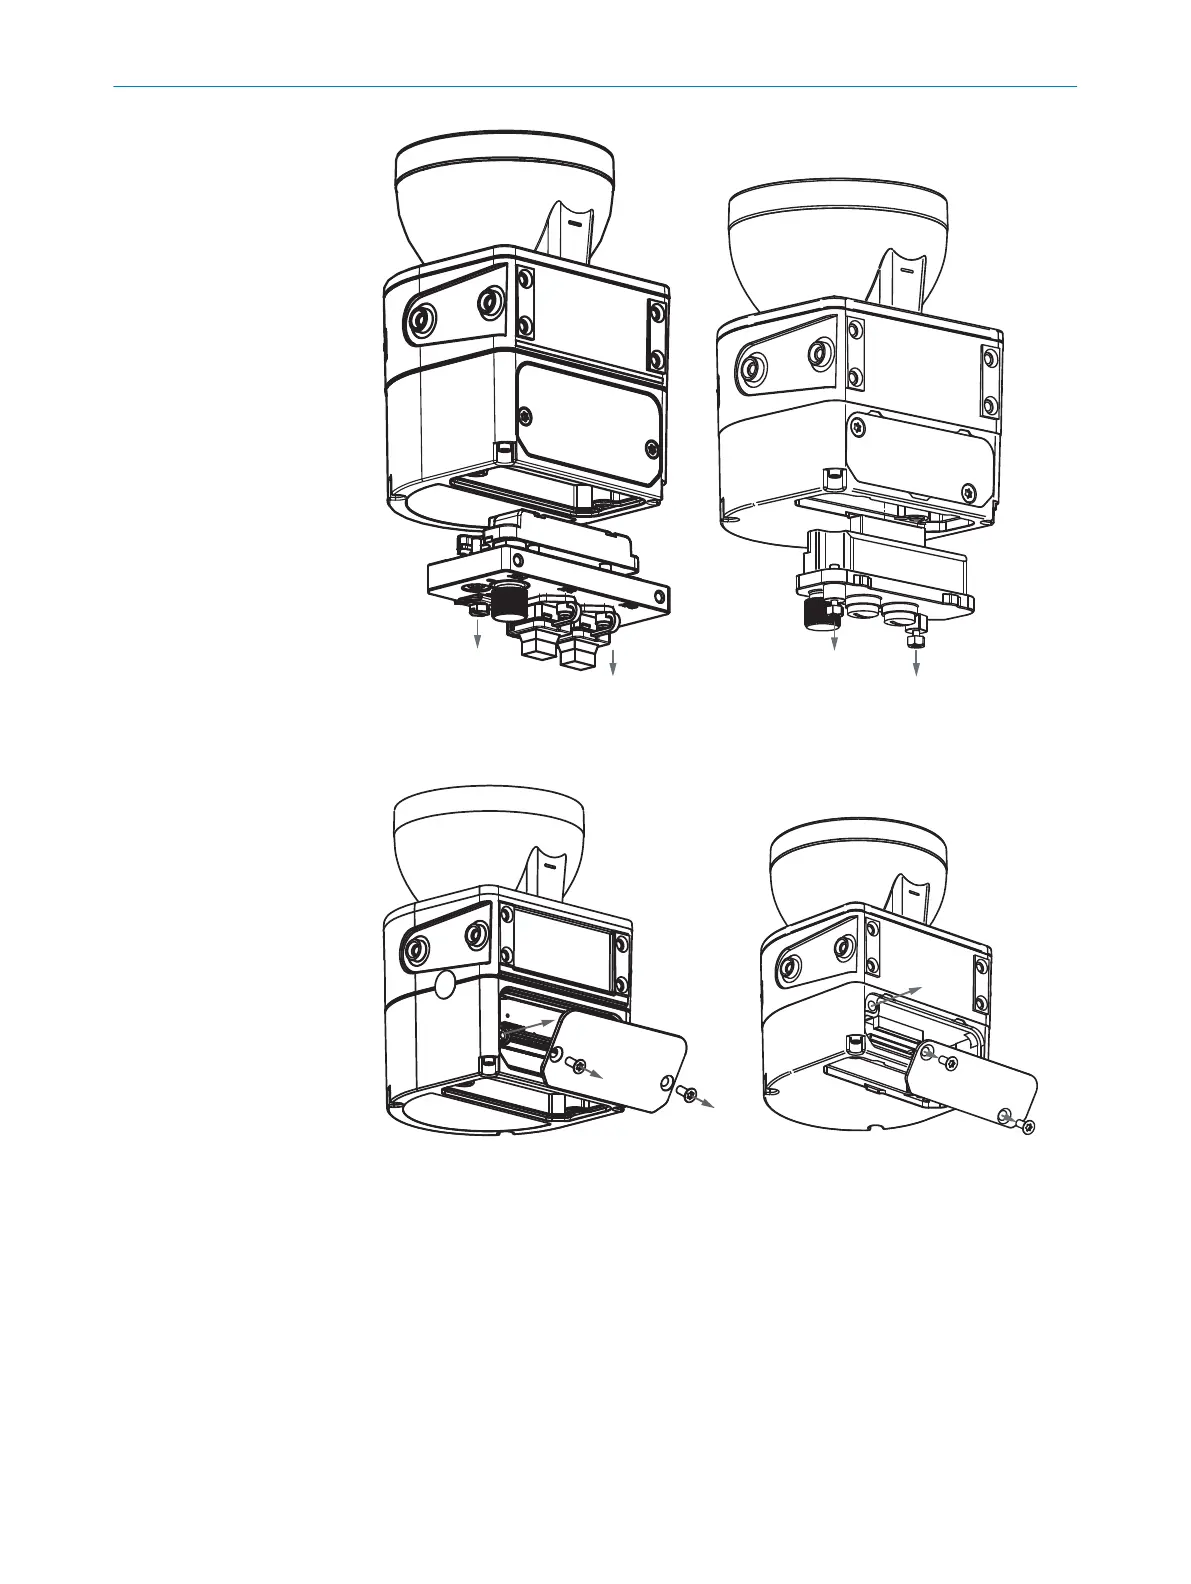
Figure 47: Remove the system plug from below. (left: microScan3 – PROFINET
(RJ45 / SCRJ), right: microScan3 – PROFINET (M12))
3. Loosen the cover plate screws.
4.
Remove the cover plate from the safety laser scanner.
Figure 48: Remove the cover plate from the rear. (
left: microScan3 – PROFINET
(RJ45 / SCRJ), right: microScan3 – PROFINET (M12))
5. Carefully slide the new system plug into the safety laser scanner at the desired
position (bottom or rear).
6. Screw in the system plug using the captive screws. Tightening torque: 2.25 Nm …
2.75 Nm.
MOUNTING 5
8021219/1ELL/2022-01-21 | SICK O P E R A T I N G I N S T R U C T I O N S | microScan3 – PROFINET
79
Subject to change without notice