Configuration
5-37SA6 Manual
C53000-G1176-C133-1
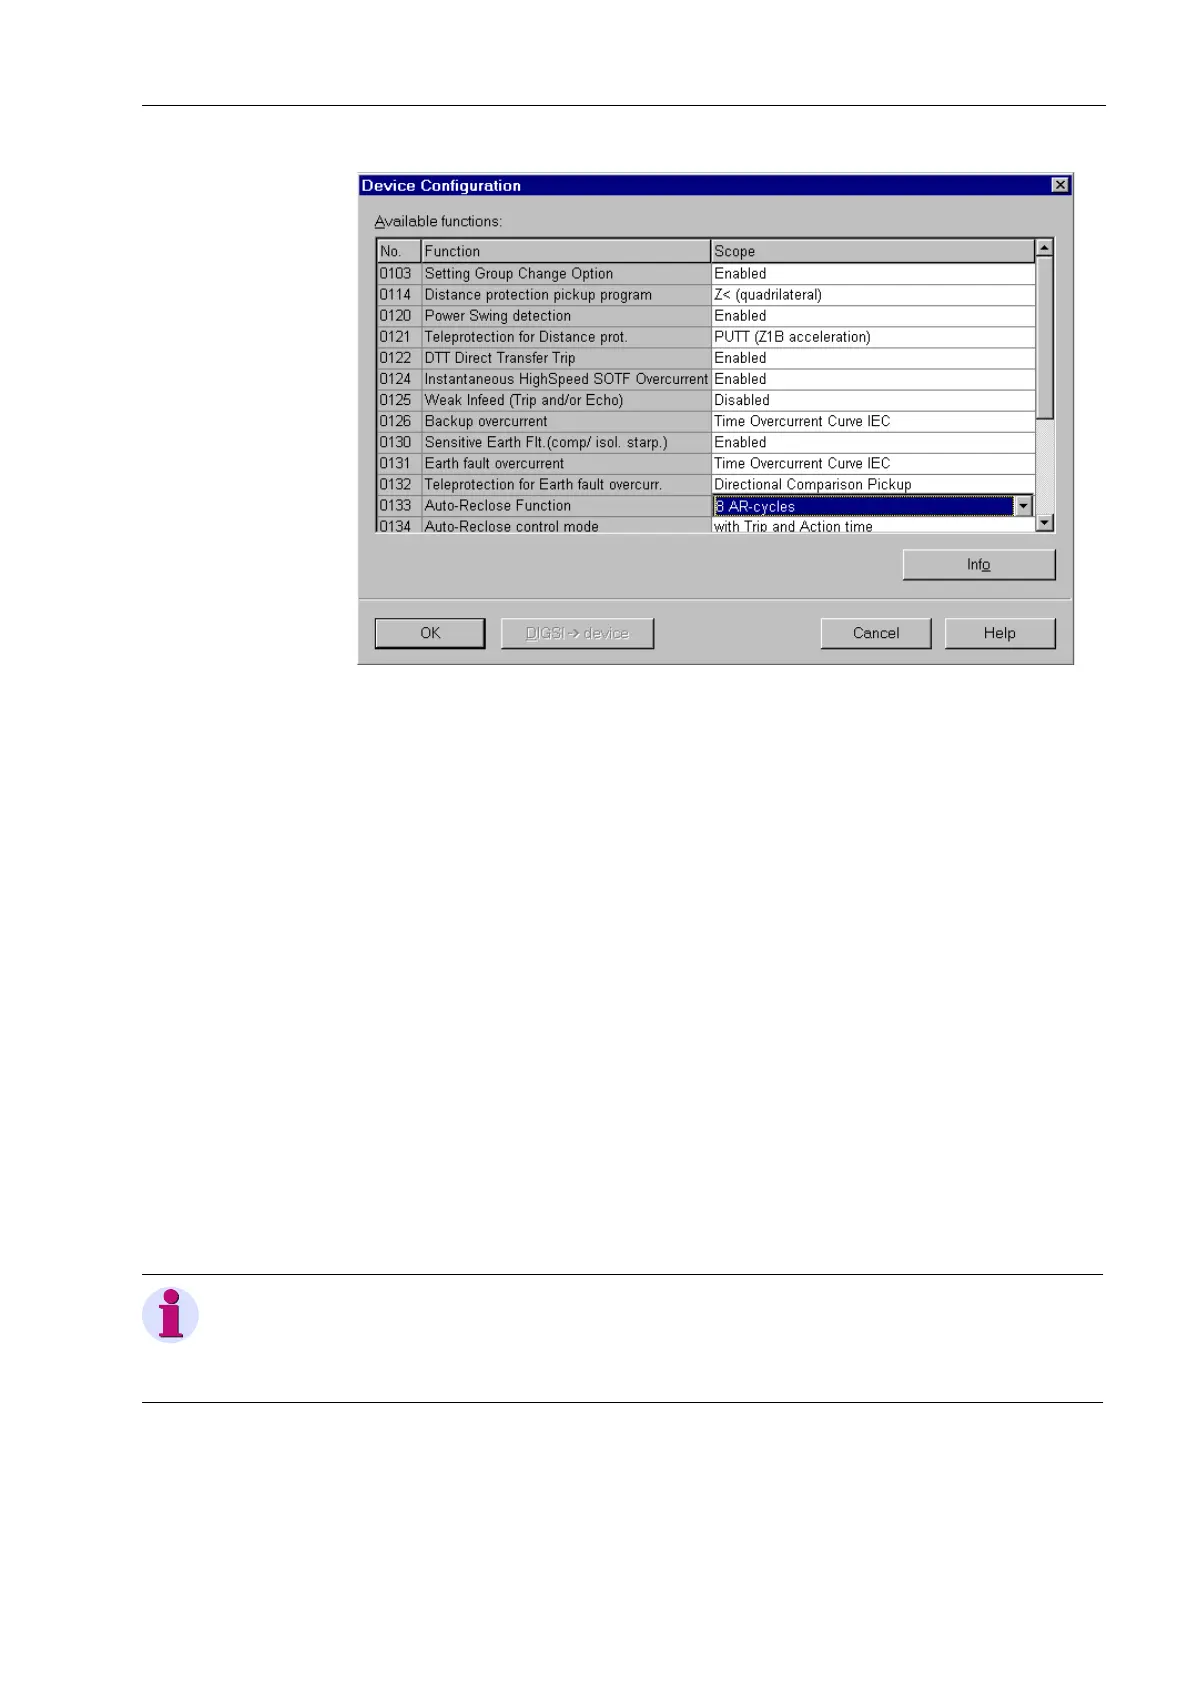
Figure 5-1 Device Configuration dialogue box in DIGSI
®
4 — example
Before closing the dialogue box, transfer the modified functional setting to the relay by
clicking on the item ',*6, → 'HYLFH. The data is stored in the relay in a non-volatile
memory buffer.
The configured functional scope can be
viewed
at the front of the relay itself, but
cannot be modified there. The settings associated with the functional scope can be
found in the 0$,10(18 under → 6HWWLQJV → 'HYLFH&RQILJ.
Special Cases Most settings are self-explanatory. Special cases are described below.
If the setting group change-over function is used, the setting in address *US
&KJH237,21 must be set to (QDEOHG. In this case, it is possible to apply up to four
different groups of function parameters (refer also to Subsection 6.1.2). During normal
operation, a convenient and fast switch-over between these setting groups is possible.
The setting 'LVDEOHG implies that only one function parameter setting group can be
applied and used.
Address 7ULSPRGH is only applicable for devices that can trip single-pole or
three-pole. Set SROH if single-pole tripping is also desired, i.e. if 1pole or
1-/3pole automatic reclosure is used. A prerequisite is that the device is provided with
the internal automatic reclosure function or that an external automatic reclosure is
used. Furthermore the circuit breaker is suited for single-pole control.
Different pickup modes can be selected for the Distance Protection. The
characteristics of these modes are described in detail in Subsection 6.2.2. If the fault
current magnitude is a reliable criterion for the distinction between fault closure and
Note:
When having changed address , first save the changes by clicking onto the 2.
button. Then open the dialogue box again, since other setting options depend on
address .

 Loading...


