Maintenance and servicing
6.4 Replacing components
Cabinet Modules NEMA
280 Manual, 04/2014, A5E03586450A
● Disconnect the cabinet from the power supply (do not forget the external power supplies).
● Allow unimpeded access.
● Remove the front cover
The steps of the removal procedure correspond to the numbers shown in the figure.
1. Disconnect the plug-in connections for the fiber optic cables and signal cables (5
connectors).
2. Remove DRIVE-CLiQ cables and connections at -X41 / -X42 / -X46 (6 connectors).
The DRIVE-CLiQ cables should be marked so that they can be correctly connected at a
later time.
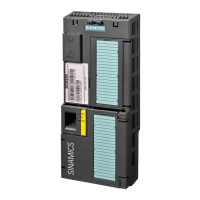
3. Take out the retaining screws for the IPD card (2 screws) and remove the IPD card from
connector -X45 on the Control Interface Module.
4. Remove the retaining screws for the Control Interface Module (2 screws).
When removing the Control Interface Module, you must disconnect 5 additional connectors
one after the other (2 at the top, 3 at the bottom).
Device damage due to signal cable damage during removal
Signal cables can become damaged when the Control Interface Module is removed. This
can cause the device to fail.
• When removing the Control Interface Module, ensure that you do not damage any signal
cables.
Installation is performed the same as removal, but in the reverse order.
Tightening torque for the retaining screws of the Control Interface Module (M6 x 16, item
④): 6 Nm.
Note
Specifications for the installation
The tightening torques sp
ecified in the "Tightening torques for screw connections" table must
Carefully insert the plug
-in connections and ensure that they are secure.
The fiber optic cable connectors must be re
-installed at their original slot. The fiber optic
and sockets are labeled accordingly (U11, U21, U31) for correct assignment.

 Loading...


