Electrical installation
4.5 Connections
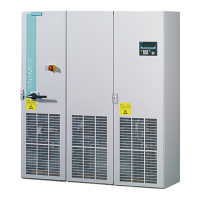
Cabinet Modules NEMA
78 Manual, 04/2014, A5E03586450A
Property damage due to improper connection of the jumpers for the DC busbar
Improper connections of the jumpers for the DC busbar may cause the busbars to heat
up, thus causing property damage.
• Insert the jumper
① of the first cabinet into the cabinet to be connected until the
washers
② rest fully on the jumper.
4. Re-tighten the nuts on the DC busbar in both cabinet units (torque: 50 Nm)
5. Repeat steps 1 to 4 for the lower DC busbar (DC N).
Note
Specifications for installation
The screws must only be loo
sened rather than removed because otherwise the nuts could
The torque (50 Nm) must be observed to avoid excessive heating of the terminal contacts
during operation.
For the busbar systems, all jumpers of the DC busbar must always be c
onnected.
For each cabinet row installed, you must install one side panel on the right (option M26) and
one on the left (option M27).
Before mounting the side panels on an installed cabinet row, you must remove any jumpers
present in the DC busbars of the
cabinet on the right.
Note
DC busbars of transport units
In the case of transport units with standard integrated DC busbars within the cabinet group,
you only need to connect the ends of the busbars of the transport units.
Auxiliary power supply system
4.5.5.1
General information
Availability
To facilitate the auxiliary voltage supply to S120 Cabinet Modules, the individual modules are
fitted with a special, standardized auxiliary voltage supply system. This system is delivered
pre-installed. The cabling required from the auxiliary power module into the relevant Cabinet
Module are factory-installed.
 Loading...