15-12 FRONT AND REAR BRAKES
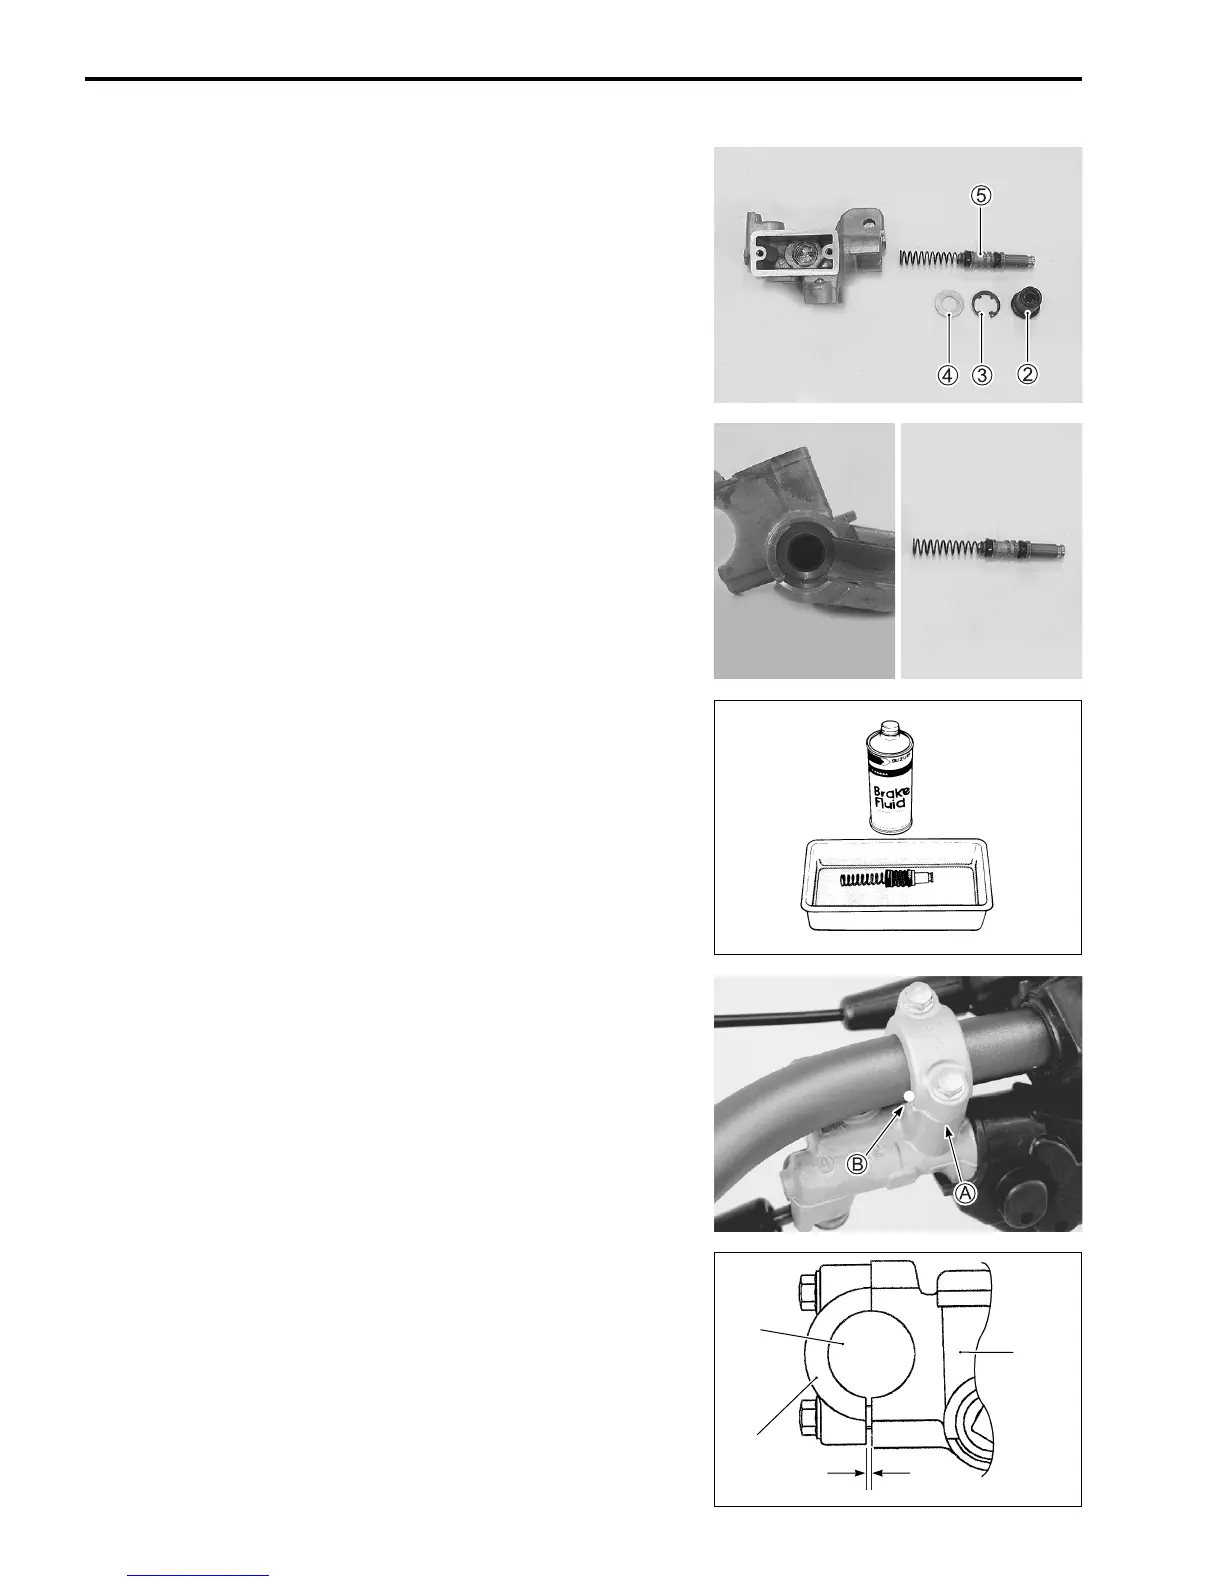
• Remove the dust boot 2.
• Remove the snap ring 3 using the snap ring pliers.
• Remove the washer 4 and piston/cup set 5.
09900-06106: Snap ring pliers
INSPECTION
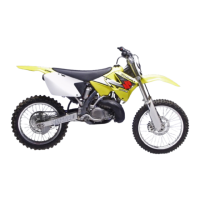
• Inspect the cylinder for scuffing.
• Inspect the piston/cup and spring for damage.
CLEANING
• Flush the master cylinder ports with pressurized air.
• Wash the master cylinder bore and piston with fresh brake
fluid.
Specification and classification: DOT 4
NOTE:
Do not use gasoline or other cleaning solvents to wash the mas-
ter cylinder parts.
REASSEMBLY AND INSTALLATION
Reassemble and remount the master cylinder in the reverse
order of removal and disassembly. Pay attention to the following
points:
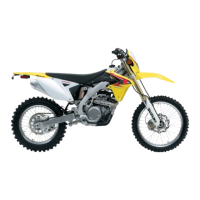
• Install the brake lever. (15-13)
• Align the master cylinder holder mating surface A with the
paint mark B on the handlebar.
• Tighten the master cylinder mounting bolts to the specified
torque.
Master cylinder mounting bolt:
10 N·m (1.0 kgf-m, 7.0 lb-ft)
NOTE:
Tighten the upper bolt first.
Clearance
Master
cylinder
Handlebars
Master
cylinder
holder