15-20 FRONT AND REAR BRAKES
REASSEMBLY AND INSTALLATION
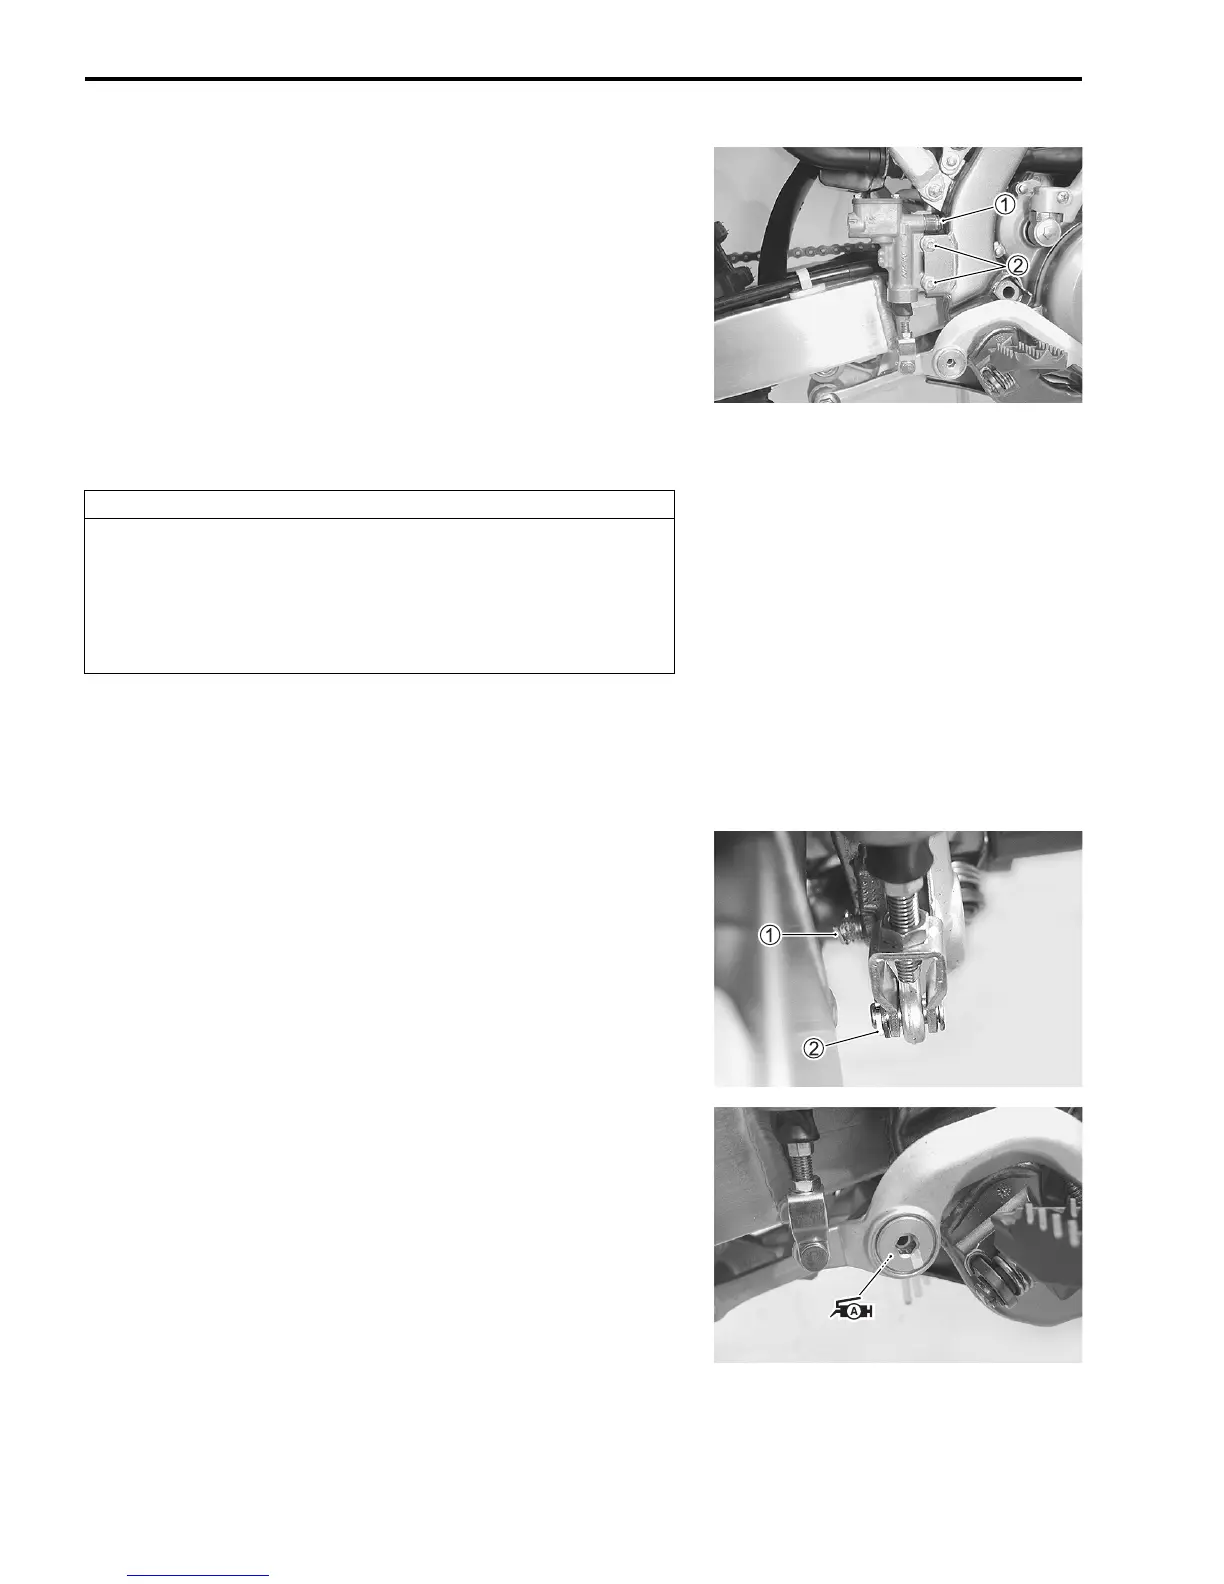
Reassemble and remount the master cylinder in the reverse
order of removal and disassembly. Pay attention to the following
points:
• Set the brake hose end between the hose stopper, then
tighten the brake hose union bolt 1 to the specified torque.
Brake hose union bolt: 23 N·m (2.3 kgf-m, 16.5 lb-ft)
• Tighten the master cylinder mounting bolts 2 to the specified
torque.
Master cylinder mounting bolt:
10 N·m (1.0 kgf-m, 7.0 lb-ft)
• Refill brake fluid and bleed air from the brake system.
(15-5)
• Check the brake pedal height. (2-20)
BRAKE PEDAL
REMOVAL
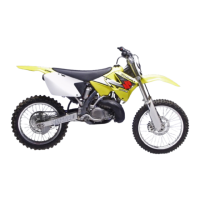
• Remove the cotter pin 1 and brake pedal pivot bolt.
• Remove the return spring.
• Remove the cotter pin 2, washer and pin.
INSTALLATION
• Fit the return spring properly. (5-9)
• Apply grease to the brake pedal pivot bolt.
99000-25010: SUZUKI SUPER GREASE “A”
(or equivalent grease)
• Tighten the brake pedal pivot bolt to the specified torque.
Brake pedal pivot bolt: 29 N·m (2.9 kgf-m, 21.0 lb-ft)
• Install new cotter pins.
• Adjust the brake pedal height. (2-20)
CAUTION
Improper brake hose routing can damage the brake
hose.
Set the brake hose so it touches the stopper then
tighten the union bolt. Ensure the brake hose has
enough clearance to the rear suspension spring.