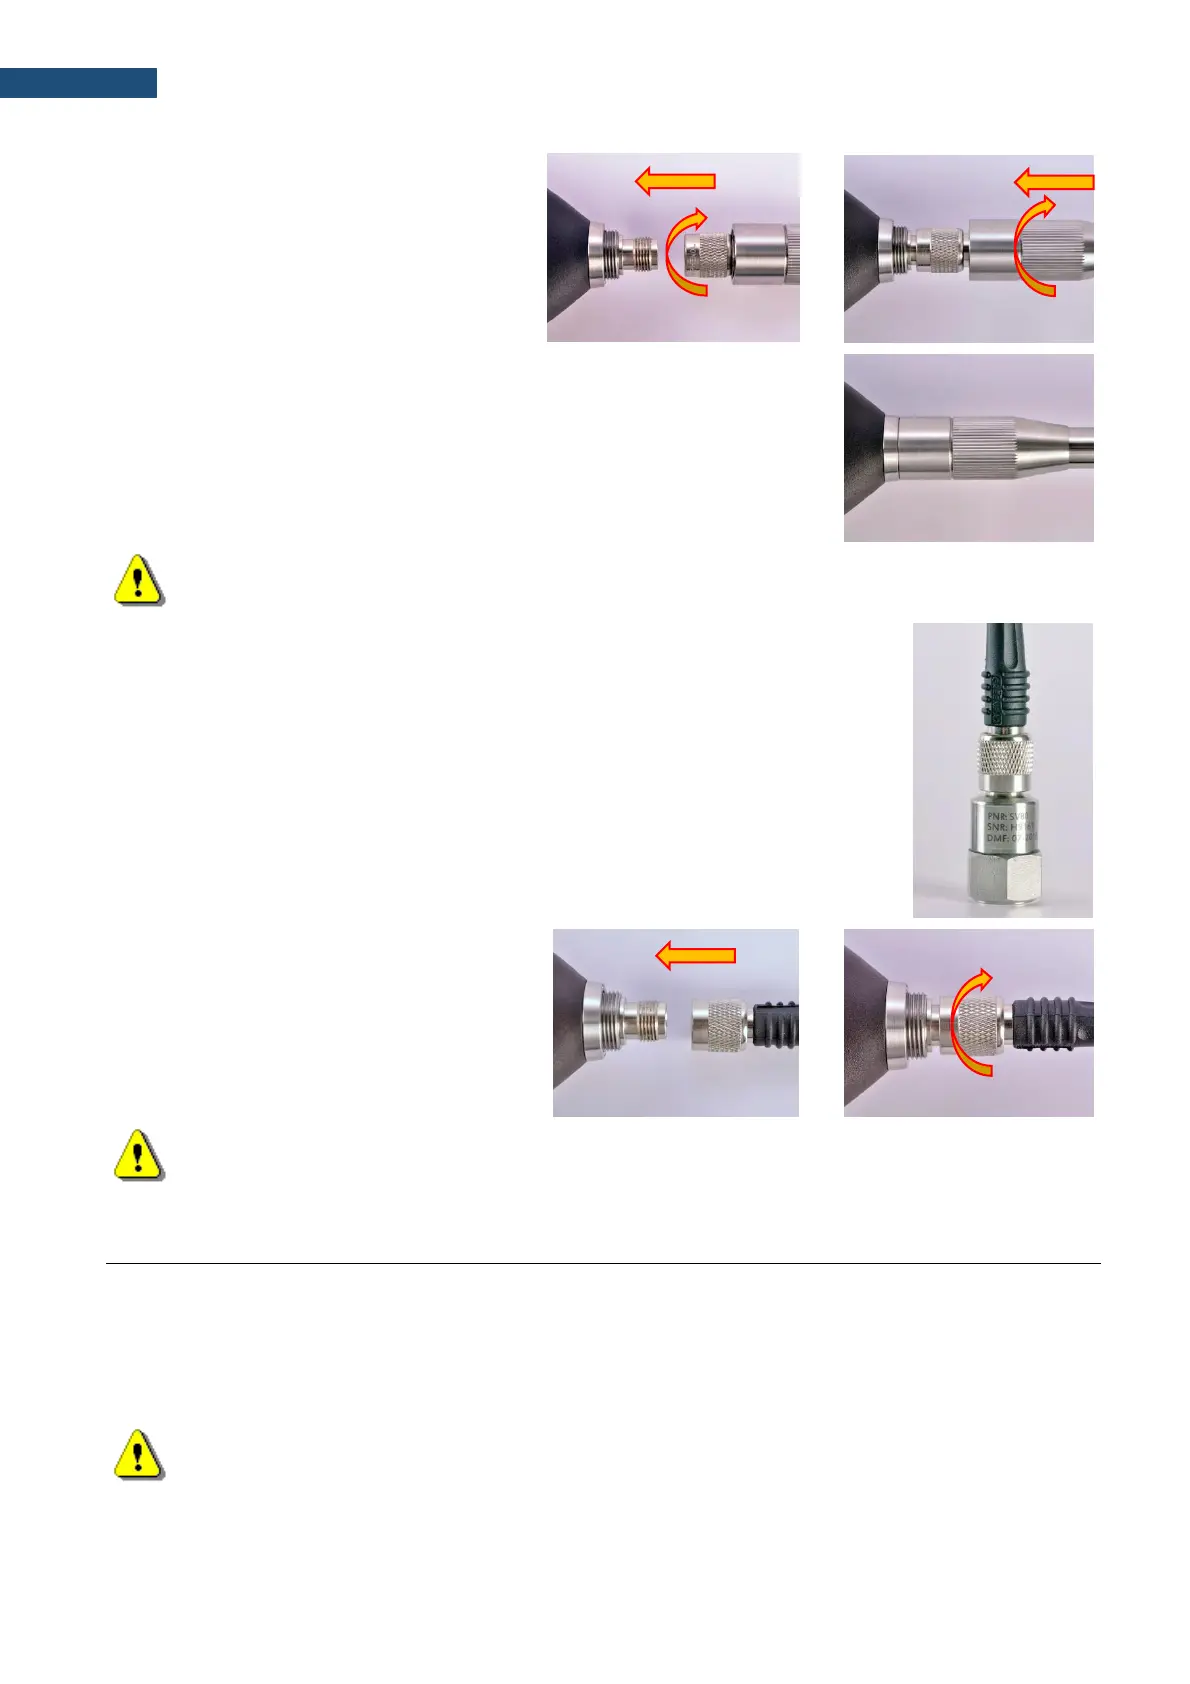
To connect the preamplifier with the
microphone to the instrument, first insert the
tip of the preamplifier into the socket and
tighten the ring to the first screw thread.
Then move the preamplifier outer sleeve in the direction to the instrument and
tighten it to the screw thread.
Note: Do not disconnect the preamplifier by turning the preamplifier body (turn only rings/collars)
because it may damage the preamplifier!
Accelerometer
Optionally general-purpose vibration accelerometer 100 mV/g (10 mV/ms
-2
)
(SV 80) with a coiled cable for accelerometer 2 m (SC 27) can be used.
The SV 80 is an industry standard IEPE accelerometer offered for SVAN 977A.
It is an ideal choice for walk-around measurement points in the rugged
environments of industrial machinery monitoring, such as pumps, motors or
fans. The accelerometer is mounted on a vibrating surface with the mounting
magnet.
The design of SV 80 features the low electronic noise and wide temperature
operating range.
The connection of the accelerometer to the
instrument is like the microphone preamplifier,
but there is only one ring to be tighten to the
first screw thread.
Note: After connecting the preamplifier or the accelerometer cable to the measurement input, the
screw should be tightened to light resistance only. Do not over tighten this connector!
14.4 RESETTING THE INSTRUMENT
• SYSTEM RESET: internal software reset clears any setup configuration and brings back the default
factory settings. See Factory Settings (path: <Menu> / Auxiliary Setup).
• HARDWARE RESET: internal hardware reset, no user data is changed. Make sure the battery is not
exhausted, and the unit is turned off. Hold down the <Alt> and <Start/Stop> keys for more than 15
seconds, and then release them. Turn on the instrument as usually.
Note: Hardware reset is only to be used in extreme situations such as an instrument hang-up.
Be aware, that a hardware reset:
- will stop any pre-programmed auto-run modes,
- will stop measurement run!