Maintain the solvent management system
July 29, 2013, 715003794 Rev. B 193
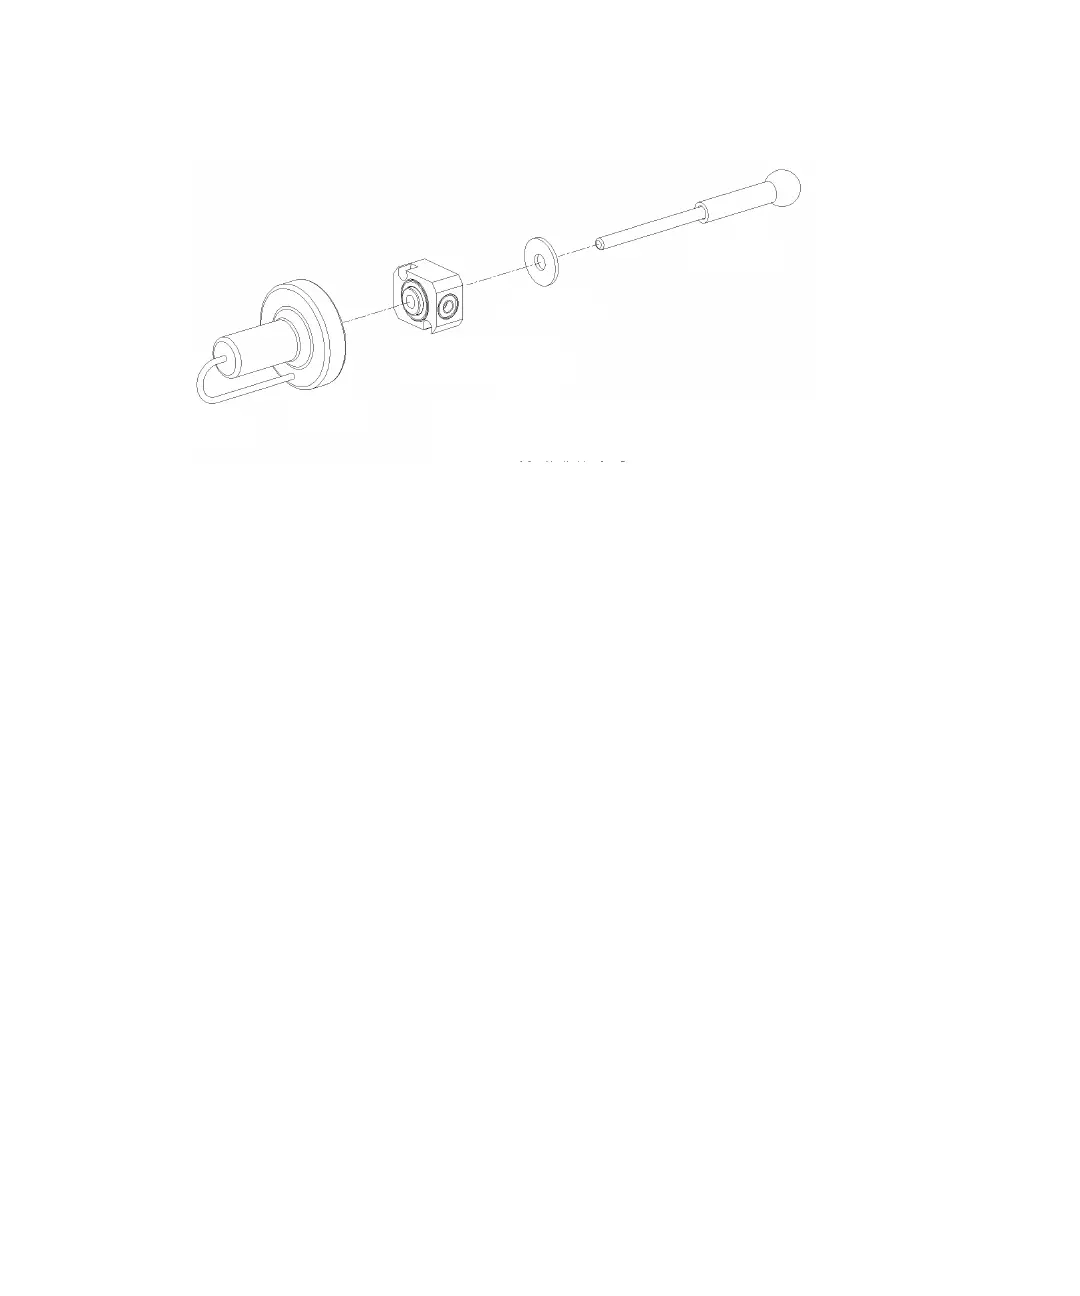
Plunger, seal-wash, and head:
3. Reinspect the plunger. If the plunger shows excessive wear, replace it.
If necessary, replace the plunger seal and face seals (see “Notes on
replacing the plunger seals” on page 187.
To replace the plunger:
1. Slide the seal-wash housing with washer onto the new plunger, and then
insert the assembly into the head (see the figure on page 186).
2. Follow the directions in the Head Removal and Replacement screen to
reinsert the head, seal-wash assembly, and plunger.
Requirement: To avoid damaging the tube seals and to properly align
the seal-wash tubes with the seal-wash housing, refer to step a through
step d below. Also, make sure that the head alignment pin is properly
oriented and that the “J” tube is facing downward.
a. After finger tightening the head nut onto the head, loosen the nut
approximately 1/2 turn.
b. Inspect the ends of the seal-wash tubes for damage. If necessary,
use a razor blade to trim the ends.
c. Reinsert the seal-wash tubes into the manifold, and then fully
tighten the head nut.
d. Return the release ring to the run position.
Seal wash
housing assembly