A
Use the last print to check the image density.
The Image density of the 1.0 Solid Square
In the center of the Test Pattern [0955-5] is
equal to or (ess than the 1.20 Density
Square on the Output Reference SIR 495.1.
Y N
Perform the Tone-Up procedure [09-06].
If the printer does not tone-up, perform the
Image Density Adjustment (ADJ 9.3).
NOTE: If unable to perform ADJ 9.3,
replace the Developer and repeat ADJ
9.3.
B
B
Enter the code [9-21-4] in order to swtich on
the Main Drive Motor and the Toner Sensor
circuit. Connect the (+) meter lead to the Main
PWB A3J303-14 and the (-) meter lead to
A3J303-13.
There is between +5.2 and +6.0 VDC
present.
Y N
C D
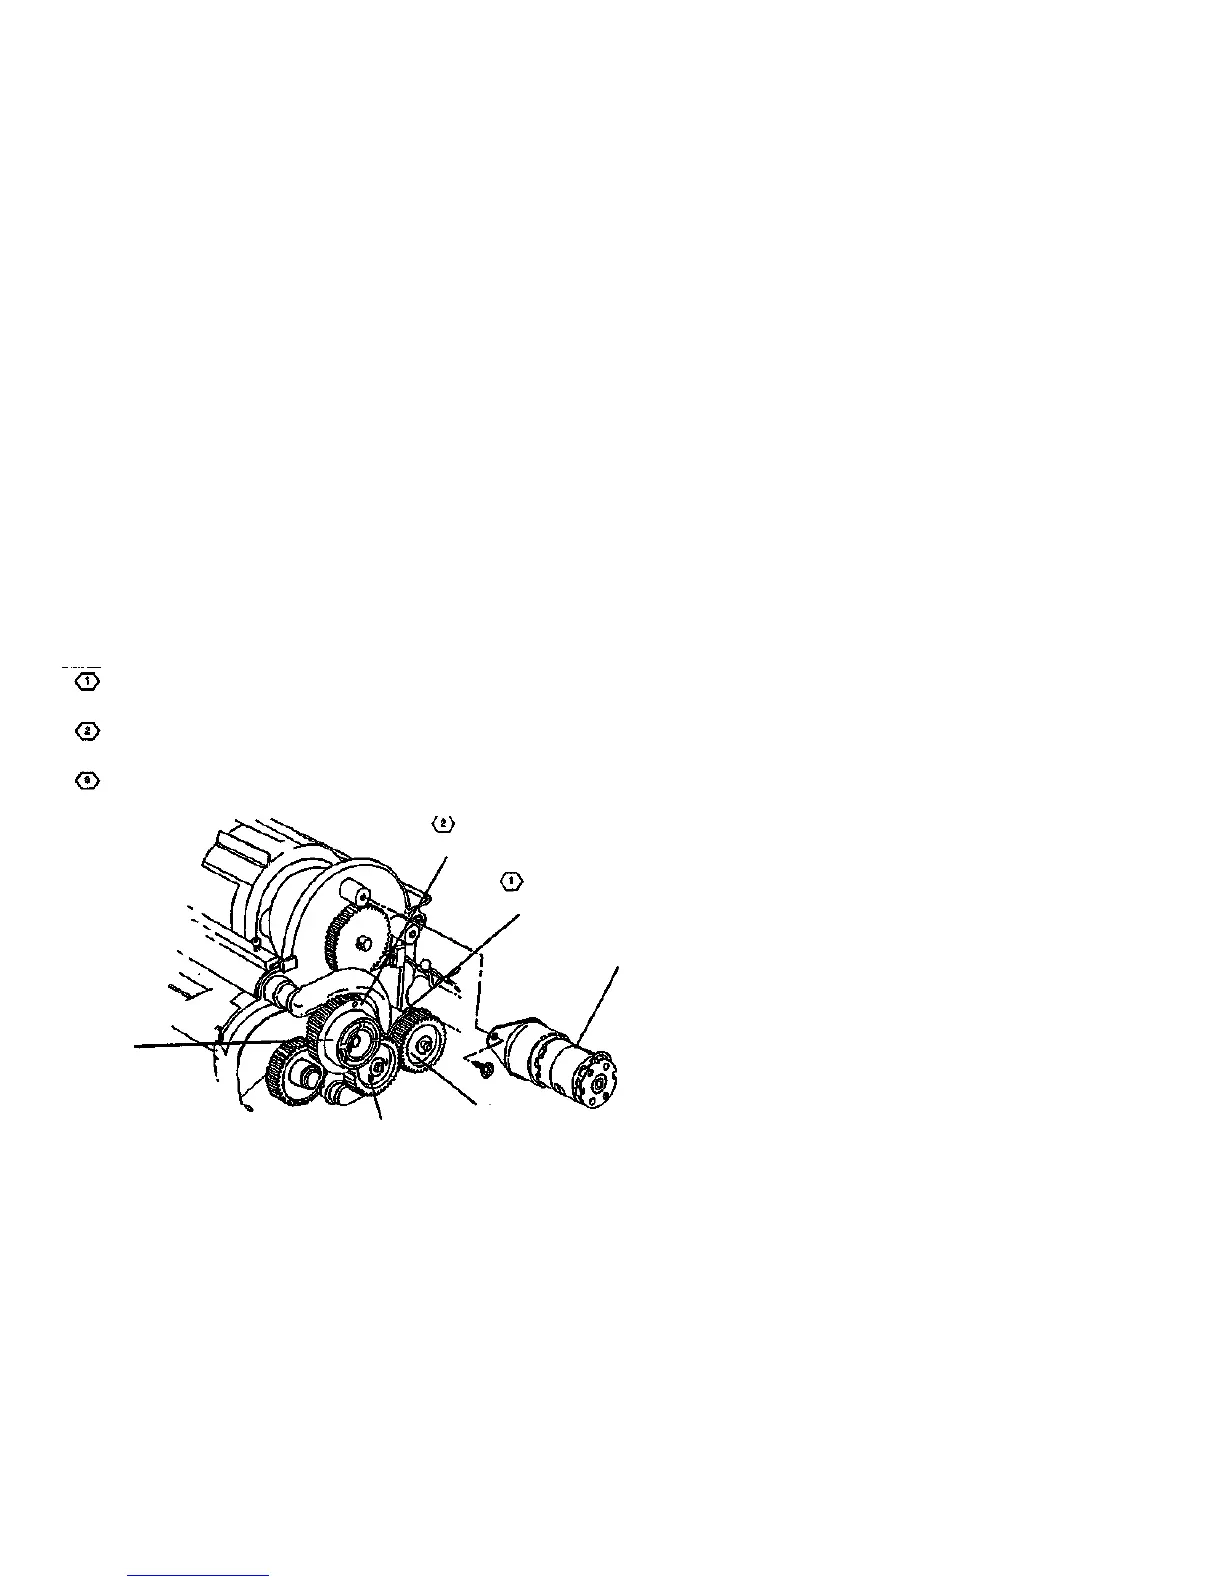
ENSURE THAT THE REAR AUGER DRIVE GEAR IS POSITIONED WITH THE FLANGE
AS SHOWN.
ENSURE THAT THE DEVELOPER HOUSING DRIVE GEAR IS POSITIONED WITH THE
FLANGE AS SHOWN.
ENSURE THAT THE FRONT AUGER DRIVE GEAR IS CAPTURED IN POSITION BY
THE REAR AUGER DRIVE GEAR FLANGE AND THE DEVELOPER HOUSING DRIVE
GEAR LLANGE.
FLANGE
FLANGE
CARTRIDGE
DRIVE MOTOR
REMOVED FOR
CLARITY
C D
Connect the (+) meter lead to the Toner
Sensor A22Q1P1-1 and the {-) meter lead
to ground.
There is less than +10 VDC present.
Y N
Disconnect Toner Sensor A22Q1P1
from A22Q1J1. Connect the (+) meter
lead to the Main PWB A3J303-16 and
the (-) meter lead to ground.
There is less than +10.0 VDC
present.
Y N
| Replace the LVPS, A5, PL 1.1.
If the problem persists, replace
the Main PWB, A3, PL 1.1.
Check for an open or short circuit to
ground in the wires connected to
A22Q1P1-1 (BRN) and A22Q1P1-4
(YEL). If the wires are OK, replace
the Toner Sensor, A22Q1, PL 9.9.
Then, run [9-21-6] Toner Sensor
Calibration.
Check for an open or short circuit to
ground in the wire connected to A22Q1P1-
3 (ORN). if the wire is OK, replace the
Toner Sensor, A22Q1, PL 9.9. Then, run
[9-21-6] Toner Sensor Calibration,
Replace the Main PWB, A3, PL 1.1. If the
problem persists, enter the code [0926] to
reset the NVM.
DEVELOPER
HOUSING
DRIVE GEAR
<3> FRONT AUGER
DRIVE GEAR
REAR AUGER
DRIVE GEAR
W2707
Figure 2. Developer Housing and Auger Drive Gears
LL.91 RAP
1/98
2-12
8830

 Loading...


