Do you have a question about the YOKOGAWA UT55A and is the answer not in the manual?
Details the manuals provided in print format, including their descriptions and manual numbers.
Lists electronic manuals available on the provided CD-ROM, specifying their titles and manual numbers.
Identifies the intended audience for this manual, including engineers and operational personnel.
Provides important notices regarding manual content changes and accuracy.
Lists trademarks and registered trademarks mentioned in the manual.
Highlights safety precautions, including EMC class A product warnings and measurement category.
Explains safety symbols and precautions for system protection and safe operation.
Emphasizes critical warnings related to power supply, explosive atmospheres, and internal units.
States Yokogawa's warranty limitations and disclaimers regarding product use.
Provides notes on software warranties, usage restrictions, and prohibited operations.
Offers guidance on cleaning, avoiding static electricity, and handling potential issues.
Explains WEEE compliance marking and disposal procedures for products within the EU.
Guides users on checking the UT55A/UT52A main unit for model and suffix code accuracy.
Provides guidance on informing the sales representative of the instrument number.
Details suffix codes for UT55A Standard model, covering types, functions, networks, and options.
Details suffix codes for UT52A Standard model, covering types, functions, networks, and options.
Details suffix codes for UT55A Detailed model, covering various terminal areas and options.
Details suffix codes for UT52A Detailed model, covering various terminal areas and options.
Lists accessories provided with the product, such as brackets and terminal covers.
Lists optional accessories available for separate purchase, like software and covers.
Explains symbols used on the instrument and textual indicators like WARNING, CAUTION, and Note.
Defines notations used for setting displays, including keystrokes and parameter details.
Provides instructions on accessing electronic manuals from the CD-ROM.
Explains the organization of the manual into chapters and their descriptions.
Describes the function for easy controller setup of basic functions.
Details PV Input, Control Output, Remote Input, Auxiliary Analog Input, and Retransmission Output.
Explains various control modes like single-loop, cascade, backup, and PV-hold.
Covers active color PV display, guide display, multilingual options, and user function keys.
Explains the use of ladder sequence programming via LL50A Parameter Setting Software.
Covers RS-485, Ethernet, PROFIBUS-DP, DeviceNet, and CC-Link communication interfaces.
Defines main symbols, terms, and engineering units used throughout the manual.
Provides a step-by-step guide from installation and wiring to operation and PID tuning.
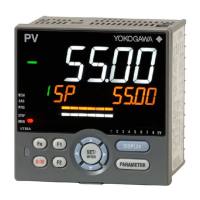
Identifies and explains the functions of all display elements on the controller's front panel.
Details the identification and functions of all keys on the UT55A and UT52A front panels.
Provides a comprehensive reference list of display symbols used on the controller.
Explains parameter symbols, names, display levels, setting ranges, and menu symbols.
Explains how to switch between Operation, Menu, and Parameter Setting displays.
Provides step-by-step procedures for setting various parameters like alarm setpoints.
Details the procedure for setting control type, input, and output via the Quick Setting function.
Explains methods to restart the Quick Setting function after initial setup.
Illustrates operation display transitions for various control modes.
Describes procedures for setting target setpoints in different operational displays.
Explains the process and conditions for performing or canceling auto-tuning operations.
Details manual tuning procedures for PID parameters like proportional, integral, and derivative.
Covers setting alarm setpoints for PV, SP, deviation, and output.
Explains SP group number selection for switching PID parameters based on target setpoint.
Covers switching between AUTO/MAN, Cascade modes, STOP/RUN, and REM/LCL.
Describes how to adjust control output values directly via keys in MAN mode.
Explains how to release latched alarms using user keys, communication, or contact inputs.
Covers setting input type, unit, range, scale, and decimal point for various inputs.
Configures the input sampling period, also known as the control period.
Explains wiring and usage of 4-wire RTD for PV input, including optional suffix codes.
Describes selecting or calculating larger, smaller, average, or difference of multiple PV inputs.
Details methods for remote input: analog signal or communication.
Configures PV range for loop control using PV switching or PV auto-selector.
Explains PV switching methods based on temperature range or contact input.
Defines primary control modes: single-loop, cascade, backup, PV-switching, PV-auto-selector, PV-hold.
Details combinations of control types (PID, ON/OFF, PI) with controller and output types.
Explains PID control modes: standard and fixed-point, with PV or deviation derivative types.
Covers switching PID groups based on Target Setpoint Number, PV, Target SP, or Deviation.
Utilizes fuzzy logic to temporarily adjust setpoint to suppress overshoot.
Mitigates controller hunting without re-tuning PID parameters using a process model.
Prevents overshoot by stopping PID computation when deviation is large.
Implements non-linear control using gap width and control gain for smoother output.
Covers auto-tuning types (normal/stable) and output limit settings for auto-tuning.
Restricts the setpoint (SP) within high and low limits for all SP groups.
Controls SP change rate (ramp-up/down) to prevent abrupt variations.
Aligns SP with PV when operation mode changes to prevent abrupt PV variations.
Aligns local SP with remote SP when switching from REM to LCL mode.
Defines controller behavior upon power recovery (CONT, MAN, or AUTO).
Sets the delay time between controller power-on and the start of control computation.
Selects control output type: relay, triac, voltage pulse, current, position proportional, heating/cooling.
Configures the basic cycle period for ON/OFF operations of relay or voltage pulse output.
Restricts control output using high and low limits for each PID group.
Allows release of the output limiter in MAN mode, excluding heating/cooling control.
Prevents sudden changes in control output to protect valves and controlled processes.
Closes control valve beyond dead band when output low limit is set to 'SD'.
Sets hysteresis for ON/OFF control to prevent relay chattering and ensure relay lifespan.
Uses manual reset to cancel PV/SP offset when integral action is disabled.
Defines hysteresis and dead bands for heating-side and cooling-side control outputs.
Provides dead band and hysteresis for position proportional control relay outputs.
Configures retransmission output terminal, type, and scales for analog output terminals.
Sets preset output values for STOP mode, manual switching, and error conditions.
Applies 10-segment linearizers for output to correct non-linear characteristics.
Enables split computation output for multiple operating units linked for control.
Describes manual and automatic adjustment of valve position for proportional control.
Provides DC power for 2-wire transmitters and includes current limiting circuits.
Configures alarm types, stand-by action, energized/de-energized, latch, and setpoints.
Manages the number of available alarm groups and allows hiding unused parameters.
Adjusts alarm hysteresis to prevent frequent switching of alarm output.
Configures on-delay and off-delay timers for alarm output activation.
Assigns alarm output to control relay terminals when not used for control output.
Allows disabling alarm action in STOP or MAN operation modes.
Configures the heater break alarm function by measuring heater current.
Configures contact inputs for functions like operation mode switching and auto-tuning.
Sets contact outputs for alarm status, operation modes, and system error status.
Covers active color PV display, display masking, SELECT displays, and guide settings.
Details assigning functions to user function keys and the A/M key for operation.
Includes password protection, parameter display levels, and menu locking.
Allows confirmation of key status, I/O status, and controller version information.
Resets all parameter settings and the ladder program to factory default values.
Enables registering and initializing user-defined default parameter values.
Describes effects of power failures and remedies based on duration.
Configures power frequency via automatic detection or manual setting.
Provides diagnostic flowcharts and error code explanations for troubleshooting.
Covers cleaning, packaging for repair, and warnings against replacing internal parts.
Recommends periodic checks for optimal instrument condition.
Provides instructions for proper instrument disposal according to regulations.
Specifies ideal installation conditions: panel mounting, ventilation, and vibration.
Details the procedure for mounting the instrument main unit onto a panel.
Provides physical dimensions and panel cutout requirements for UT55A and UT52A.
Covers general wiring precautions and specific interface wiring diagrams.
Describes the procedure for attaching and detaching the terminal cover.
Explains group display, loop-2 display, and parameter display level indicators.
Provides comprehensive lists of parameters organized by menu (PID, PV, RSP, etc.).
Details general specifications, measurement categories, and safety standards.
Covers ranges and accuracy for universal inputs like thermocouples and analog signals.
Details specifications for current and voltage pulse outputs, including accuracy.
Lists contact types, numbers, and ratings for control and alarm outputs.
Provides specifications for triac outputs, including load voltage and current.
Details specifications for position proportional output, including signal input and relay output.
Specifies retransmission output capabilities and current output range.
Details specifications for the 15 V DC loop power supply for 2-wire transmitters.
Outlines requirements for contact input types, ratings, and status detection.
Configures heater break alarm function and current measurement specifications.
Details specifications for the 24 V DC loop power supply for 2-wire transmitters.
Lists relevant safety (IEC/EN/CSA/UL) and EMC (CE) compliance standards.
Covers material, dimensions, panel cutout, mounting attitude, and wiring standards.
Specifies normal operating and transportation/storage conditions for temperature, humidity, vibration.
Lists model and suffix codes for UT55A Standard model, detailing input/output capabilities.
Lists model and suffix codes for UT52A Standard model, detailing input/output capabilities.
Details the assignment of Digital Input (DI) and Output (DO) terminals for UT55A standard model.
Details the assignment of Digital Input (DI) and Output (DO) terminals for UT52A standard model.
Lists model and suffix codes for UT55A Detailed model, detailing input/output capabilities.
Details the assignment of Digital Input (DI) terminals for UT55A detailed model.
Lists model and suffix codes for UT52A Detailed model, detailing input/output capabilities.
| Model | UT55A |
|---|---|
| Type | Temperature Controller |
| Input Type | Thermocouple, RTD, DC voltage, DC current |
| Number of Control Outputs | 1 or 2 |
| Number of Alarms | 2 |
| Control Method | PID control, ON/OFF control |
| Sampling Cycle | 0.5 seconds |
| Weight | Approx. 300 g |
| Mounting | Panel Mount |
| Alarm Output | Relay contact |
| Control Output | Relay, Voltage, Current |
| Display | LED |
| Power Supply | 100 to 240 VAC |
| Communication | RS-485 |