892 J006 MNAH | PGC5000 G EN 2 | 61
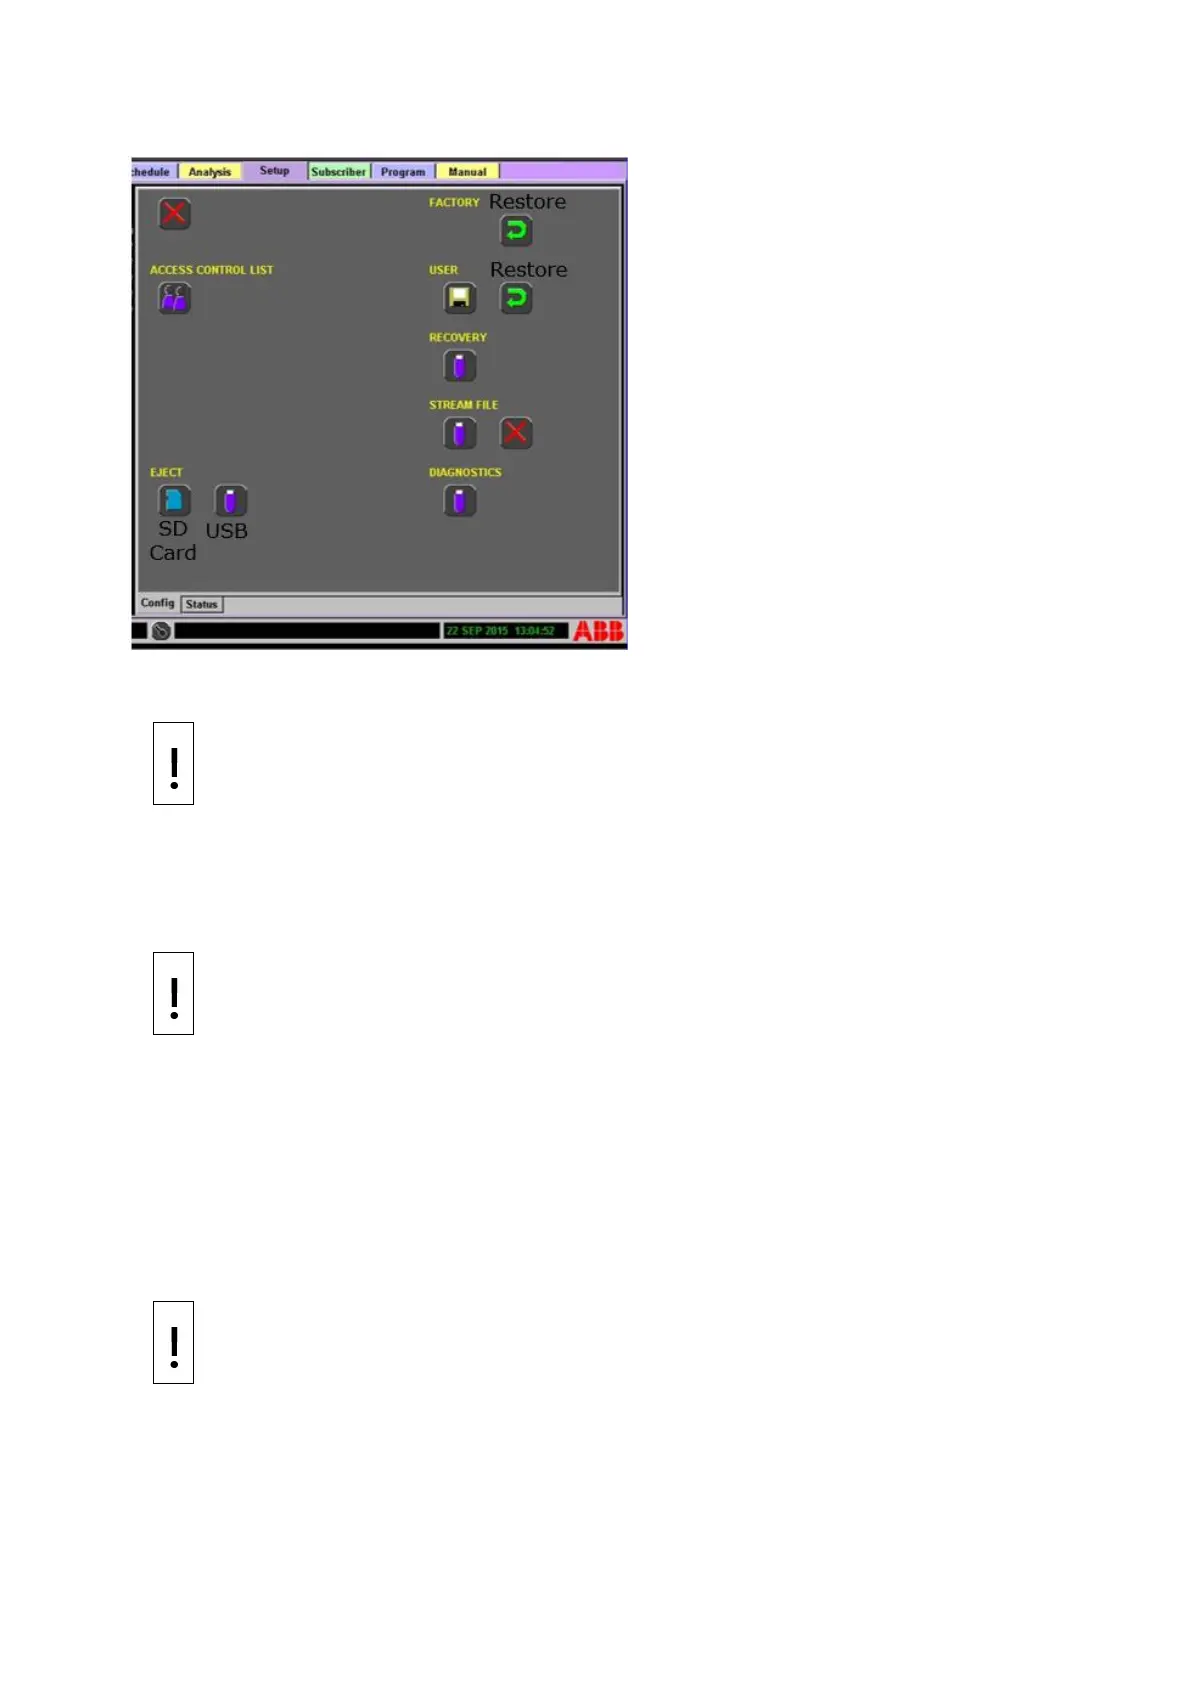
Figure 4-25: Recovery and Backup Options
If only option names show, then you do not have the correct permissions to use the backup and
restore options.
NOTICE – Equipment damage or loss of data. Risk of loss of data on USB and the
PGC5000. Stop all schedules before creating a recovery USB or backing up the stream files
to a USB flash drive.
⎯ ACCESS CONTROL LIST: Selecting the Access Control List (ACL) icon displays a dialog box
containing a list of users, passwords, and access levels that is distributed, encrypted and
persisted at each device. The ACL can be modified from a PGC5000 (LUI or RUI), VNSA, or a
STAR Client. If the PGC5000 is secured, only users with supervisory rights can modify the
ACL. If the PGC5000 is unsecured, everyone has the ability to modify the ACL.
NOTICE – Equipment damage or loss of data. Stop all schedules before restoring from a
recovery USB flash drive.
⎯ FACTORY: Selecting the Restore Settings icon restores the analyzer to the factory
configuration. All user configuration changes to the system will be lost.
⎯ USER: Selecting the Save icon creates a User Restore point. The system copies all
configuration files from the working directory to the Restore directory on the analyzer. You
should create a restore point prior to making any changes or updates to the analyzer. Only
one restore point is saved. Creating a second restore point will overwrite the initial restore
point.
Selecting the Restore Settings icon restores the system to the user-created restore point. It
copies the configuration files from the Restore directory to the Working directory of the SBC
and restarts the system.
NOTICE – Equipment damage or loss of data. Creating the Recovery drive takes several
minutes. Wait for the “Creation Complete” message before removing the USB drive. Select
the Eject USB icon on the Setup screen before removing the Recovery drive. Store the
Recovery drive in a safe place.
You must use a USB drive with 8 GB or less. If a USB drive larger than 8 GB is used, the
system will appear to write the data to the drive and give a “Creation Complete” message,
but no data will be on the drive.
⎯ RECOVERY: Selecting the USB Flash Drive Operation icon creates a recovery drive on the USB
flash drive inserted in the Single Board Computer (SBC). This operation takes up to thirty