64 | PGC5000 GEN 2 | 892 J006 MNAH
• LOW: Low level limit, in seconds, that the peak crest can shift
• HIGH: High level limit, in seconds, that the peak crest can shift
⎯ LIMITS: Concentration (Reported Component Values)
• LOW-LOW: Sets the low-low indicator concentration limit
• LOW: Sets the low indicator concentration limit
• HIGH: Sets the high indicator concentration limit
• HIGH-HIGH: Sets the high-high indicator concentration limit
The Status subtab displays the component’s associated indicators, their state and allows reset. The
component indicators must be checked active on the Status Tab to see state color.
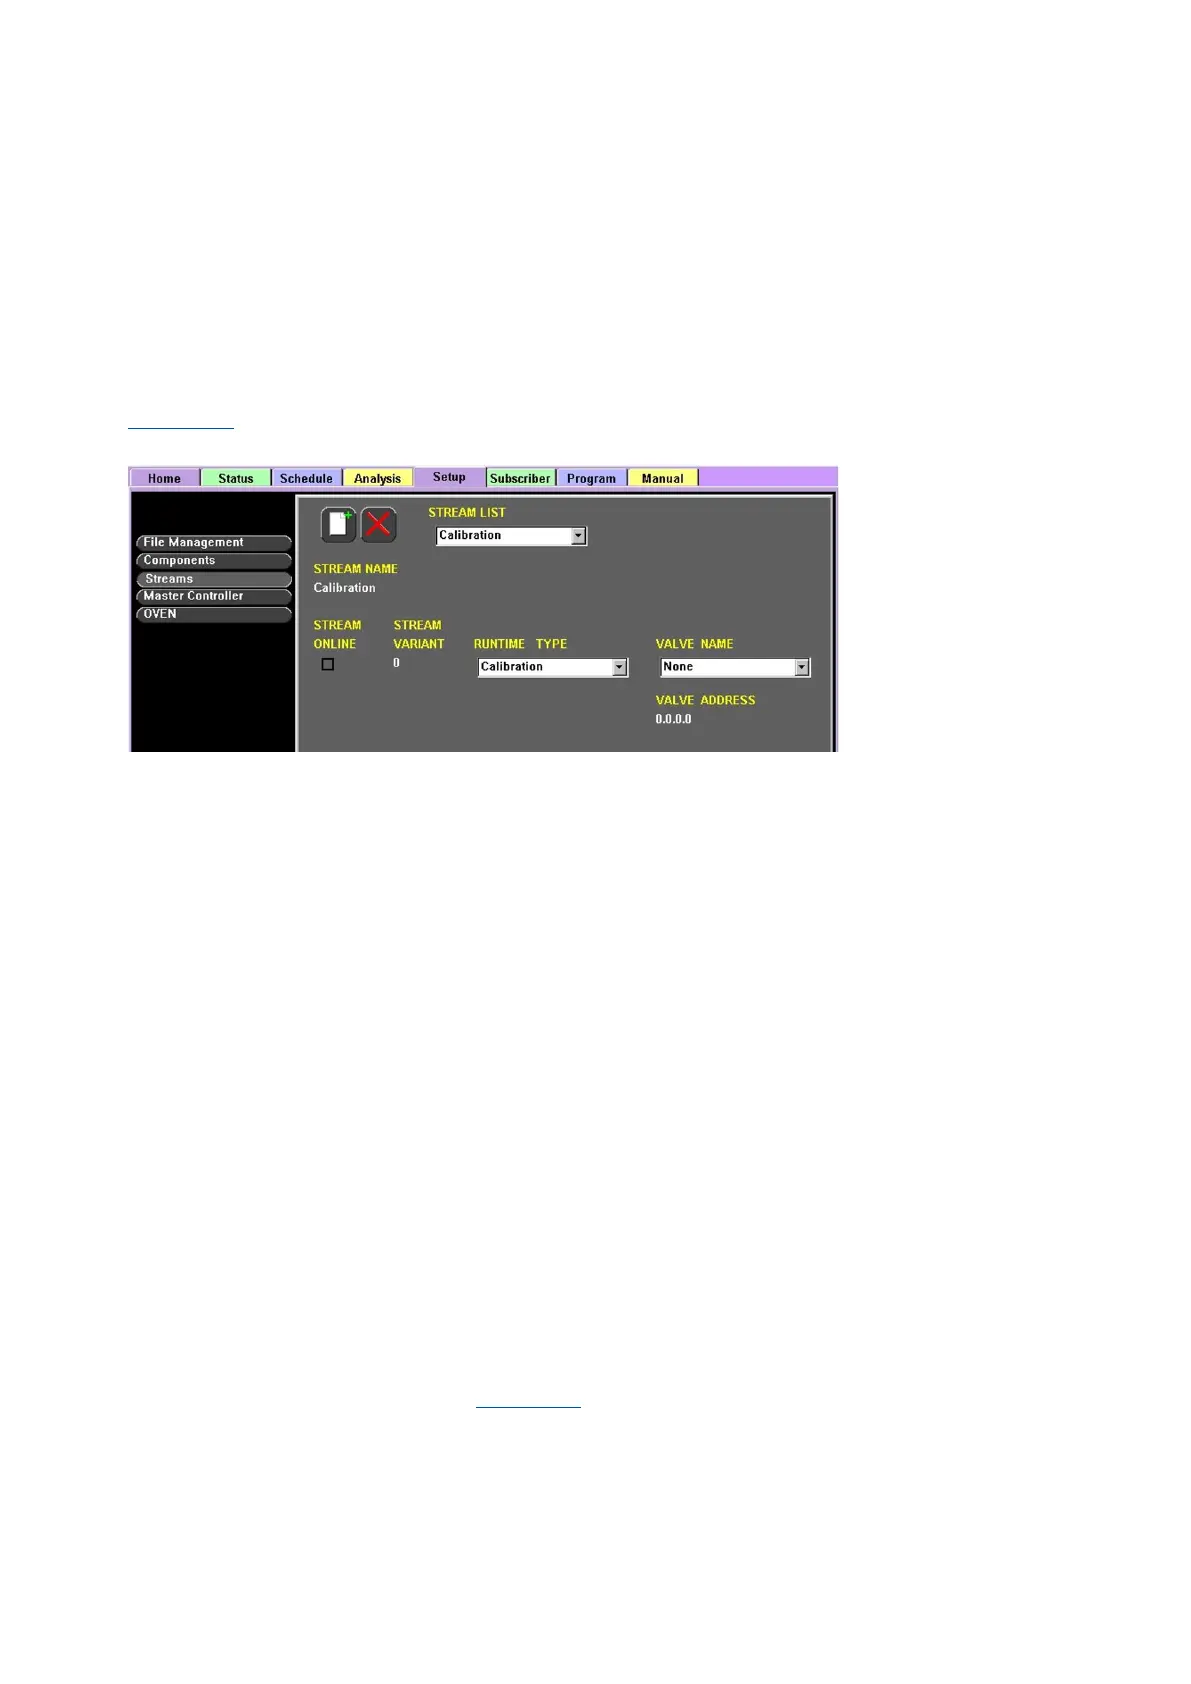
4.6.5 Streams
Select Streams in the Function Select list to display all streams configured for the analyzer (see
Figure 4-28). Streams can be created, configured and deleted from this display.
Figure 4-28: Setup>Streams Configuration
⎯ STREAM LIST: Drop-down list of available streams
⎯ STREAM NAME: Reference name of the stream
⎯ STREAM ONLINE: Current status of Stream (Checked = Active/Online). Clearing (Deactivating)
triggers the Offline Indicator.
⎯ STREAM VARIANT: Current variant of the stream being used
⎯ RUNTIME TYPE: Drop-down list of selectable stream types
⎯ VALVE NAME: Drop-down list of selectable valve types
⎯ VALVE ADDRESS: Reference address of the selected valve
The Status subtab displays the configured indicator’s state, date and time of the selected stream.
To create a stream:
1. Navigate to the Setup tab>Config subtab and select Streams in the Function Select list.
2. Select the Add New icon and enter a name and a variant for the new stream. Stream names
must be unique in the analyzer.
3. Confirm the stream creation by pressing the Accept button, or cancel the operation by pressing
the Abort button.
4. Select the RUNTIME TYPE from the drop-down list.
5. Select the VALVE NAME from the drop-down list.
6. Select the STREAM ONLINE box to activate the stream in the schedule.
To delete a stream:
1. Navigate to the Setup Tab>Config subtab and select Streams in the Function Select list.
2. Select the stream to delete from the STREAM LIST drop-down list.
3. Select the Delete icon.
4. Confirm the stream deletion by pressing the Accept button, or cancel the operation by pressing
the Abort button.
4.6.6 Master controller
Select Master Controller in the Function Select list to display the Config and Status subtabs and all
associated cards and peripherals (see Figure 4-29).