44 | PGC5000 GEN 2 | 892 J006 MNAH
4.3.1 User-configurable scopes
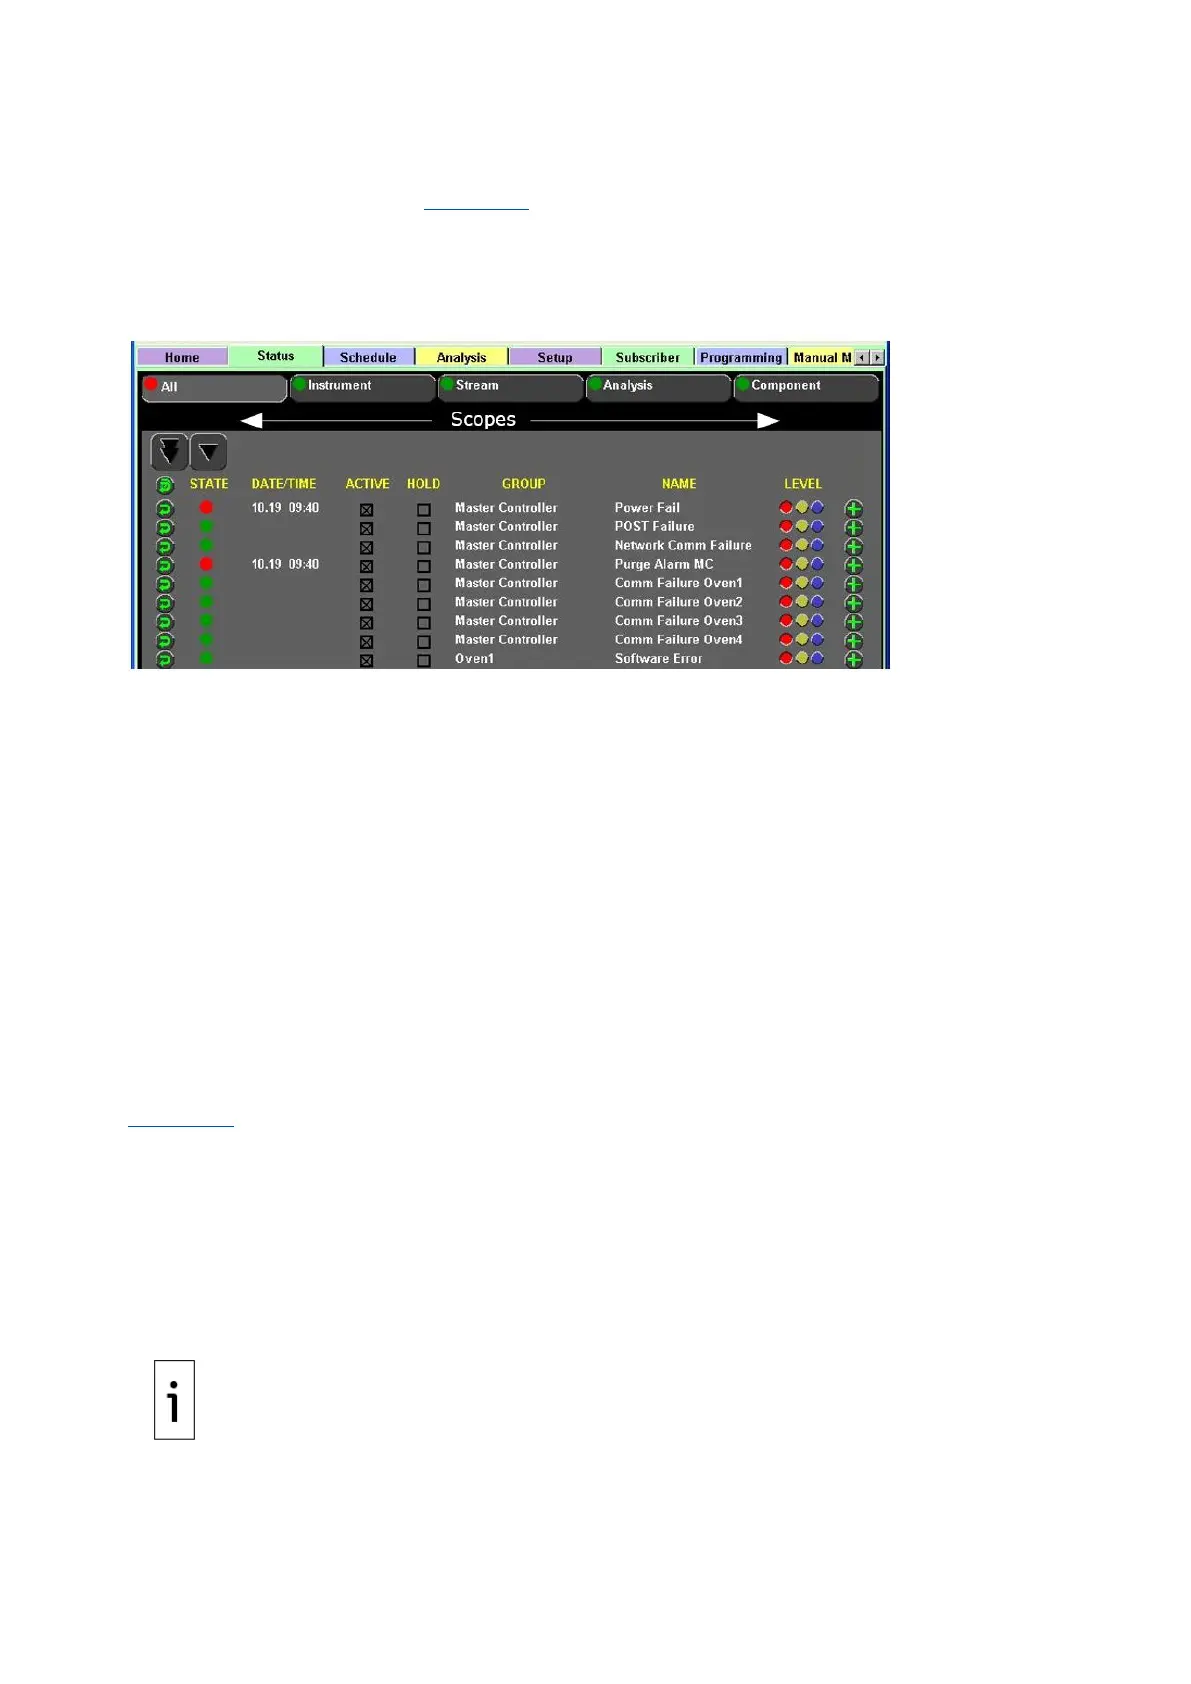
The analyzer scopes represent a collection of indicators directly related to the hardware or software
within the analyzer system (see Figure 4-10). Each scope allows assignment of configurable indicators
to optimize the Condition Monitoring System for each installation. Indicators are assigned reporting
levels depending on user need. All Indicators can be set to Alarm, Warning or Information Only levels.
Indicators set to a Warning or Information Only level do not invalidate data reported to the
subscribers.
Figure 4-10: Scope Indicators
⎯ Instrument: The only scope where indicators set to an Alarm level do not invalidate the
reported data.
• Master Controller Sub-scope: Any active, triggered, alarm-level indicator activates the
common malfunction relay contact closure for the Master Controller; it also sets the
Master Controller rollup out to the Modbus link. The “Master Controller” nomenclature is
used whether the SBC is located in a PGC5000A Master Controller or in an Oven with
Integrated Controller.
• Oven Sub-scope: Any active, triggered, alarm-level indicator activates the common
malfunction relay contact closure for the associated oven.
⎯ Stream: Any active, triggered, alarm-level indicator invalidates the analysis data reported to
all subscribers for that stream. (This may span multiple analyses.) It also sets the Is Valid
indicator.
⎯ Analysis: Any active, triggered, alarm-level indicator invalidates the analysis data reported to
all subscribers for the analysis. It also sets the Is Valid indicator.
⎯ Component: Any active, triggered, set alarm-level indicator invalidates the component data
reported to all subscribers for the component to which it is assigned. It also sets the Is Valid
indicator.
4.3.2 Configure indicators
Figure 4-10 shows each scope with a color-coded indicator status icon. This icon represents the
highest-level triggered indicator configured and activated for the scope. Indicators may be assigned to
multiple scopes. Changes made to an indicator’s activation criteria take effect immediately.
To assign an indicator and level of an indication to a scope:
1. Locate the desired indicator in the All list.
2. Set the desired indicator level by selecting the appropriate indicator level (color) at the right of
the screen.
3. Press the Add button at the right of the indicator.
4. Choose the scope and sub-scope categories.
5. Press the Next button to continue.