Installation and User Manual ADPRO FastTrace by Xtralis
24 Doc 11168_12
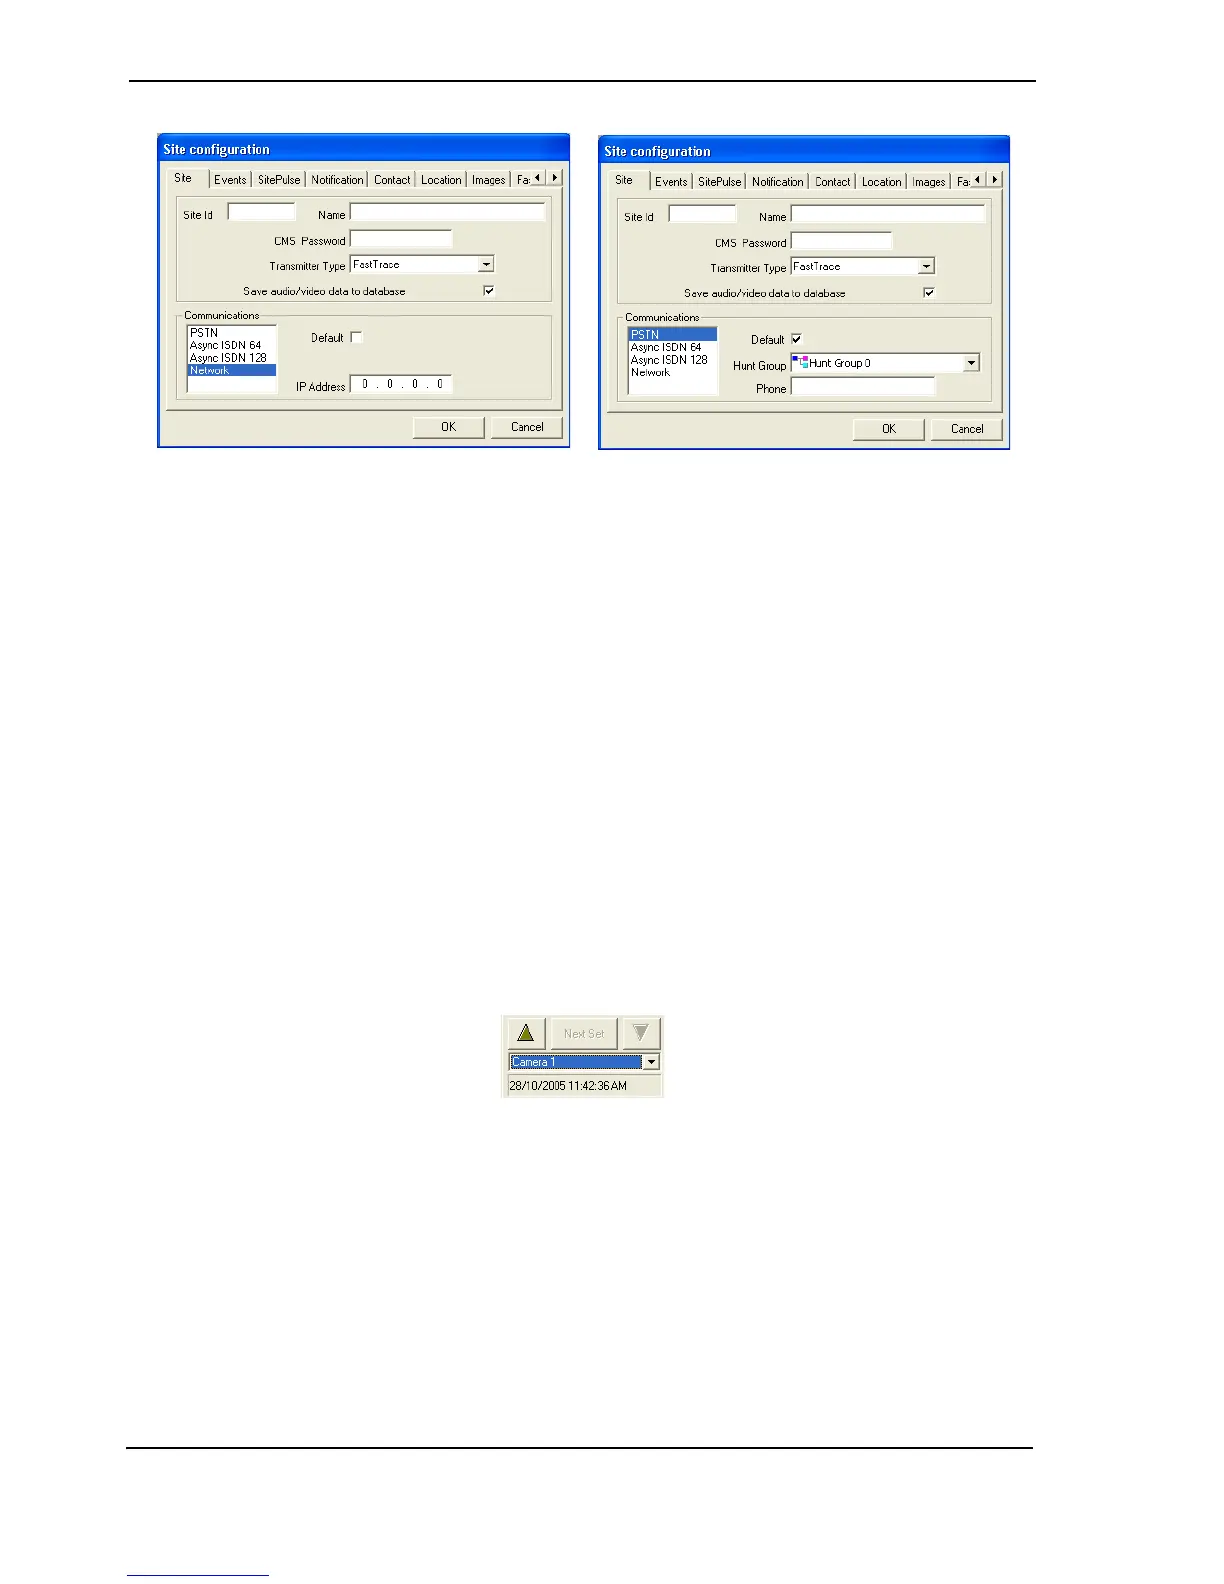
Figure 29: Configure a New Site
2. Enter the following site details:
- Site Id: 9 characters (max)
- CMS Password: 8 characters (max)
- Communications: Network or PSTN
3. If Network is selected, enter a valid IP address for the FastTrace
4. Click OK. The configure Site dialog box is shown again. Click Close. The System
Administration options are then shown. Click Exit.
If a Network connection is being used, the PC must now have its IP Address changed to be on
the same subnet mask as the modified IP Address of the FastTrace (but with a different IP
address). Refer to Configuring the PC for Ethernet Connection on page 9 for details of how to
perform this.
2.11 Testing the FastTrace Installation
1. Reconnect to the site by selecting the Connect to site button, highlighting the new site and
press OK.
2. Test the operation of all connected cameras by selecting each camera in turn from the drop
down list on the user interface.
Figure 30: Camera List
3. While still connected to the site, test the operation of all programmed alarms by triggering
them in turn and ensuring that the appropriate alert is sent to VideoCentral.
4. Once operation is confirmed onsite, test the connection and operation at the CMS (if
required). Connect to the CMS by triggering an alarm at the site, and ensure that the CMS
can initiate connection to the site.