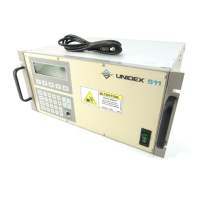
Windows Interface and Utilities U511 User’s Manual
7-10 Aerotech, Inc. Version 1.1
shows “Transfer Complete,” the software has been loaded properly. Turn power off and
replace the JP12 jumper connecting pins 5 to 6 to put the U511 back into the normal
operation mode.
7.6.3. Loading DOS or BIOS
Reloading DOS or BIOS to the U511 should only be necessary in the case of a crash or
error in the operating system. This procedure is similar to loading system software (see
Section 7.6.2). Follow the same procedure for loading system software: set the U511 in
Manufacturing mode, connect the RS-232 cable from COM2 of the U511 to the host PC,
and select the PC’s COM port from the software. From the “File” menu item, select either
“Load DOS” or “Load BIOS.” This will bring up a file dialog box. Select the DOS file:
DOS.ABS or select the BIOS file: BIOS.ABS.
7.6.4. Erasing B Drive
This procedure requires that a PC keyboard be connected to the U511. Set up
Manufacturing mode by following the procedure for loading system software (Section
7.6.2). This selection will erase the B drive which contains the parameters and all user
program files. Following this procedure, the B drive will need to be reformatted. From the
a> prompt on the U511, type “format b:.”
This procedure should only be performed in the event of a catastrophic failure of the
B drive.
7.6.5. Uploading a File (to UNIDEX 511)
To upload a file, the U511 must be in normal operating mode with the U511 software
running. Connect a one-to-one RS-232 cable between the U511 and the host PC. The
COM port settings must be selected for both the U511 and the host PC. To change the
U511 COM port settings, from the main screen of the U511 software, select the Setup
menu (F2) to enter the parameter screen. The COM port settings are on Pages 2 and 3.
Enter the desired settings. The Windows software will run up to and including the 57.6 k
baud setting. Select the COM port settings of the host PC from the File Transfer Utility
software’s “Remote” menu item. Once the COM port settings are correct, select “Upload
File” from the “File” menu item. A file dialog box will be displayed. Select the file from
the host PC to be uploaded. After this file is selected, another dialog box will be
displayed showing the files stored on the U511, enter the file name to save the file as on
the U511. The status bar will show the progress of the file transfer, when the status bar
shows 100% and the display shows “Transfer complete,” the file has been uploaded
properly.
WARNING
Artisan Technology Group - Quality Instrumentation ... Guaranteed | (888) 88-SOURCE | www.artisantg.com