Installer manual AlphaVision ML Rev. 3.60 01-01-2015 21
The speaker connection can be used for the playback of custom speech messages or vocal support of the
user. On the speaker connection, a keypad with integrated speakers (art.nr. 004128) or an external 4-8 ohm
speaker can be connected.
Keypads for the AlphaVision ML
The Alpha Vision ML can be equipped with LCD, LCD/PROX or LED keypads. Each installation must contain a
minimum of one LCD or LCD/PROX keypad. A LED keypad is mainly used in industrial installations with dirty
environments or for outdoor use. In the AV-ML firmware V1.09 and higher the ‘last door’ function was
introduced to be able to start and entry delay or stop and exit delay.
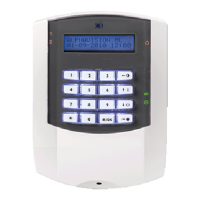
LCD keypad is equipped with an LCD display, silicone keys and status LEDs. This keypad is also available in a
version (LCD/PROX) with an integrated proximity reader to be able to arm/disarm the system with a
proximity tag.
The LCD display shows all messages from the control panel. On both sides of
the LCD display status LED’s are present to display the status of the four
sections and various system information. The LCD display and silicone keys
contain a backlight feature, depending on the programming the backlight is
always on or turns off after 10 seconds and lights up again if a key is pressed
(take into consideration the guidelines for grade 2 if necessary) . Besides
optical indications the keypad features an integrated buzzer. The buzzer is
used for audible entry / exit delay and warns the user in case of a fault.
Connecting LCD keypads to the AlphaVision ML
The AlphaVision ML control panel can be equipped with a maximum of 8 LCD
or LCD / PROX keypads. Keypads are connected to the AlphaVision ML control with a RS-485 bus connection.
Connect the keypads using a RS-485 cable (2x2x0, 5mm shielded twisted). It is strongly recommended not to
connect components on the RS-485 bus using standard security cable!
All keypads are equipped with 4 additional terminals for connecting the integrated speakers and
microphone (if present) to the speech plug-on board (optional). A maximum of 1 keypad can be equipped
with speakers and microphone (item 004128). The two terminals with the text 'SPEAKER' must be
connected to the 'SPEAKER' terminals of the speech plug-on board. The two terminals with the text "MIC"
must be connected to the "INPUT" terminals of the plug-on board.
►! If a keypad is equipped with microphone and speakers a 8-core cable is needed!
The RS-485 bus is a 4-wire cable which incorporates both the data communication (A and B) and the power
(+12 V and 0V). When connecting keypads it is important that cables are clearly connected, A to A, B to B,
etc.
All keypads are equipped with a 4-6 pole dipswitch. The first 3 switches are for the desired address on the
RS-485 bus, switch 4 on hardware version 1.5 and higher is used to bypass the internal tamper switch. On
hardware versions 1.7 and above two extra (5 and 6) dipswitches have been added, these dipswitchs have
no function in combination with the AlphaVision ML panel. Each keypad should be set to its own address. By
default, all keypads are factory default set to address 1. See Appendix E “Dipswitch settings” for the correct
address.
►! Dipswitch settings for keypads are different to dipswitch settings for expansion modules. For
dipswitch settings, see Appendix E.