Installer manual AlphaVision ML Rev. 3.60 01-01-2015 35
programming cable (art.nr. 003834) can be used. When connecting through a network a straight LAN cable
can be used. When connecting directly between the computer/laptop through the network connection a
cross-over cable should be used.
When connecting through a network cable no power-down or power-up procedure is needed. Just connect
the network cable between the computer/laptop and a free network port on the modem/router. Ensure
that the LAN network settings of your computer/laptop are set to ‘Automatic IP’ of DHCP as it is commonly
called, the DHCP server and in the modem/router will automatically issue a IP address to your
computer/laptop. The default network settings of the AlphaVision ML are DHCP, after getting an IP address
from the modem/router both the computer/laptop and the AlphaVision ML will be in the same IP range.
When using a network cross-over cable, the cable should be connected directly between the AlphaVision
ML and computer/laptop. Ensure that dipswitch 2 (sets the IP address of the AlphaVision ML to
192.168.0.48) of the Alpha Vision ML is in the ON position and reset the control panel. The IP address of the
computer/laptop must now be set to a fixed IP address set in the range of 192.168.0.xxx.
When connecting through RS-232 you must first switch off the mains power supply and disconnect the
battery wires from the battery / battery pack on the main board of the AlphaVision ML.
The AlphaVision ML main board contains a boxed header (J32). The boxed header is an RS-232 port and can
be found directly under the RS-485 terminals on the main board. Connect the programming cable (art.nr.
003834) between the control panel and the computer/laptop. Power up the computer/laptop and start the
AlphaTool software package. The default Username is “Admin” and no password is needs to be filled in. In
the Connect screen choose for ‘Local’ connection in the Connection box en then press OK. It is
recommended that the PC/laptop is only connected to the AlphaVision ML when it is powered down.
Reconnect the power supply and battery / battery pack of the AlphaVision ML.
The AlphaVision ML will startup automatically and detect that a computer/laptop is connected to the RS-
232 port and will establish a connection with the computer/laptop.
►! After programming via an RS-232 cable it is advised to restart the AlphaVision ML control panel.
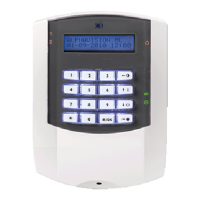
OPERATING THE ALPHAVISION ML
To arm or disarm the AlphaVision ML control panel or to perform specific functions a LCD or LCD/PROX
keypad can be used. The keys on the keypad are typically used to control the system but can also be used by
the installer for programming purposes or to perform special functions.
In general, when arming the system a message is momentarily shown in the display to indicate that the
arming was successful. Also this is shown with the "red lock" symbol. When there is an exit time
programmed the buzzer will sound a continuous tone during this exit time. The last few seconds, this
continuous tone will change into short beeps after which the system is armed.
The Alpha Vision ML by default is armed and disarmed using a six-digit code, from firmware V2.01 and
above it is also possible to arm and disarm the system using a 4-digit code. A fundamental choice must be
made between 4 - or 6-digit codes, this can be done in the SYSTEM OPTIONS programming menu under
menu option 'USER CODES ".
Arming and disarming the Alpha Vision ML on the keypad can be done in two different ways. A clear choice
should be made for one of two options:
1) Enter a valid user code followed by additional actions to arm or disarm the desired sections. The