Installer manual AlphaVision ML Rev. 3.60 01-01-2015 7
INTRODUCTION
Purpose of this manual
The purpose of this manual is to provide the installer step by step instructions for installing and
programming the Alpha Vision ML security system. The manual is intended to make installers familiar with
the operation and construction of the AlphaVision ML and its components.
The AlphaVision ML was designed and tested in accordance with the applicable standards on stability,
reliability and immunity to electrical interferences from the environment.
General guidelines
Frequently check the Alphatronics website for the latest tips and instructions, www.alphatronics.nl /
security installers and click on the button "Service & Support. Contact the sales department to receive a
username and password.
When the ML Alpha Vision is part of security installation for which a certificate should be issued, follow the
instructions carefully in this guide regarding comments "for a grade 2 installation it .... ' (see also the Grade
2 installation instructions).
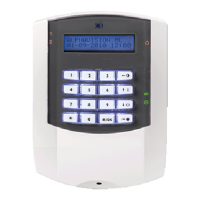
ALPHAVISION ML SPECIFICATIONS
Versions: The AlphaVision ML is available in a synthetic casing and a metal casing, both with the same
power and battery pack (2700mAh) for use up to grade 2 installations.
Identification: On the inside of each enclosure a label is applied, enabling the device to be identified. On
each label the name of the manufacturer, type, batch number (starting with a capital B, B014 for example,
batch number 014), the security grade and the environmental class is mentioned.
For the synthetic casing of the AlphaVision ML the label is placed on the inside of the lid. For the keypad the
label is placed on the inside of the rear shell. For the metal casing of the AlphaVision ML and the I/O module
the label is placed on the rear inside of the cabinet.
Labels must not be removed!
If the installation does not meet to grade 1 or grade 2 the labels MUST be removed!
The individual label with serial number must never be removed.
For the PSTN and GSM plug-on dialers loose identification labels are provide with each plug-on dialer.
These labels should be placed in the cabinet of the control panel if the installation complies with grade 1 or
grade 2.
Applications: Residential, retail and light commercial applications.
Partitions: 8 separate partitions possible.
Zones: Standard 12 hard-wired zones and expandable up to 100 hard-wired zones using Input or I/O
modules. A maximum of 32 wireless zones using a wireless expansion module can be connected.
Expansion modules (a maximum of 4 modules can be connected):
Input + 8 o.c. module for 8 hard-wired zones and 4 open collector outputs.
I/O module including 3A power supply for 8 hard-wired zones, 2 potential free relay outputs, 2 open
collector outputs and a speaker (LS) output.
Wireless expansion module for incorporating wireless detectors and keyfob transmitters.