Version 6.2 205 February 2011
SIP User's Manual 5. EMS-Based Management
b. Double-click each field to enter values.
c. Right-click the new entry, and then select Unlock Rows.
d. Click Apply and close the active window.
6. If a Proxy Server is not implemented, map outgoing telephone calls to IP addresses.
Open the 'SIP Routing' frame (Configuration pane > SIP Routing menu).
a. Select the Tel to IP tab.
b. Click the button to add a new entry, and then click Yes to confirm; the Tel to
IP Routing table is displayed.
c. Double-click each field to enter values.
d. Right-click the new entry and select Unlock Rows.
e. Click Apply and close the active window.
5.5 Configuring Advanced IPSec/IKE Parameters
After you have pre-configured IPSec via SSH (see ''Securing EMS-Device Communication''
on page 200), you can o
ptionally configure additional IPSec and IKE entries for other
SNMP Managers aside from the EMS.
Note: Do not remove the default IPSec and IKE tables that were previously loaded
to the device when you enabled IPSec.
¾ To configure IPSec/IKE tables:
1. In the Navigation pane, select VoIP > Security, and then in the Configuration pane,
select Security Frame; the 'Security Provisioning' screen appears.
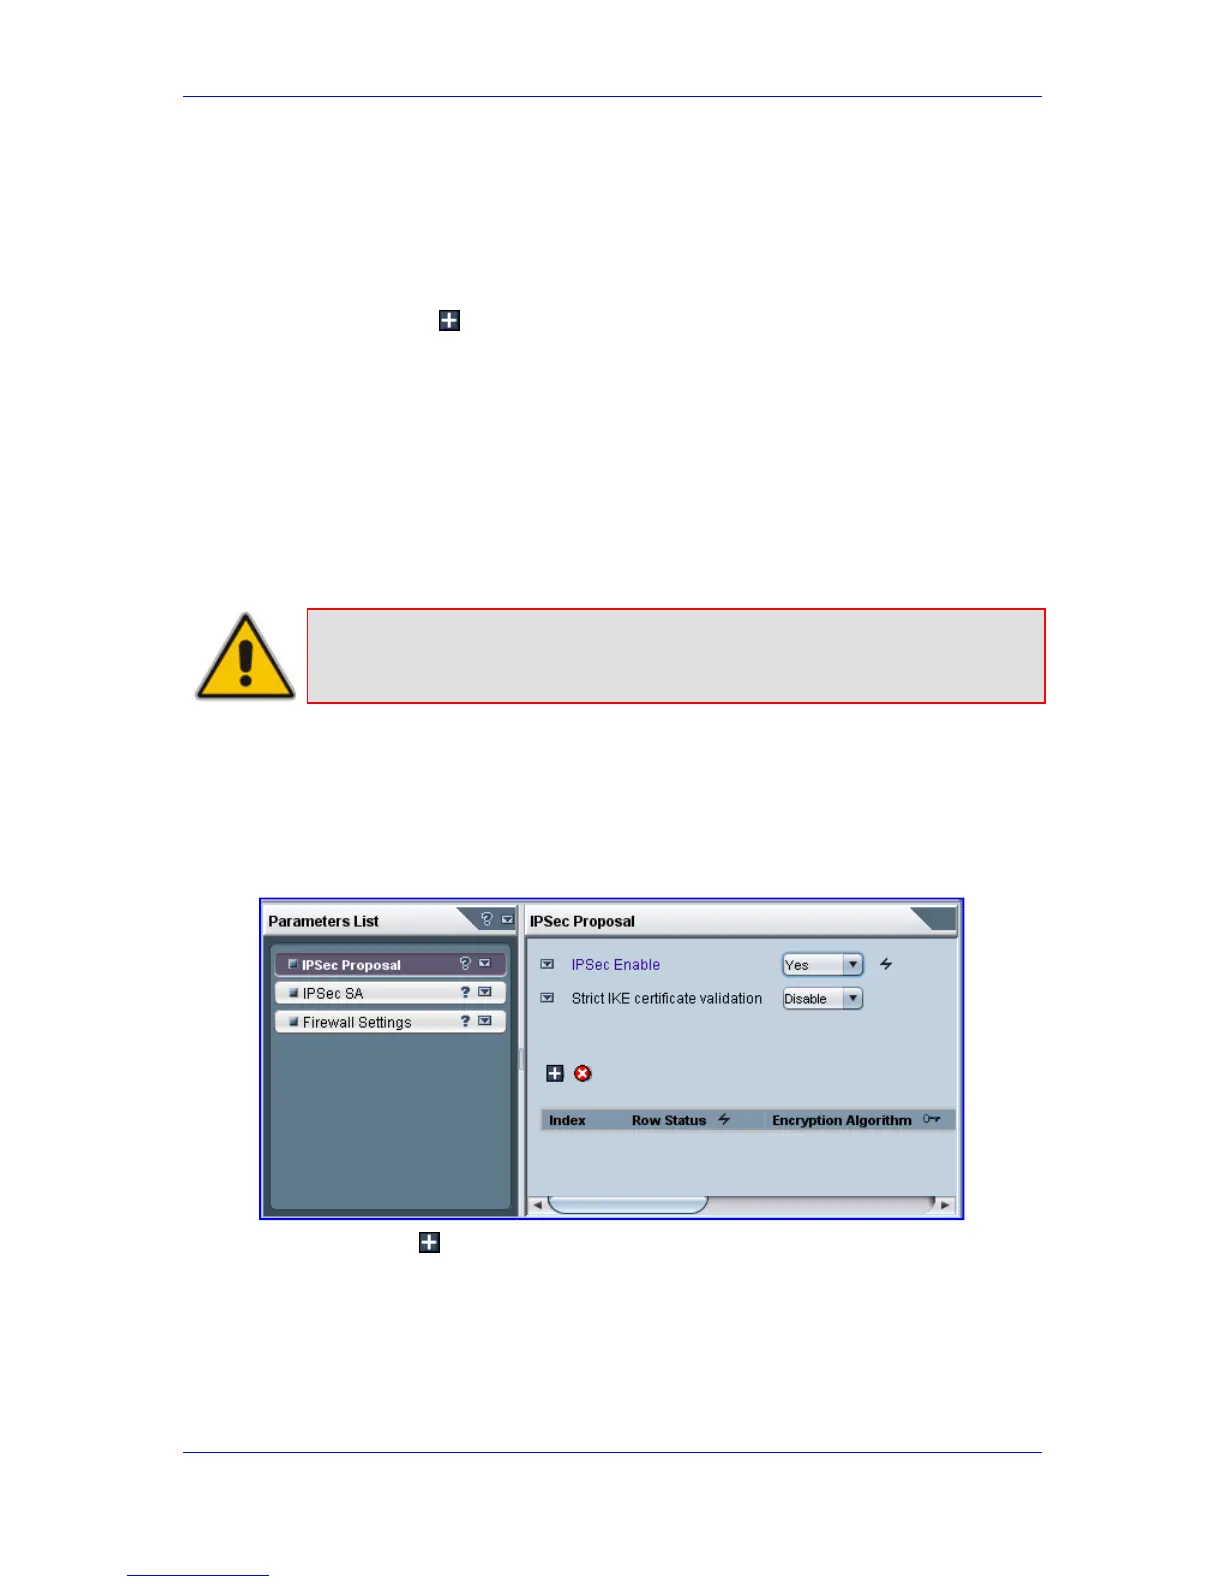
2. Select the IPSec Proposal tab; the 'IPSec Proposal' screen is displayed.
Figure 5-6: IPSec Table Screen
3. Select the button to add a new entry, and then click Yes at the confirmation
prompt; a row is added to the table.
4. Enter the required values.
5. Right-click the new entry, and then from the shortcut menu, choose Unlock rows.
6. Click Save, and then Close.
7. Select the IPSec SA tab; the 'IPSec SA' screen appears.
8. Repeat steps 4 through 7.