5/16
Chapter 5: Routine Operational Procedures
Operators & Maintenance Manual GENIUS Compact Version UK 0.1 © BESTnv
BESTnv Industrial Research BV, Marinus van Meelweg 20, 5657 EN, EINDHOVEN, THE NETHERLANDS
General tel. +31 (40) 292 2622 - Service tel. +31 (40) 292 2620 - Fax. +31 (40) 292 2633 - Email: service.BESTnv@bestnv.com
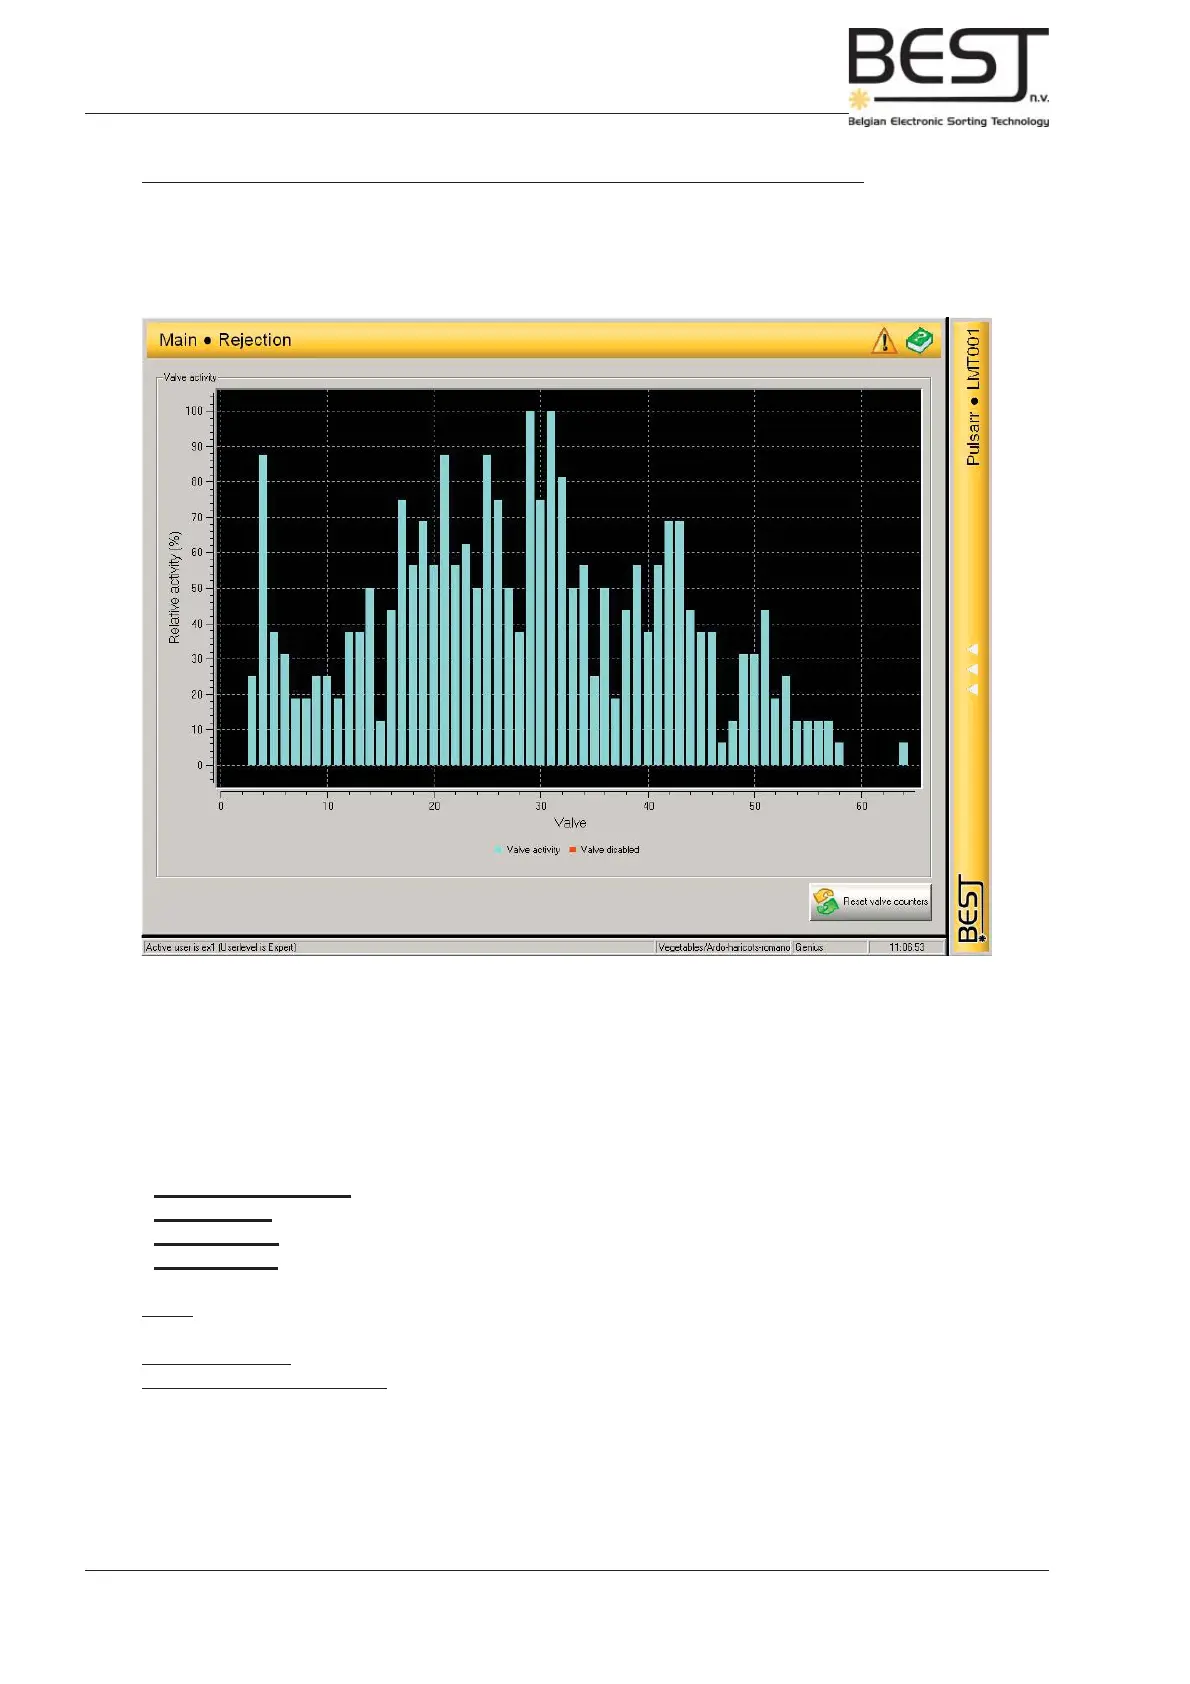
The Rejection menu displays a graph that shows the relative activity of all the valves. In optimum sorting
circumstances this graph should show that all valves are +/- equally active (all columns should be +/-
equally high). If one valve or a particular group of valves are clearly more or less active, or one side of
the screen shows clearly more activity than the other, something is wrong (see troubleshooting).
Via the navigation bar of this menu all parameters that have to do with the actual rejection of detected
defects can be adjusted.
- 1. Rejection Settings: Delay; Blast (Blast time): Neighbour valves (Overlap)
- 2. Valve Test: Testing and Deactivating Valves.
- 3. Belt Speed: Can only be changed in Expert level.
- 4. Reject unit: Mechanical settings for ejection unit and accept chute.
Delay: the distance between detection zone (camer/laser) and ejection zone (air gun valves) in mm. Can
only be changed by Expert user.
Blast (blast time): the duration of the air gun blast (in mm).
Neighbour valves (overlap): the number of neighbouring valves that are activated together with the
triggered air gun to be certain to eject the defect (depending on product size and shape.
Part 1: Adjusting the Ejection Settings (only when setting completely new product)
(This part is usually not necessary when making a product setup fi le that can be based on the setup fi le
of a similar product.)
3.- Go to Rejection Menu (see picture) by pressing the Rejection button in the navigation bar.