Chapter 7: Maintenance
7/12
Operators & Maintenance Manual GENIUS Compact Version UK 0.1 © BESTnv
BESTnv Industrial Research BV, Marinus van Meelweg 20, 5657 EN, EINDHOVEN, THE NETHERLANDS
General tel. +31 (40) 292 2622 - Service tel. +31 (40) 292 2620 - Fax. +31 (40) 292 2633 - Email: service.BESTnv@bestnv.com
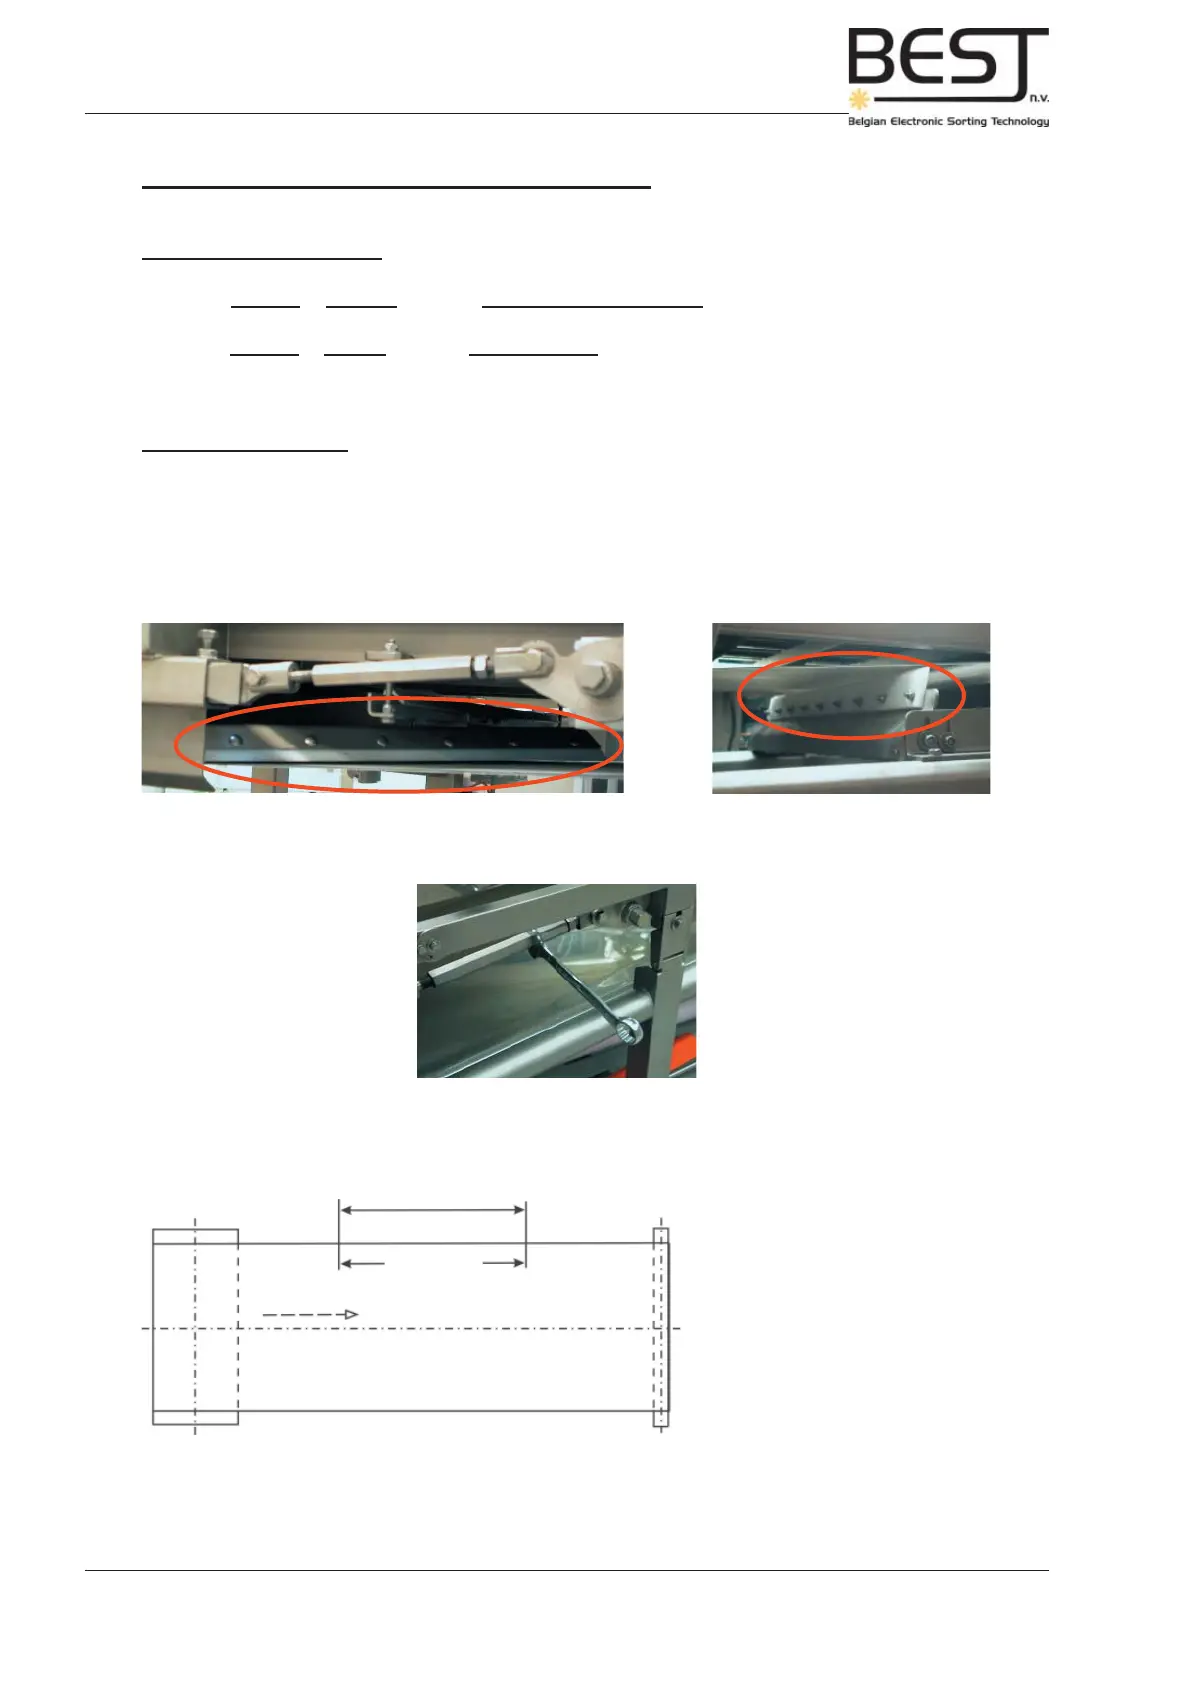
A: Drive Drum
B: Return Axle
C: Marks indicating 1000 mm
distance on belt
D: Transport direction belt
3. Make sure that both drive drum and return axle (or bull nose) are at right angles to the direction of the belt
motion (see picture underneath). Do not put tension on the Belt before it has been placed correctly.
7.5.3. Tensing and Tracking of Detection Belt
Tensing of Detection Belt
If the Belt Tension is too high, the Belt will damage the bearings of drive drum and/or return axle(s).
If the Belt Tension is too low, the Belt will start to slip, which will have a negative infl uence on the sorting
process.
Belt Tensing Procedure:
1. Set inner and outer scrapers and support shoes in such a way that they do not touch the detection
belt.
2. Adjust the position of the drive drum in such a way that the belt is not under tension (move drum slightly
inwards using tightening screw on both sides).
5. Increase the belt tension by adjusting the position of the drive drum, away from the return shaft, until
the 1000 mm distance between the two dashes has become 1003 to 1004 mm on both sides of the belt.
This corresponds to the advised belt tension of 0.3% to 0.4%.
4. Place two easily removable dashes to mark a distance of 1000 mm (39,37”) on both sides of the belt
(see picture above).
A
B
C
D