Chapter 2: Pre-installation Guide:
Unpacking & placing of GENIUS Compact optical sorter
2/8
Operators & Maintenance Manual GENIUS Compact Version UK 0.1 © BESTnv
Pulsarr Industrial Research BV, Marinus van Meelweg 20, 5657 EN, EINDHOVEN, THE NETHERLANDS
General tel. +31 (40) 292 2622 - Service tel. +31 (40) 292 2620 - Fax. +31 (40) 292 2633 - Email: service.pulsarr@bestnv.com
Picture: Placing the shaker unit
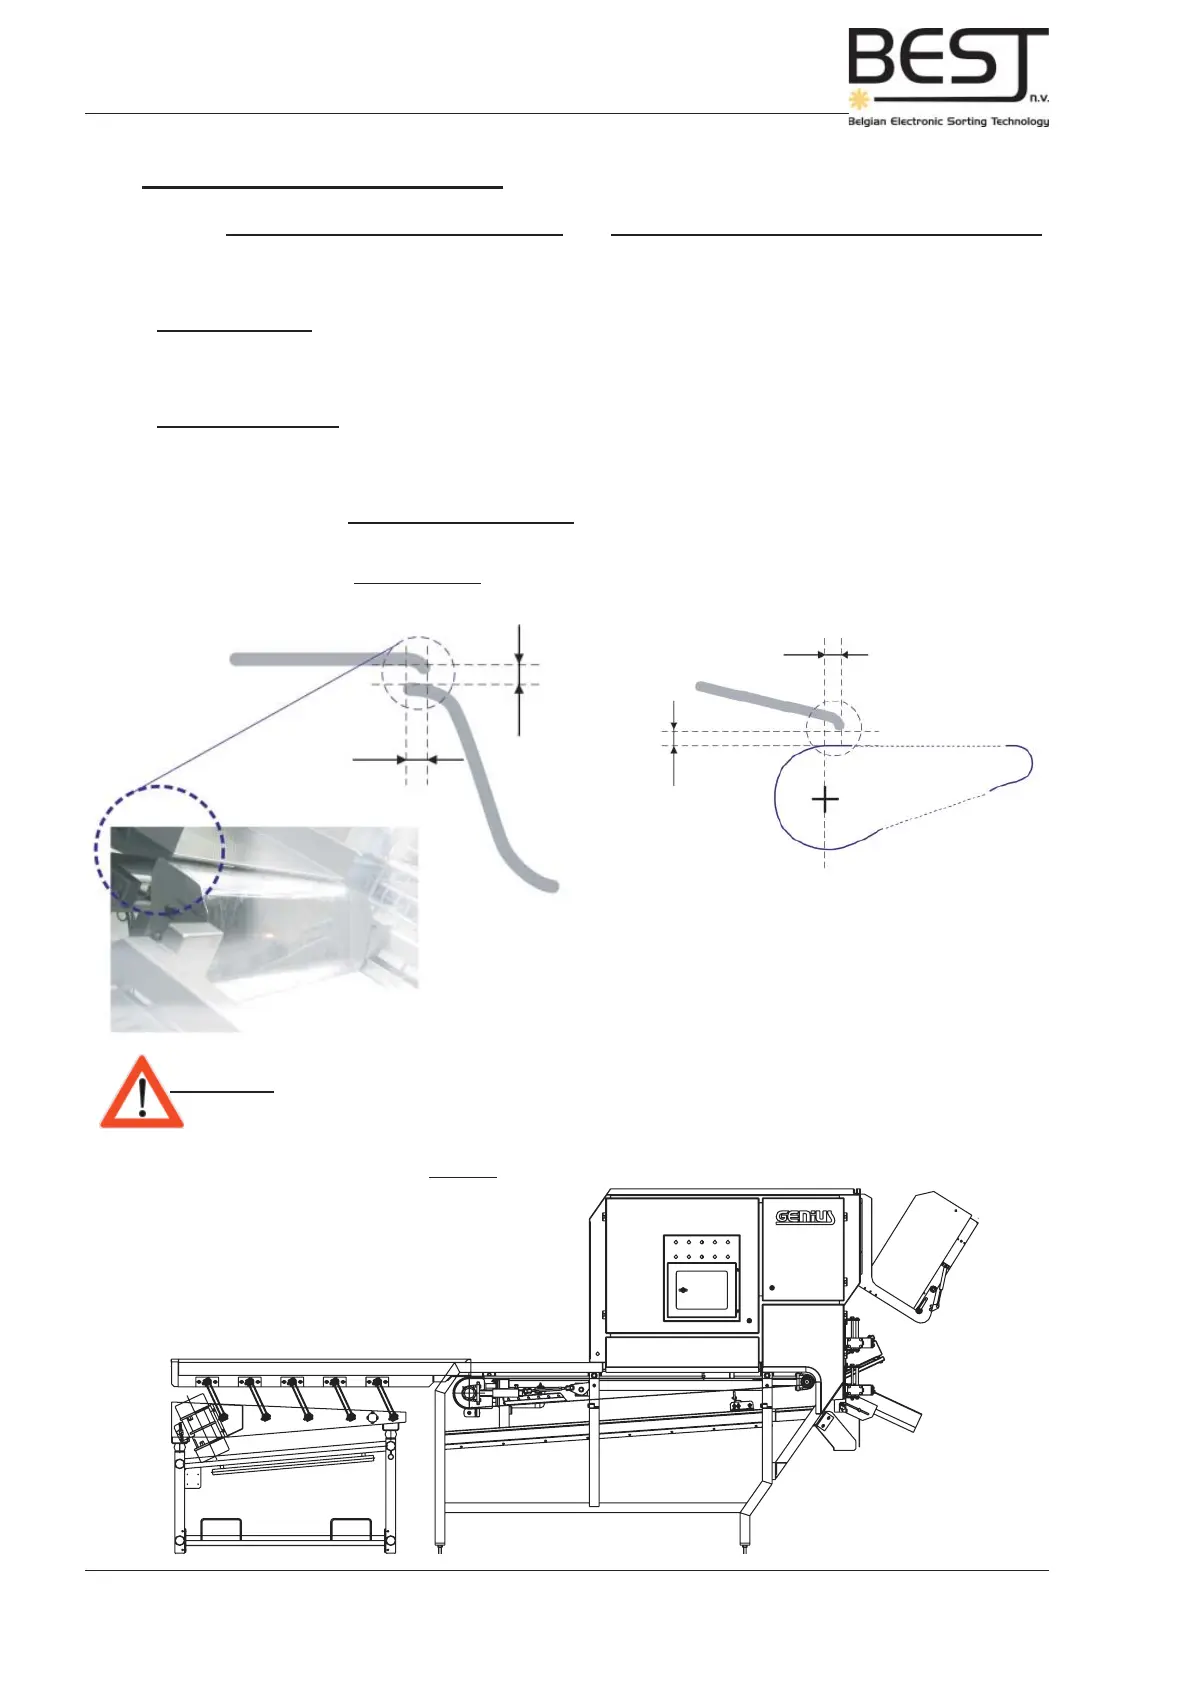
Picture 2.5.11: Relative position of infeed shaker
(sorter with infeed chute) (sorter without infeed chute)
Infeed
chute
Infeed
shaker
A
B
A = 1.0 cm
(0.4”)
B = 1.0 cm (0.4”)
A
B
Infeed
shaker
Transport belt
2.4.2. Placing the different units
Once the GENIUS Compact optical sorter unit (see 2.5.2. The GENIUS Compact optical sorter unit)
has been placed in the production line, lift the shaker unit and turn in the adjustable feet (see pictures).
- Move the shaker up against the front of the sorter unit:
With infeed chute: the gap between the infeed shaker nose and the infeed chute of the sorter unit
should be no more than 1.0 cm (0.4”) in height. The nose of the shaker should overlap the beginning
of the infeed chute by approximately 1.0 cm (0.4”).
Without infeed chute: the gap between the infeed shaker nose and the belt drive drum should be no
more than 1.0 cm (0.4”) in height. The nose of the shaker should overlap the highest point of the belt
drive drum by approximately 1.0 cm (0.4”).
(For further details see 2.5.3. The Infeed shaker).
Attention: - Do not fi x the sorter unit or the shaker frame to the ground before the fi nal
position has been determined and approved by BESTnv’s service engineer
during the commissioning.