4. WEB MANAGEMENT
You can manage the Managed Switch via a web browser. However, you must first assign a unique
IP address to the Managed Switch before doing so. Through the connection of any SFP ports
using the fiber cable or any TP ports using a RJ45 cable, you will be allowed to have an access of
the Managed Switch and set up the IP address for the first time. (Note: The Managed Switch can
be reached with the default IP address of “192.168.0.1”. You can change the IP address of the
switch to the desired one later in its Network Management menu.)
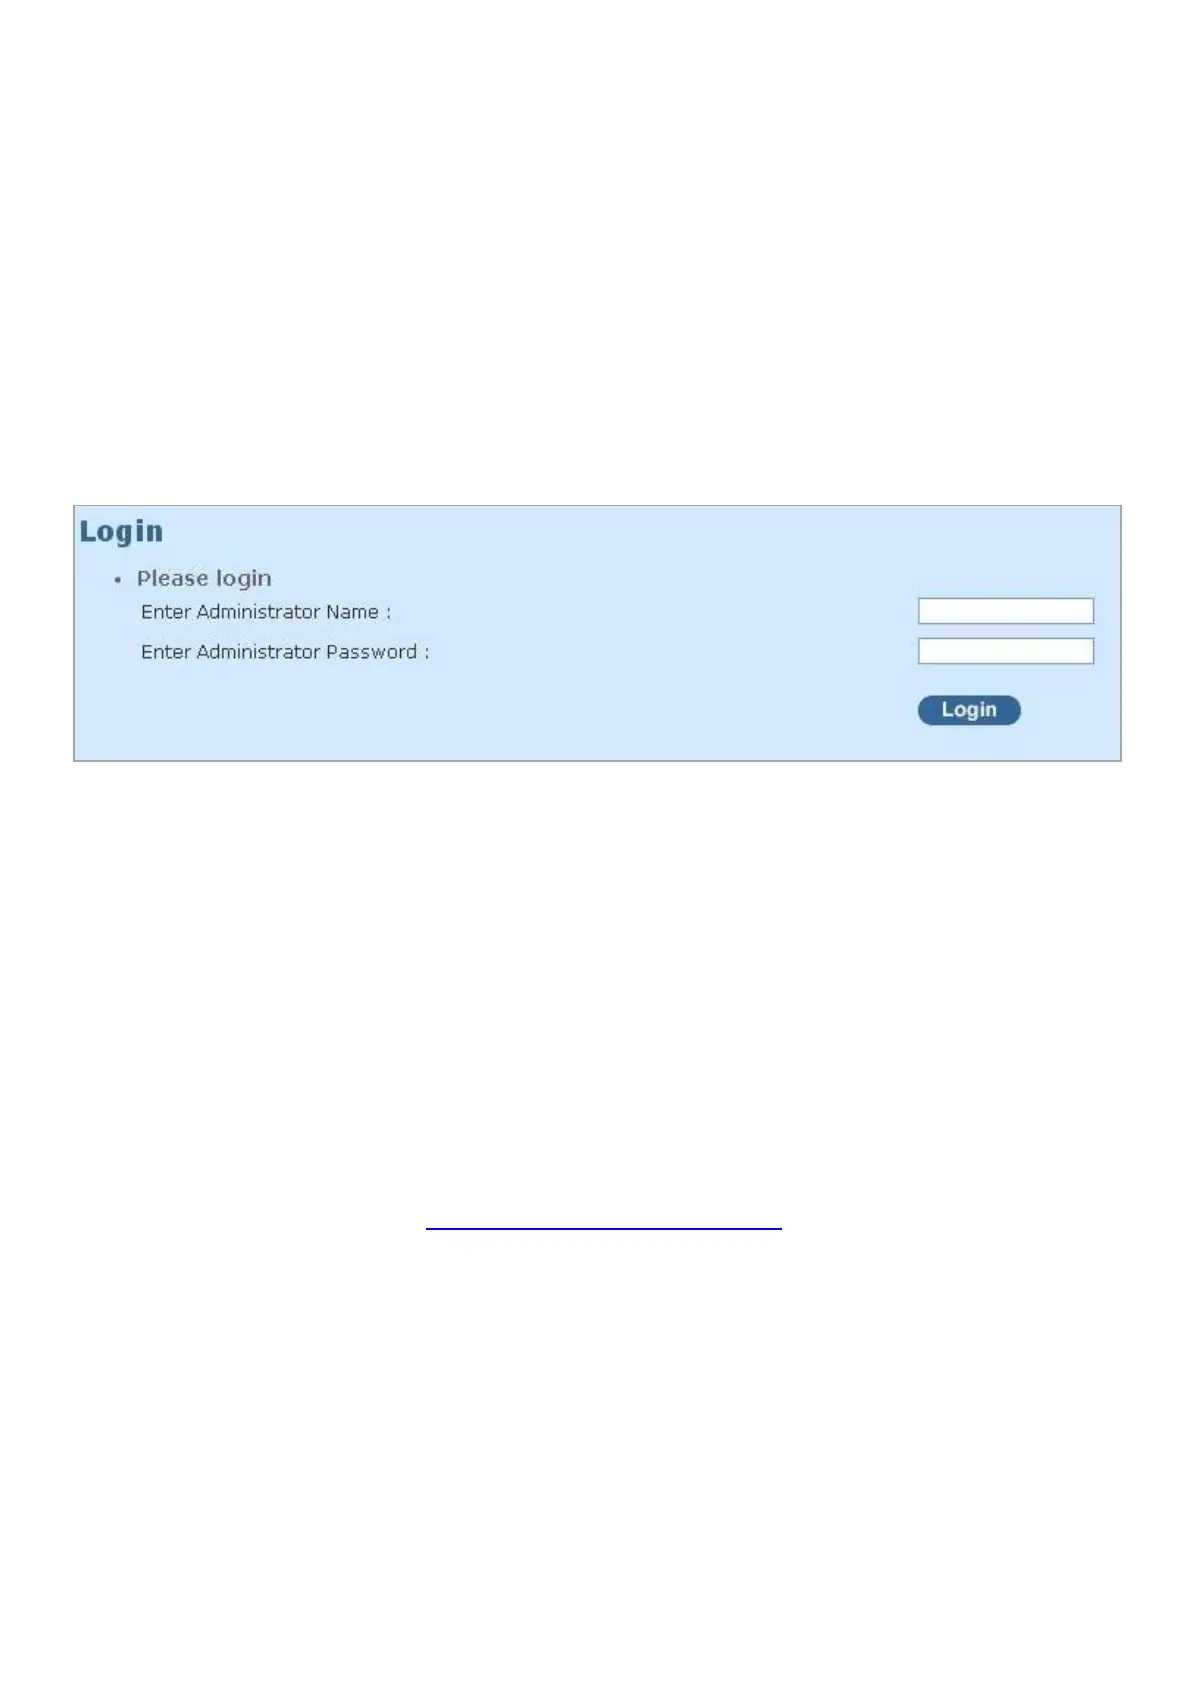
Initiate a web browser and input http:// 192.168.0.1 to enter the Managed Switch system. Once
you gain the access, the following login window will appear. Also input the default administrator
username admin and keep the administrator password field blank (By default, no password is
required.) to login into the main screen page.
After you login successfully, the screen with the Main Menu will show up. The functions of Main
Menu in the Web Management are similar to those described at the Console Management.
On the top side, it shows the front panel of the Managed Switch. On this front panel image, the
corresponding LED of the link-up port will display in green or orange color upon the transmitting
speed; as to the link-down ports, their LEDs will be dark. The link-up TP or SFP port will show
different module image on it. Likewise, if the port is disconnected, it will become dark as well or a
white module image is shown on SFP port if a module exists.
Additionally, there are clicking functions on this front panel image. When clicking on any port of this
panel image, you will directly jump to the Port Configuration webpage belonging to the clicked
port.
In this port configuration webpage, it shows the basic information of the clicked port. For more
details about this, please refer to Section 4.4.2 “Port Configuration“.
 Loading...