Chapter 19: Plug-Ins 153
Moving and Copying Plug-Ins
(Config Mode Only)
To move or copy a plug-in in the rack, drag the plug-in icon to
a new rack slot. A pop-up menu appears offering three
choices: “Cancel,” “Copy Plug-In Here,” or “Move Plug-In
Here.”
Moving a Plug-In
When you move a plug-in from one rack slot to another, the
plug-in type, in/out state, power on/off, current plug-in set-
tings, and routing are maintained. In addition, all associated
snapshots are updated to reflect the new rack position.
Copying a Plug-In
When you copy a plug-in to a new rack slot, the source plug-in
type, in-circuit state, active state, and current plug-in settings
are copied to the destination rack slot. However, the source
plug-in routing is not copied. In addition, plug-in snapshots
are not copied.
Overwriting An Existing Plug-In
When either moving or copying, if there is an existing plug-in
in the destination rack slot, that plug-in is deleted. When the
plug-in in the destination rack is deleted, any routing or refer-
ences to the deleted plug-in in existing snapshots will be au-
tomatically cleared.
Active and Inactive Plug-Ins
To toggle the active/inactive state of a plug-in:
■ Click the appropriate rack slot Power switch. When active,
the Power switch is lit green. When a plug-in is unavailable
(and inactive), the Power switch is lit yellow.
Routing Plug-Ins
After a plug-in has been assigned to a rack slot, you can specify
its routing. Plug-In routing determines whether the plug-in is
used as a channel insert or as a bus processor.
Using Plug-Ins as Channel Inserts
Each D-Show channel provides four slots for channel inserts
(as well as one hardware insert slot). Signal from the channel
is routed to the insert and returned to the same channel.
You can assign plug-ins to specific channel insert points from
the Plug-Ins screen or from the Input screen.
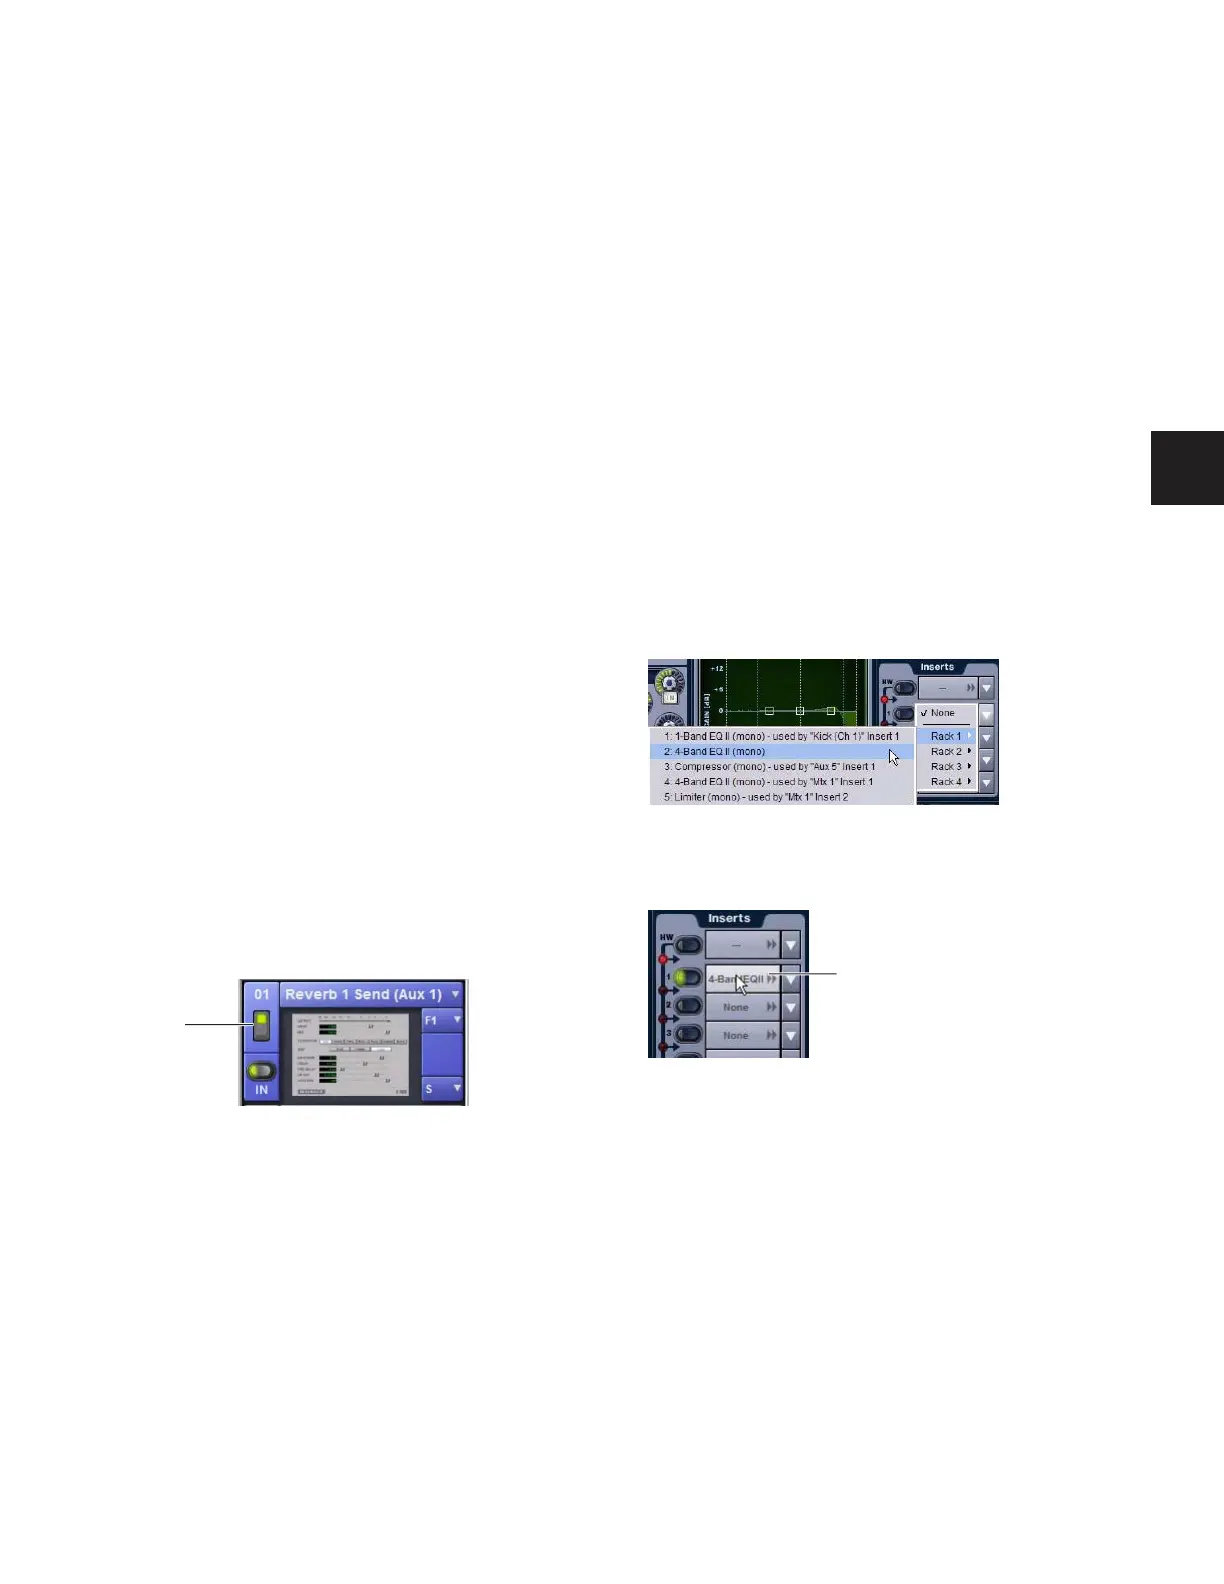
To insert a plug-in on a channel from the Inputs or Outputs page:
1 Go to the Input or Output screen.
2 Click the first available Channel Insert selector and choose
an available plug-in from the rack sub-menus. All currently
available plug-ins of a compatible mono/stereo format are
listed in the sub-menus. Plug-Ins that are unavailable are
listed in italics. Plug-Ins that are already assigned as channel
inserts are shown with their insert assignment.
3 The selected plug-in appears in the Inserts list for that chan-
nel.
4 To open the window for an inserted plug-in, click its name
in the channel Inserts list.
Indication of an inactive plug-in
Power
Inserting a plug-in on an input channel from the Inputs page
An assigned channel insert