EPSON Stylus COLOR 3000
EPSON Stylus Color 3000 Service Manual 1-25
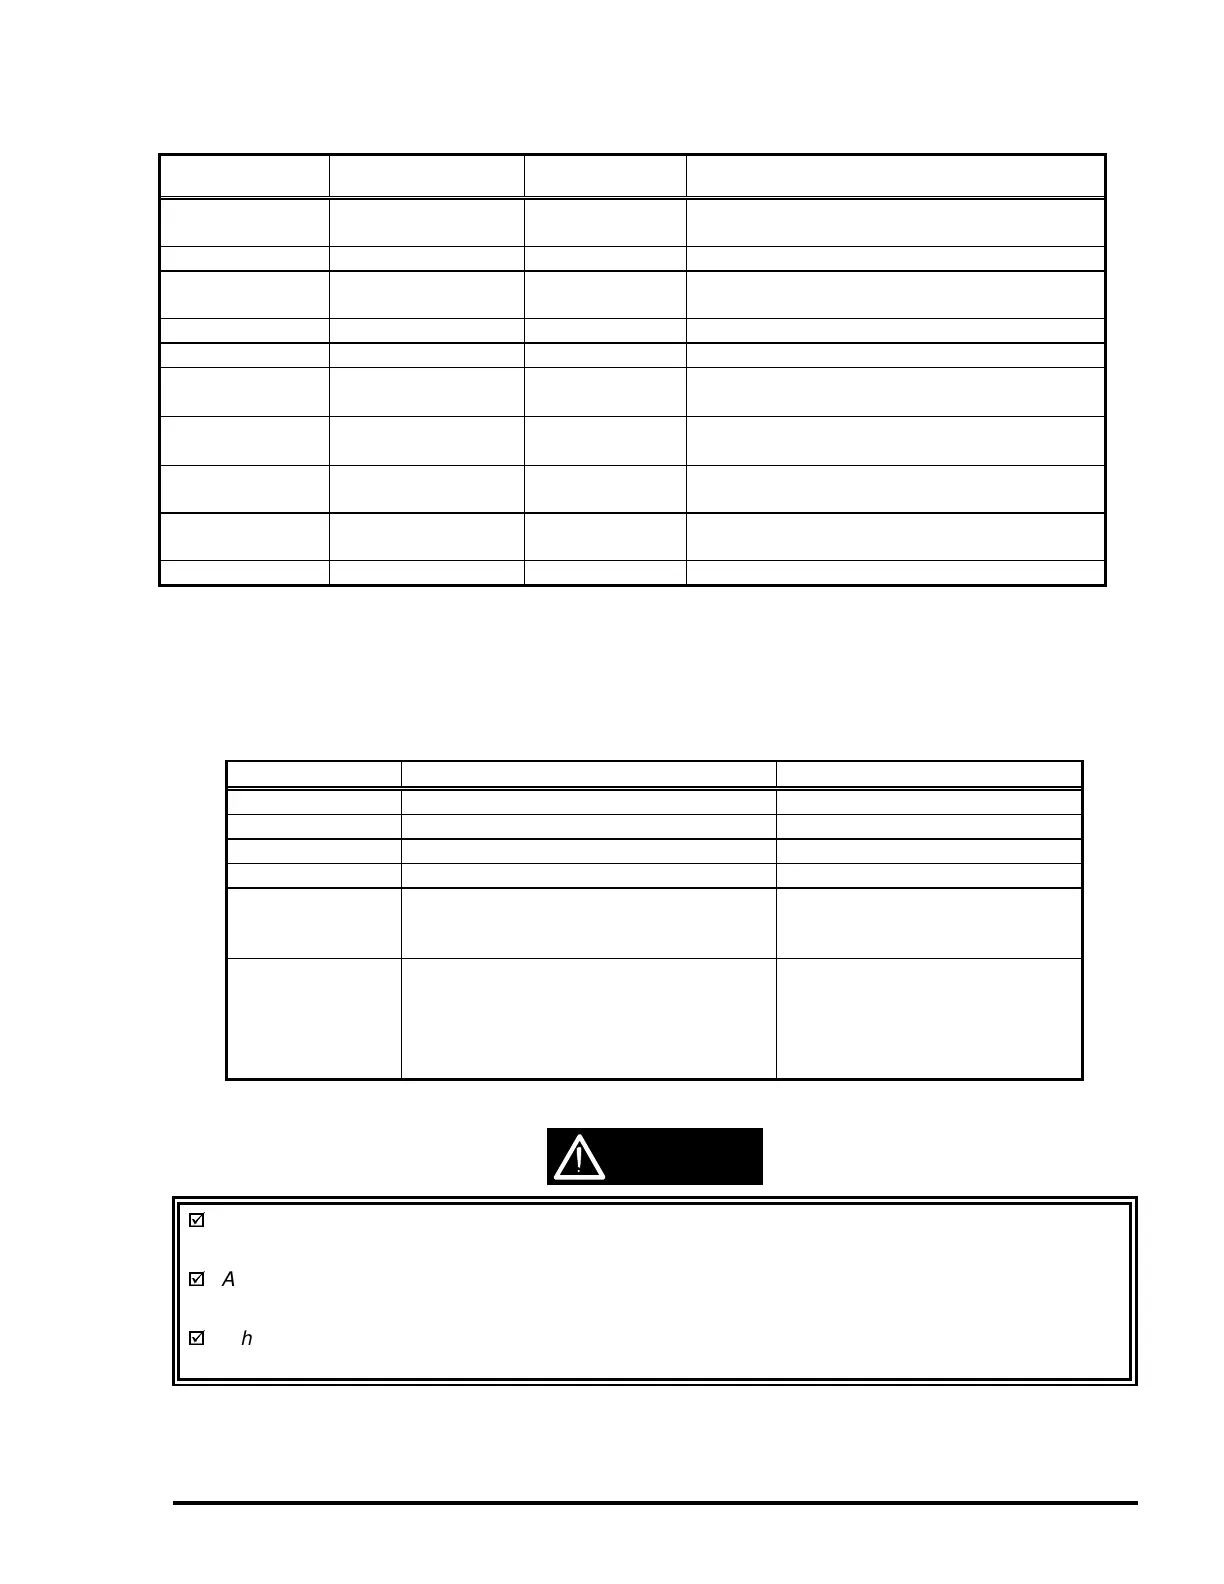
Button Function
Availability
Comments
Operate Power On/Off Always
When the printer is turned off, it runs the
capping function before powering down.
Pause Pause/Non-Pause Always
Pause
(>3 seconds)
Reset Pause/Standby
This button must be held down for more
than 3 seconds.
LF/FF LF/FF Pause/Standby
Load/Eject Load/Eject Pause/Standby
↑
Micro Adjust
Micro Adjust
(Forward feed)
Pause/Standby See the note below.
Micro Adjust
↓
Micro Adjust
(Reverse feed)
Pause/Standby See the note below.
Cleaning (Black)
(3 seconds)
Cleaning (Black) Pause/Standby
This button must be held down for more
than 2 seconds.
Cleaning (Color)
(3 seconds)
Cleaning (Color) Pause/Standby
This button must be held down for more
than 2 seconds.
Media Type Selects paper type. Pause/Standby
Note: Loading and tear-off position adjustments
When the Micro Adjust buttons are used to set the loading or tear-off position, the adjusted position is
stored in the EEPROM. Loading positions for the ASF, manual insertion and tractor are stored in their
corresponding addresses in the EEPROM. See Chapter 2 for details.
Button Function Comment
Pause Enters printer adjustment mode. Refer to page 1-30.
LF/FF Enters LQ self-test print mode. Refer to page 1-31.
Load/Eject Enters draft-self test print mode. Refer to page 1-31.
Media type Enters default setting mode. Refer to page 1-27.
LF/FF
+
Load/Eject
Enters hex-dump mode. Refer to page 1-31.
Pause
+
LF/FF
+
Micro adjust ↓
Performs EEPROM and IC reset. Initializes Timer IC and a part
of the EEPROM.
The power switch is connected to the secondary side of the electrical circuit. Since it has a delay
circuit, voltage is still on for a specified period of time after the printer power is turned off.
As long as the printer is plugged in, voltage is sent to the primary side of the electrical circuit.
Therefore, unplug the printer before servicing or replacing the interface.
When the EEPROM is reset, the waste ink drain pads need to be replaced. This must be performed
by a qualified service person only. (See Chapter 3.)
Indicators
This printer has 13 LED printer indicators, which are shown in Table 1-29.
Table 1-27. Panel Functions
Table 1-28. Panel Functions when pressed simultaneously with Power On
CAUTION

 Loading...


