Epson Artisan 800/Epson Stylus Photo PX800FW/TX800FW/Epson Artisan 700/Epson Stylus Photo PX700W/TX700W
Disassembly Procedures
https://www.manualsbooks.com
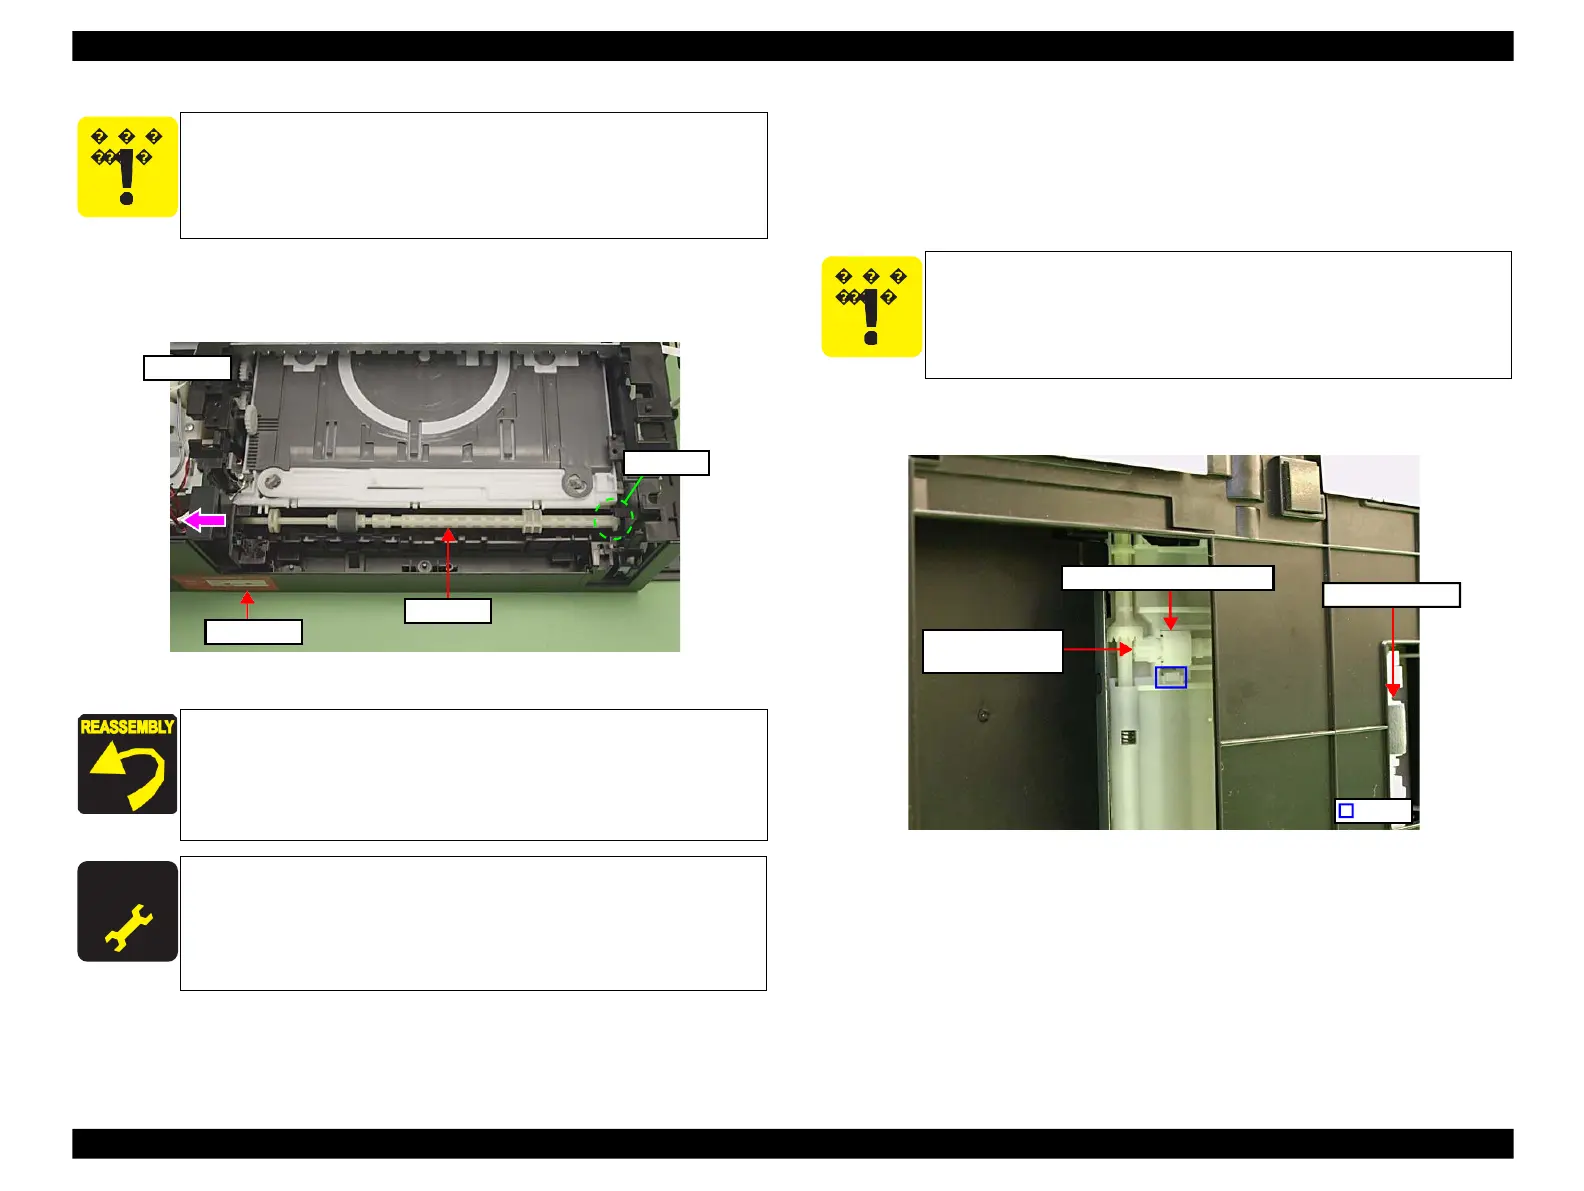
5.
Slide the LD Roller in the direction of the arrow and pull out the Section A of
the shaft from the Base Frame, then remove the LD Roller by pulling out the
other side of the shaft from the Base Frame.
Figure 4-101. Removing the LD Roller (5)
4.2.4.10
Pick-up Roller
Parts/Components need to be removed in advance:
Cassette Unit
Removal procedure
1.
Release the hook (x1), and remove the Pick-up Roller Shaft Bush and Pick-up
Roller Transmission Shaft.
Figure 4-102. Removing the Pick-up Roller (1)
Never touch or damage the surface of the LD Roller as doing so can
adversely affect print quality.
Make sure to align the dowels (x4) on the Base Frame with the
positioning holes (x4) when reassembling the Rear Paper Guide
Assy. (See
When replacing the LD Roller, make sure to carry out the specified
lubrication. (See
Chapter 6 "MAINTENANCE".)
So as to make description easier, the printer in the photographs is
placed vertically in the following steps. Be careful about ink spilling
if the printer is tilted in practical operation.
Pick-up Roller
Transmission Shaft
Pick-up Roller Shaft Bush
 Loading...


