Epson Artisan 800/Epson Stylus Photo PX800FW/TX800FW/Epson Artisan 700/Epson Stylus Photo PX700W/TX700W
Adjustment without Using Adjustment Program
https://www.manualsbooks.com
5.3
Adjustment without Using Adjustment Program
This section explains the adjustment procedure without using the adjustment program.
5.3.1
PG Adjustment
Described below is the platen gap (PG) adjustment.
Purpose:
Adjust the distance between the head surface and the Paper Guide Front Assy
(platen) properly and adjust the parallelism on the 0-digit side and on the 80-digit
side to ensure reliable print quality.
When the gap to the platen has been changed by adjusting the adjustment bushes
as in removing the Carriage unit, make this adjustment to correct the deviation of
the platen gap.
Table 5-7. PG Positions
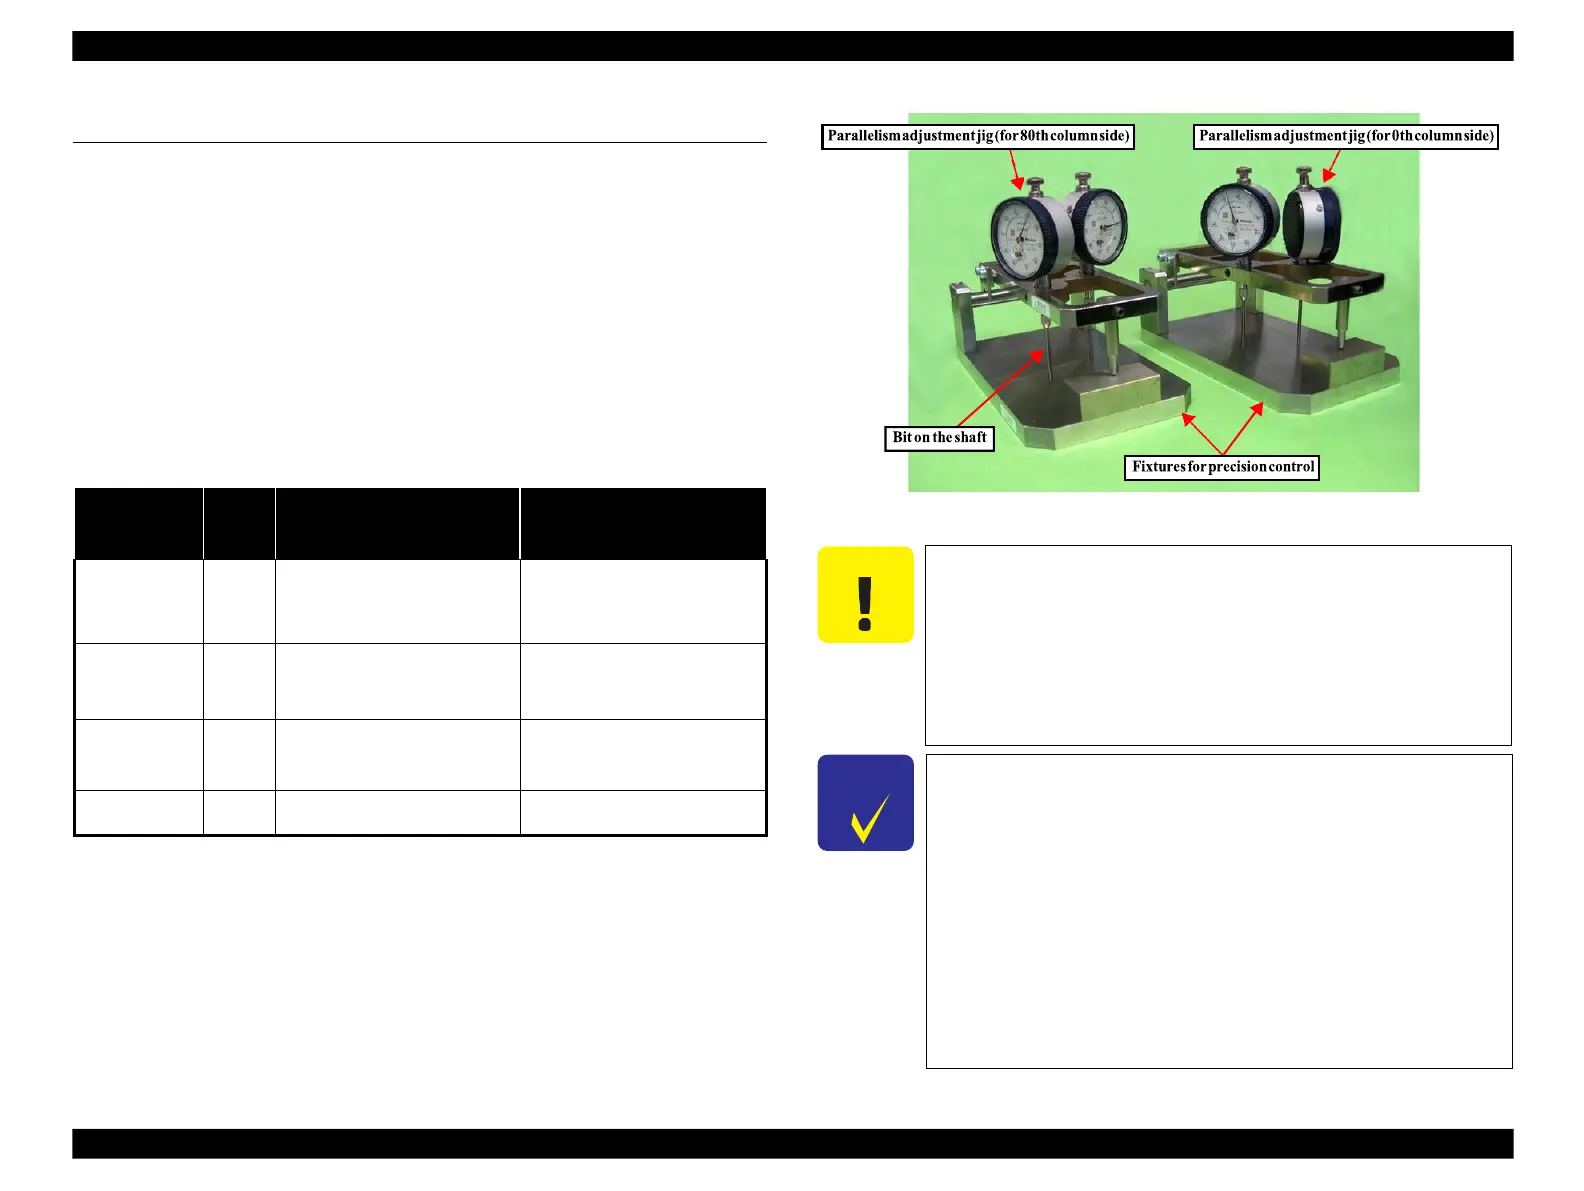
Figure 5-31. Parallelism adjustment jig/Fixtures for precision control
Tools
Parallelism adjustment jigs (two types; the one for 0th column side and the
one for 80th column side)
Fixtures for precision control
Thickness gauge: 1.15 mm (x2)
1.3 mm (x2)
Phillips screwdriver
Hex wrench
Standard value
Specified PG value: 1.2 ± 0.1 mm
Carry out this adjustment with installing the Printhead, the Ink
Supply Tube Assy and the Cartridge Box Unit. (Install the CR
Scale after this adjustment) See “ 4.2.4 Disassembling the
Printer Mechanism (p124) ” .
Epson Artisan 800/Epson Stylus Photo PX800FW/TX800FW/
Epson Artisan 700/Epson Stylus Photo PX700W/TX700W have
five PG pre-settings using the APG mechanism. Use the
minimum PG setting (PG – : 1.2mm) to carry out this
adjustment.
See Figure. 5-36.
Carry out “ Checking the result of PG adjustment (p239)” only, if the
position of the notch on the Parallelism Adjustment Busings
have not changed.
Application for Printing
(selected from PG flag list for
normal/head rubbing))
Applied while capping, wiping
operations, during standby after
power-on, performing AID
adjustment.
PG typ.
<Mechanical
default>
Plain paper
Select when PG- is too narrow
Envelopes
Select when PG typ. is too
narrow
Applied while capping
Applied while EJ release operation
Handle the jigs with care because the bit on the shaft of dial
gauge of parallelism adjustment jigs is very fragile and gets
broken easily.
The thickness gauges to be used must be free from dust and dirt
and from deformation. Be sure to clean it before use.
Take care not to soil or scratch the Printhead.
Move the carriage right and left by pulling the belt, not by
holding down (or pressing) the carriage.
 Loading...


