Epson Artisan 800/Epson Stylus Photo PX800FW/TX800FW/Epson Artisan 700/Epson Stylus Photo PX700W/TX700W
Disassembly Procedures
https://www.manualsbooks.com
4.2.4.21
Lower Paper Guide Waste Ink Pad Assy
Parts/Components need to be removed in advance:
Cassette Unit
Removal procedure
1.
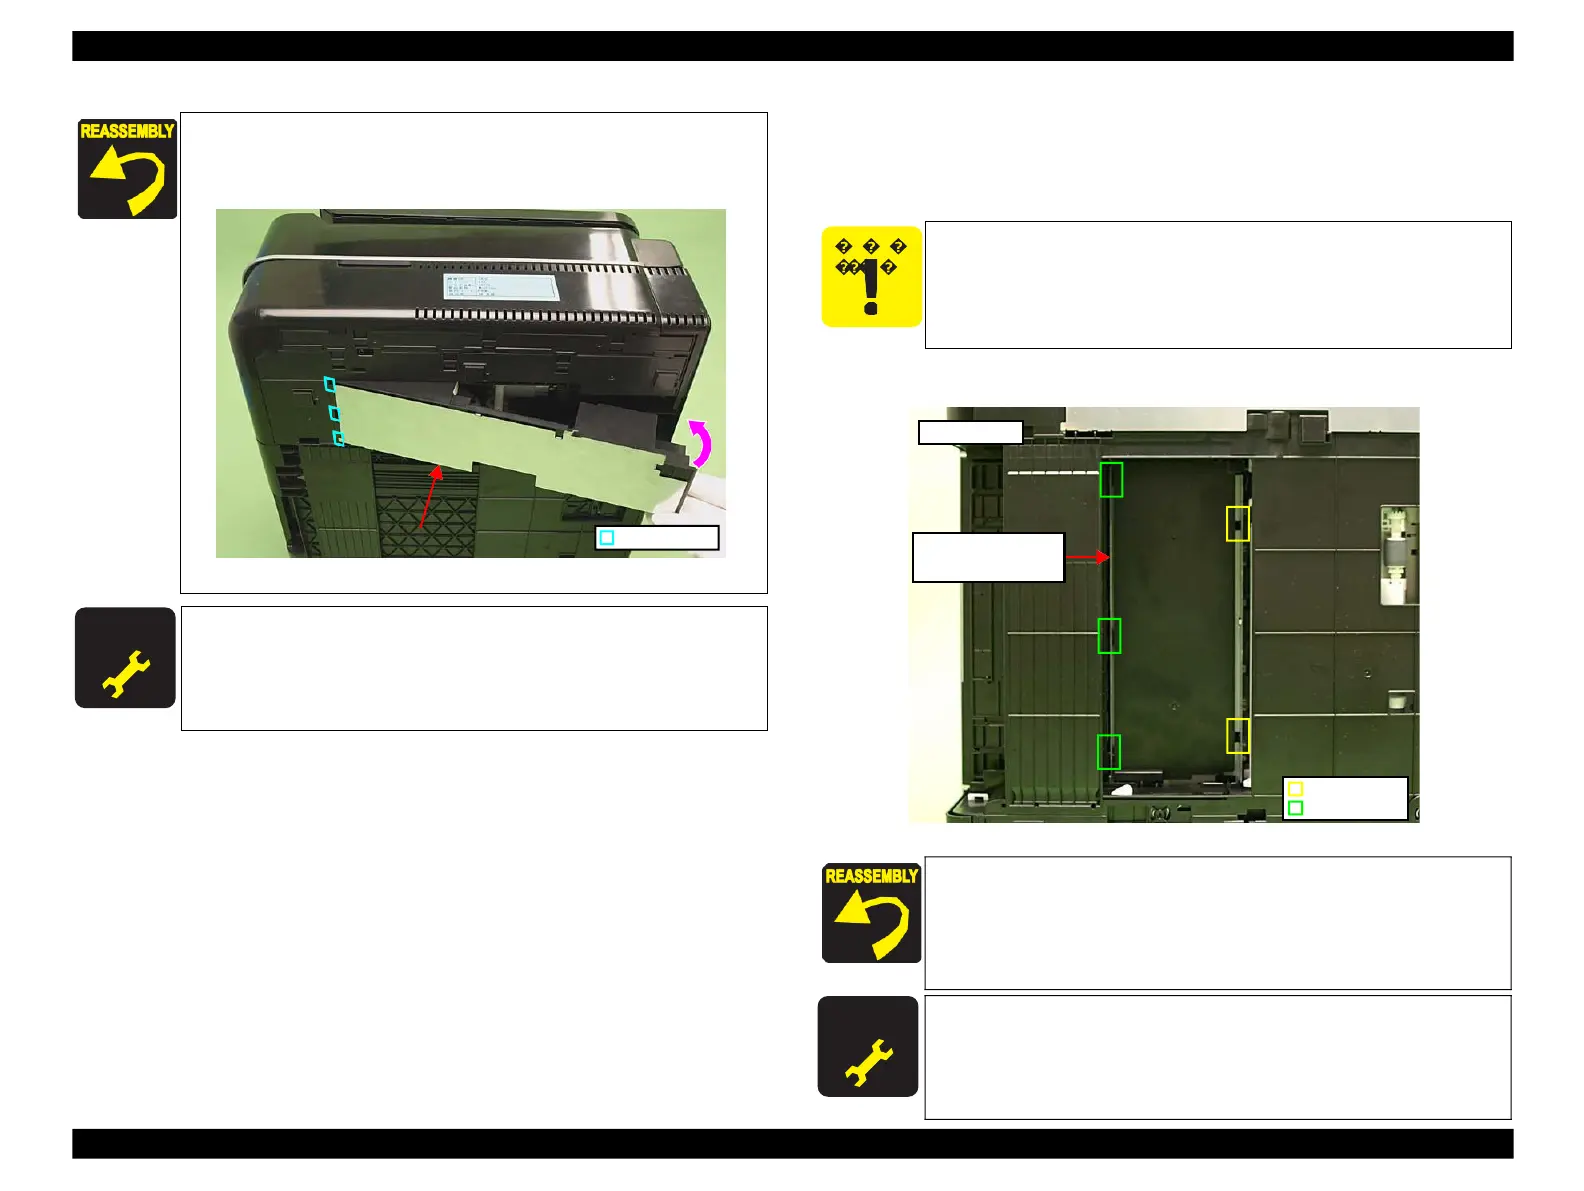
Release the hooks (x2) and remove the Lower Paper Guide Waste Ink Pad
Assy from the opening at the bottom of the Printer.
Figure 4-159. Removing the Lower Paper Guide Waste Ink Pad Assy
After removing/replacing the Waste Ink Tray Assy, make the
specified adjustments. (See Chapter 5 "ADJUSTMENT".)
Lower Paper Guide
Waste Ink Pad Assy
Align and insert the ribs (x3) of the Waste Ink Tray Assy to the
holes (x3) of the Base Frame, and secure the assy with the hook
(x1) and screw (x1). (See Fig. 4-154, Fig. 4-155, Fig. 4-158.)
Rib & hole
Figure 4-158. Installing the Waste Ink Tray Assy
Be careful about ink spilling if the printer is tilted in practical
operation.
After removing/replacing the Lower Paper Guide Waste Ink Pad
Assy, make the specified adjustments. (See
Align the ribs (x3) of the Lower Paper Guide Waste Ink Pad Assy
with the holes (x3) of the Main Frame, and secure the assy with the
hooks (x2). (See
 Loading...


