Epson Artisan 800/Epson Stylus Photo PX800FW/TX800FW/Epson Artisan 700/Epson Stylus Photo PX700W/TX700W
Disassembly Procedures
https://www.manualsbooks.com
3.
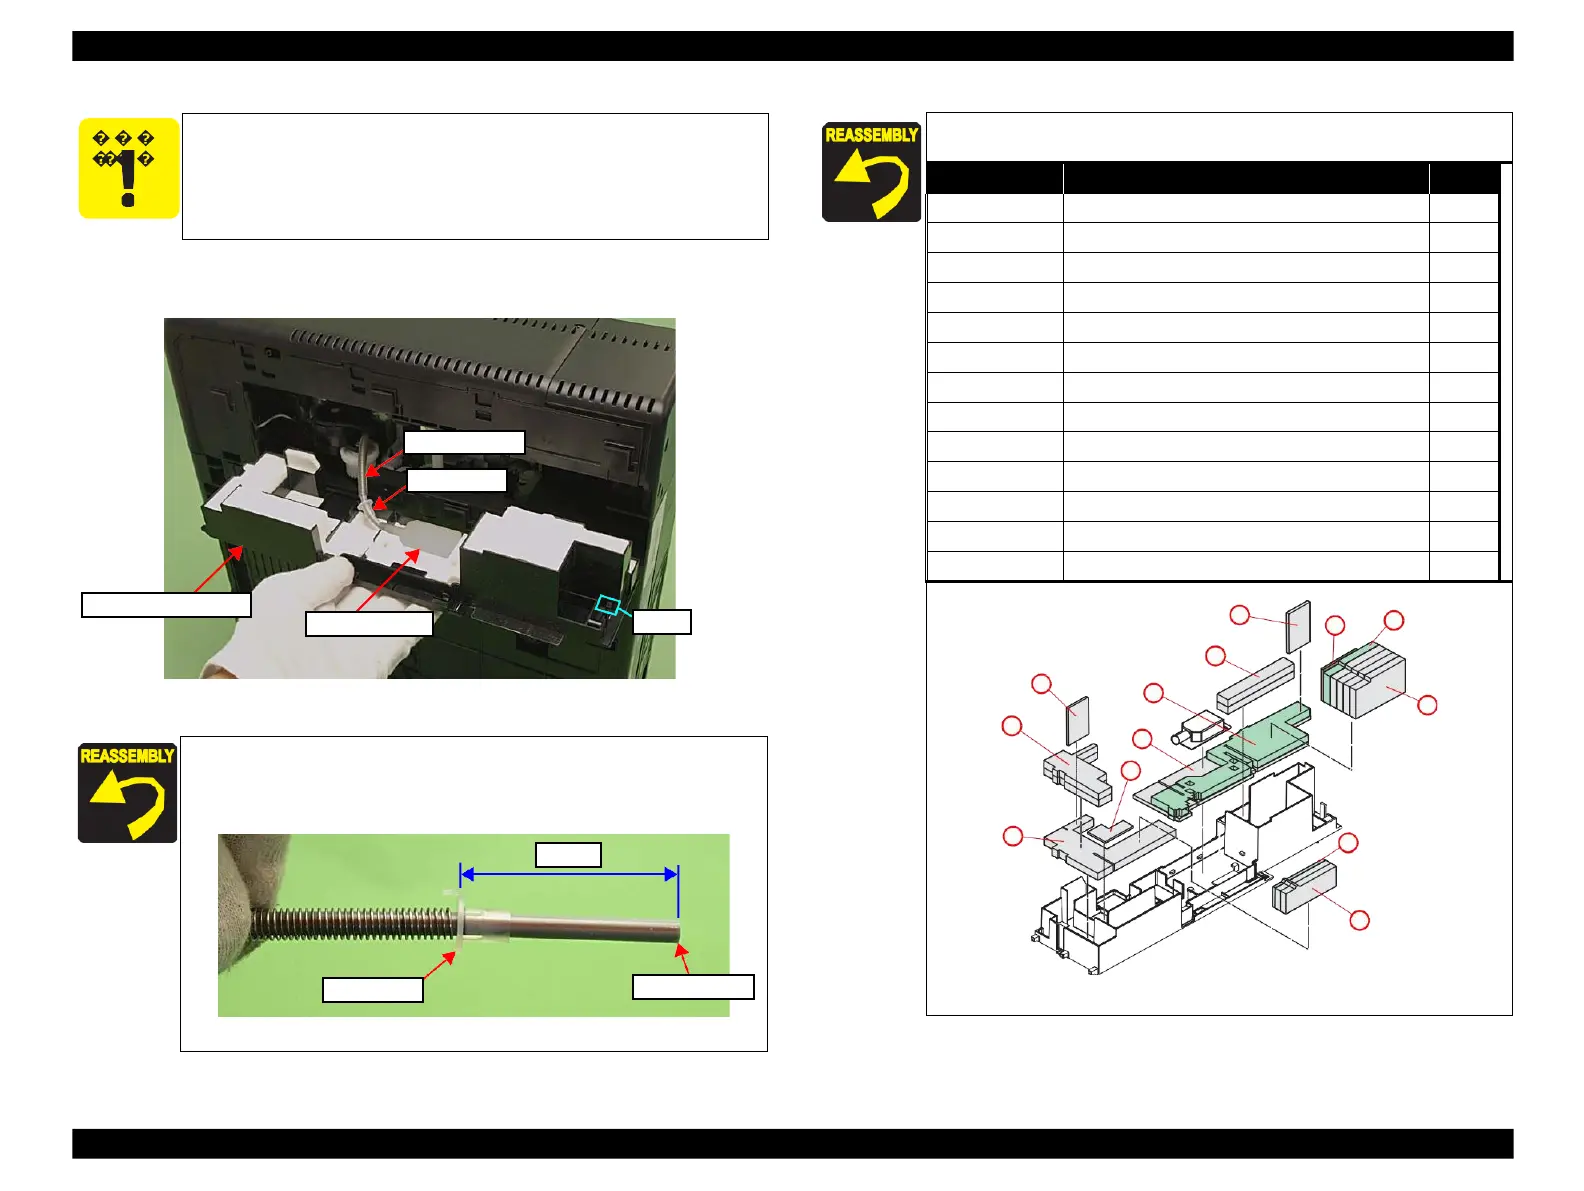
Remove the Waste Ink Tube from the Waste Ink Cover together with the Tube
Stopper, and remove the Waste Ink Tray Assy.
Figure 4-155. Removing the Waste Ink Tray Assy (2)
Be careful about ink spilling from the Waste Ink Tube.
The Waste Ink Tray Assy includes below waste ink pads.
POROUS PAD,INK EJ,FRONT,LOWER
POROUS PAD,INK EJ,FRONT,2
POROUS PAD,INK EJ,BOTTOM,2
POROUS PAD,INK EJ,FRONT,VERTICAL,1
POROUS PAD,INK EJ,FRONT,VERTICAL,2
POROUS PAD,INK EJ,FRONT,VERTICAL,3
POROUS PAD,INK EJ,VERTICAL
POROUS PAD,INK EJ,VERTICAL,2
POROUS PAD,INK EJ,VERTICAL,3
POROUS PAD,INK EJ,VERTICAL,4
M
L
J
C
I
B
K
D
F
E
A
H
G
Figure 4-157. Installing the Waste Ink Tray Assy
Following the standard below, attach the Tube Stopper to the
Waste Ink Tube, and insert the tube properly to the hole of the
Waste Ink Cover. (See
Figure 4-156. Attaching the Waste Ink Tube
 Loading...


